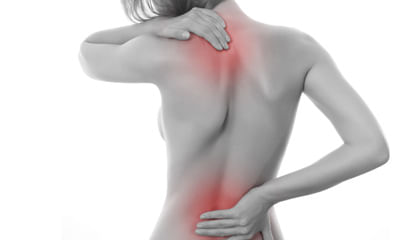
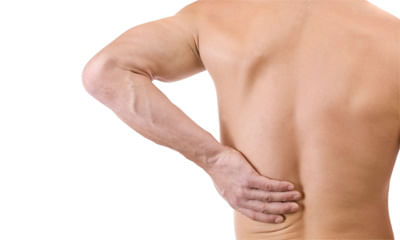
Severe Thecal Sac Compression Back
Sir, I have serious pain infrequent in my right shoulder since 10 years. Initial days I went to local doctor and they su ...


Ask Free Question
Based on the mri findings of your cervical spine, here are some observations and potential implications: mild lateral curvature of cervical spine with convexity of left side: this indicates a slight sideways curvature of the cervical spine, which may be contributing to your shoulder pain and other symptoms. Mild marginal osteophytes: osteophytes are bony growths that can develop along the edges of the vertebrae in response to degenerative changes in the spine. They can sometimes cause compression of nearby structures, leading to pain and other symptoms. Mild disc osteophyte complexes at c4-c5, c5-c6 levels: this refers to the presence of bone spurs and associated disc degeneration at specific levels of the cervical spine (cervical vertebrae 4-5 and 5-6). These changes may be contributing to compression of the thecal sac (the membrane that surrounds the spinal cord) and abutment of the spinal cord itself. Hydrosyringomyelia: this is a condition characterized by the presence of fluid-filled cavities (syrinx) within the spinal cord. In your case, it appears to be extending from the cervical to the dorsal (upper back) levels of the spinal cord. This can lead to symptoms such as pain, weakness, and sensory disturbances. Crowding at foramen magnum with mild tonsillar herniation: the foramen magnum is the opening at the base of the skull through which the spinal cord passes. Crowding at this location, along with tonsillar herniation (where the lower part of the cerebellum extends below the opening), can sometimes lead to compression of the spinal cord and related symptoms. Based on these findings, it's important to consult with a neurologist or spine specialist who can provide a comprehensive evaluation and recommend the most appropriate treatment options. Treatment may involve a combination of medications for pain management, physical therapy to improve strength and flexibility, and possibly surgical intervention depending on the severity of symptoms and underlying pathology. In terms of what you can do: follow the recommendations of your healthcare provider regarding pain management, activity modification, and any prescribed treatments. Consider seeking a second opinion from a spine specialist or neurosurgeon to ensure you have a comprehensive understanding of your condition and all available treatment options. Avoid activities that exacerbate your symptoms or put strain on your neck and spine. Maintain good posture and ergonomics to minimize stress on your cervical spine. Stay informed about your condition and ask questions during your medical appointments to ensure you understand your treatment plan and prognosis.

My mri ls - spine findings: l5-s1 central, left paracentral disc protrusion indenting thecal sac with severe neural cana ...

Ask Free Question
This simple stretch helps relieve sciatica pain by loosening your gluteal and piriformis muscles, which can become inflamed and press against the sciatic nerve. 1.Lie on your back with your legs extended and your feet flexed upward. 2.Bend your right leg and clasp your hands around the knee. 3.Gently pull your right leg ac 4.Ross your body toward your left shoulder. Hold it there for 30 seconds. Remember to pull your knee only as far as it will comfortably go. You should feel a relieving stretch in your muscle, not pain. 5.Push your knee so your leg returns to its starting position. 6.Repeat for a total of 3 reps, and then switch legs. 5.sitting spinal stretch sciatica pain is triggered when vertebrae in the spine compress. This stretch helps create space in the spine to relieve pressure on the sciatic nerve. 1.Sit on the ground with your legs extended straight out with your feet flexed upward. 2.Bend your right knee and place your foot flat on the floor on the outside of your opposite knee. 3.Place your left elbow on the outside of your right knee to help you gently turn your body toward the right. 4.Hold for 30 seconds and repeat three times, then switch sides. 6. Standing hamstring stretch this stretch can help ease pain and tightness in the hamstring caused by sciatica. 1.Place your right foot on an elevated surface at or below your hip level. This could be a chair, ottoman, or step on a staircase. Flex your foot so your toes and leg are straight. If your knee tends to hyperextend, keep a slight bend in it. 2.Bend your body forward slightly toward your foot. The further you go, the deeper the stretch. Do not push so far that you feel pain. 3.Release the hip of your raised leg downward as opposed to lifting it up. If you need help easing your hip down, loop a yoga strap or long exercise band over your right thigh and under your left foot. 4.Hold for at least 30 seconds, and then repeat on the other sideif you have low back pain and sciatica you can undergo intermittent pelvic traction where in your half of your body weight will be added in the electronic traction so that that would help you to reduce the pain, along with interferential therapy stimulations which would help you to get relieved from the radiating pain. Apply ice for the pain to get subsided immediately. If you cannot go immediately for the physiotherapy treatment. Ice can be kept in the low back where you have back pain. It is suggestible to wear lumbo sacral belt which would help you to build the abdominal muscle tone which itself would make you feel better. You can also wear mcr chappals which would help you to have less weight falling in the painful back. U have to take vitamin d rich foods. Likemilk,cheese, yogurt,brocoli, spinach.u need calcium consumption for increase the bone density.

Plz help me from the pain! I am having pain at l5-s1 level and severe pain to my left leg due to which I am completely o ...
Ask Free Question
Herniated disc 1. Spinal decompression how it helps – spinal decompression should be the very first thing you do to treat a herniated or bulging disc because it essentially creates space between your vertebrae, and thus takes pressure off the discs. How to do it – use a bar or the top of a door (or anything you can hang from) and allow your body to “just hang”. – hang for 30 seconds and do 3 sets. – release very slowly from this so as not to cause any spasms. ** this should not cause any pain. If you feel pain during it is not a good one for you. In that case, stop and try some of the other exercises below instead. 2. Standing extension how it helps – this standing extension helps reverse what you do on a daily basis (hunching)… since most bulging discs and herniated discs are caused by poor posture and repeated flexion of the spine (esp bending fwd in bad posture), this stretch helps push the disc back to neutral position. How to do it – begin this exercise by standing up with good posture. Now take both hands and place them on both sides of your lower back. Now with the help of your hands push your pelvis forward and extend your spine back. Follow the extension with your neck so that you end up facing the ceiling. – start with 10 repetitions and do 2-3 sets. – this one is particularly great to do when you need a break from sitting at your desk. ** this should not cause any pain. If you feel pain during it is not a good one for you. In that case, stop and try some of the other exercises below instead. 3. Half cobra pose (prone lumbar extension) how it helps – the half cobra stretch helps to push the disc material back towards the center of the inter-vertebral disc to allow for improved healing. The goal of repeated lower back extension is the “centralization of symptoms”, which basically means pain that travels down the affected leg to the foot should come back up closer to the low back – which will in turn alleviate the pain. How to do it – begin this exercise by lying on your stomach (prone position) and slowly prop yourself up on your elbows while keeping your hips in contact with the floor. – hold the prop-up position for 10-15 seconds before returning to the prone position (lying face down). – gradually increase to holding the end position for 30 seconds. Aim for 10 repetitions of this stretch. ** initially, you may not be able to tolerate this position very well, so make sure you start slowly and carefully. If there’s any pain, try a different exercise instead. 4. Full cobra pose (advanced extension) how it helps – this stretch is based on the same principle as the half cobra pose above. This advanced extension helps to push disc material back towards the center of the intervertebral disc, with the goal of alleviating pain symptoms. How to do it – once you’ve mastered the half cobra pose, you can increase the difficulty by moving to the advanced version of this stretch. Begin this exercise by lying on your stomach in the prone position (lying facing down) and slowly press up on your hands while keeping your pelvis in contact with the floor and lower back relaxed. – hold the prop-up position for 10 seconds. Aim for 10 repetitions of this stretch. – eventually try to hold this pose for longer if it feels good (20-30 seconds). ** if you feel pain during this exercise, it is not a good one for you. In that case, stop and try some of the other exercises instead. 5. Cat-cow how it helps – this is one of the most popular herniated disc exercises. By combining two yoga poses, the cat-cow stretch can help to relieve pressure on the herniated disc by opening the intervertebral disc space. It also improves mobility of the spine, which may help to relieve disc herniation pain and speed recovery. How to do it – begin this stretch on your hands and knees. Inhale and let your stomach “drop” towards the floor as you look up towards the ceiling. – follow this by exhaling and slowly rounding your spine while pressing into the floor with your hands and slightly curving your neck to look at your feet. – aim for 10 repetitions of this stretch and do 2-3 sets. How it helps – this exercise will help strengthen and stabilize your lower back and deep spine muscles. This will help you to maintain a good posture and avoid future episodes of herniated discs. How to do it: – begin on your hands and knees with your hands positioned under your shoulders and knees positioned under your hips. – raise your left arm and reach it forwards until it is aligned with your torso; at the same time, kick your right leg backwards until is it aligned with your torso. – hold this position for 2-3 seconds before slowly returning to the starting position. – repeat with your right arm and left leg. – alternate sides for 10 repetitions and do 2-3 sets. ** ensure that your head, neck, and back maintain a neutral alignment to minimize stress on your neck. 6.plank: how it helps – just like the bird dog, this “core” exercise will help bring your pelvis into right position by strengthening the deep spinal muscles and glutes (butt muscles). How to do it – begin lying on your stomach with your forearms against the mat. – engage your core and lift your body so that you are resting on your forearms and toes. – start with 10 second holds and work up to 30 second holds, do 2-3 sets. ** ensure to keep your back straight throughout the entire exercise – spine in neutral position. Thoracic expansion if you’re using a chair, sit facing forward and allow your upper body to fall over the back of the chair. Extend your arms above your head for a deeper stretch. Hold either position for 10 seconds and release. Repeat 3 times. 7.sitting spinal stretch sciatica pain is triggered when vertebrae in the spine compress. This stretch helps create space in the spine to relieve pressure on the sciatic nerve. 1.sit on the ground with your legs extended straight out with your feet flexed upward. 2.bend your right knee and place your foot flat on the floor on the outside of your opposite knee. 3.place your left elbow on the outside of your right knee to help you gently turn your body toward the right. 4.hold for 30 seconds and repeat three times, then switch sides. 8. Standing hamstring stretch this stretch can help ease pain and tightness in the hamstring caused by sciatica. 1.place your right foot on an elevated surface at or below your hip level. This could be a chair, ottoman, or step on a staircase. Flex your foot so your toes and leg are straight. If your knee tends to hyperextend, keep a slight bend in it. 2.bend your body forward slightly toward your foot. The further you go, the deeper the stretch. Do not push so far that you feel pain. 3.release the hip of your raised leg downward as opposed to lifting it up. If you need help easing your hip down, loop a yoga strap or long exercise band over your right thigh and under your left foot. 4.hold for at least 30 seconds, and then repeat on the other sideif you have low back pain and sciatica you can undergo intermittent pelvic traction where in your half of your body weight will be added in the electronic traction so that that would help you to reduce the pain, along with interferential therapy stimulations which would help you to get relieved from the radiating pain. 9.anterior pelvic tilt 1.lie on the back with the knees bent and feet flat on the floor, hip-width apart. 2.squeeze the buttocks and tilt the pelvis upward. 3.the back should feel as though it is flattening to the ground. 4.return to normal pelvis position. 5.repeat 10–12 times. Apply ice for the pain to get subsided immediately. If you cannot go immediately for the physiotherapy treatment. Ice can be kept in the low back where you have back pain. It is suggestible to wear lumbo sacral belt which would help you to build the abdominal muscle tone which itself would make you feel better. You can also wear mcr chappals which would help you to have less weight falling in the painful back. U have to take vitamin d rich foods. Likemilk, cheese, yogurt, brocoli, spinach. U need calcium consumption for increase the bone density. Lackof bone and bones crush inside the body vitamin d intake via supplements or exposure to low levels of sunlight. Vitamin d is used to absorb calcium in the bone and regulate calcium in the blood.this might be due to low calcium or vitamin d which has more impact on the bone density and also it makes one to feel that there is lack of bone strength or in a way the bones are brittle and almost breaking and they feel it is crushed in a way there are many bones breaking at the same time. You have to take vitamin d rich foods. Likemilk, cheese, yogurt, brocoli, spinach. U need calcium consumption for increase the bone density.
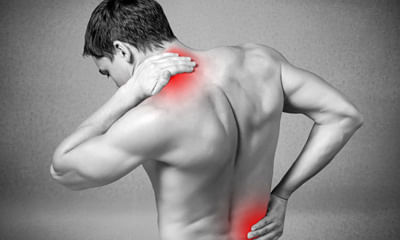
Mri cervical spine (h/o neck pain radiating to right upper limb) scanacquired on a ge 1.5 tesla hdxt 16 channel 23x mach ...
Ask Free Question
Neck pain cervical spondylosis– chronic condition with radiating pain this is cervical pain (neck pain) and that's the reason the pain radiates until the shoulder blades. If you keep ice that would help and along side you can do hot water fermentation. You shall use cervical collar which would help you to reduce the radiating pain ie. Due to the nerve compression. You have to go for traction and also you can do ift. Please consult the near bytherapist for quick relief. Use collar will definitely be helpful for him to maintain the good posture. And also cervical pillow can be used which might make you to have better posture of the shoulder neck and arm. 1.neck tilt: from the sitting position, tilt your head down so your chin touches your chest. Hold this position for 5 second s. Return to the starting position and repeat. Do this five times. 2.side-to-side neck tilt. From the same starting position, tilt you neck toward one shoulder, leading with your ear. Hold for 5 seconds and then return to the starting position. Do this five times on each side. 3.neck turn. Look straight ahead, then turn your head to one side, keeping your chin at the same level. Do this five times on each side. 4.neck stretch. Holding the rest of your body straight, push your chin forward, stretching your throat. Hold for 5 seconds. From the same starting position, push your chin backward and hold for 5 seconds. Do the forward and backward stretch five times each. If any of these exercises cause severe pain or weakness in your hands or arms, stop right away and talk with your doctor. We suggest you to wear cervical collar which will help you to improve the cervical angle and also it definitely helps you to improve the neck posture due to which your neck pain is triggered more. The importance of wearing cervical collar is to give good stability to the neck and also it definitely prevents you to have excess neck movements which makes the condition worse. If you wear cervical collar you cannot turn your neck as you like which itself will help you to have better functioning of the cervical spine. This cervical soft collar what we are suggesting for you is available at our clinic. If you want you can buy from us, if you are far away from chennai we can send you by courier. The reason why we are conveying you to buy from us is we can demonstrate over the videocall (using whatsapp) and also we can monitor you throughout when to wear it and how long to wear it. And also if you find any difficulty wearing the brace you can also revert back to us for few more suggestions and we can propose you good solution how to go about it.

I am 34 years old girl having low back pain from last 9 years. Various treatment along regular physiotherapy took but no ...
Ask Free Question
In the early stages of a disc bulge, your body’s natural response is to tighten up and protect the spine and buttocks area. Because of this, one of the the simplest things you can do yourself to relieve radiating back pain caused my a disc bulge is stretching piriformis muscle. Not sure about the surgery part. If you have l4-l5 disc bulge which is quite common, since you are young you can definitely go for conservative management - physiotherapy and rehabilitation exercises for the abdomen and spine which will help you to improve much better.in the early stages of a disc bulge, your body’s natural response is to tighten up and protect the spine and buttocks area. Because of this, one of the the simplest things you can do yourself to relieve radiating back pain caused my a disc bulge is stretching piriformis muscle. How to perform it: ● begin lying on your back with your knees bent and feet positioned flat on the floor ● place your right ankle over your left knee ● use your hands or a band to pull the left thigh towards your chest, and hold for 20 to 30 seconds ● repeat on the other leg ● aim for 3 repetitions on each side exercise #2: prone alternating leg raises the prone leg lift creates spinal extension helping push the jelly-like material back towards the center and reduce bulging disc. How to do it: ● lay face down with your palms on the floor under your forehead. ● straighten one leg then lift it a few inches off the ground with your toe pointed. ● lower your leg to the floor with your knee remaining straight. ● switch legs ● repeat 3 x 15 reps each side ● 3 x a day exercise #3: half cobra pose the half cobra pose creates spinal extension helping push the nucleus (jelly) back towards the center and reduce bulging disc. How to do it: ● begin this exercise by lying on your stomach (prone position) and slowly prop yourself up on your elbows while keeping your hips in contact with the floor. ● hold the prop-up position for 10-15 seconds before returning to the prone position (lying face down). ● gradually increase to holding the end position for 30 seconds. Aim for 10 repetitions of this stretch. ** initially, you may not be able to tolerate this position very well, so make sure you start slowly and carefully. Recommended: half cobra pose exercise video demo exercise #4: full cobra pose the full cobra pose creates even more spinal extension than half cobra helping push the nucleus (jelly) back towards the center and reduce bulging disc. How to do it: ● begin lying on the ground with your hands flat on the floor at the level of your shoulders ● slowly push your hands to raise your shoulder off of the ground until you feel a slight stretch ● increase your range of motion by exhaling as you push further into lumbar extension ● aim for 5 repetitions exercise #5: abdominal drawing maneuver a solid core foundation helps provide stability which in turn prevents re-injury and further injury from occurring. This will help reset the spine into neutral position. How to do it: ● lie on your back ● bend your knees ● contract your stomach muscle (abdominals) ● hold for 5 seconds ● release ● perform 3 x 20 sets daily.
Hello doctor, I am 19 years old male. 1 year ago, I did some intense exercises, due to which I suffer from lower back pa ...
Ask Free Question
Back pain can affect people of any age, for different reasonsas people get older, the chance of developing lower back pain increases, due to factors such as previous occupation and degenerative disk disease. Lower back pain may be linked to the bony lumbar spine, discs between the vertebrae, ligaments around the spine and discs, spinal cord and nerves, lower back muscles, abdominal and pelvic internal organs, and the skin around the lumbar area. •acute pain starts suddenly and lasts for up to 6 weeks. •chronic or long-term pain develops over a longer period, lasts for over 3 months, and causes ongoing problems. Home advise: •resting from strenuous activity can help, but moving around will ease stiffness, reduce pain, and prevent muscles from weakening. •applying heat, ice, ultrasound, and electrical stimulation — as well as some muscle-release techniques to the back muscles and soft tissues — may help alleviate pain. •as the pain improves, the physical therapist may introduce some flexibility and strength exercises for the back and abdominal muscles. Techniques for improving posture may also help. •the patient will be encouraged to practice the techniques regularly, even after the pain has gone, to prevent back pain recurrence. Regular exercise helps build strength and control body weight. Guided, low-impact aerobic activities can boost heart health without straining or jerking the back. Before starting any exercise program, talk to a health care professional. There are two main types of exercise that people can do to reduce the risk of back pain: •core-strengthening exercises work the abdominal and back muscles, helping to strengthen muscles that protect the back. •flexibility training aims at improving core flexibility, including the spine, hips, and upper legs. We suggest you to wear lumbosacral corset (belt) which is available at our clinic. If you want you can buy from us, if you are far away from chennai we can send you by courier. The reason why we are conveying you to buy from us is we can demonstrate over the videocall (using whatsapp) and also we can monitor you throughout when to wear it and how long to wear it. And also if you find any difficulty wearing the brace you can also revert back to us for few more suggestions and we can propose you good solution how to go about it. Uses of lumbosacral corset (belt) a lumbosacral corset adds pressure to the intra-abdominal area. This adds stability to the spine. It is prescribed to people suffering from moderate to severe pain. Other benefits of using a lumbar spine belt are: 1.helps in a certain degree of immobilization of facet joints. 2.reduces pain to allow continuation of normal activities. 3.speeds up the healing process. 4.the pressure exerted by a lumbar spine belt helps in stretching the erector spine muscles. 5.this belt can also be used to support the lower back while exercising. Helps prevent rolling provides stability to lumbar and sacral regions of the back can be used when performing actions like lifting and handling heavy items can also be used when playing sports restricts back movement to aid treatment of back problems do’s and don’ts sitting do: • sit as little as possible and then only for short periods. • place a supportive towel roll at the belt line of the back especially when sitting in a car. • when getting up from sitting, keep the normal curves in your back. Move to the front of the seat and stand up by straightening your legs. Avoid bending forward at the waist. • try to keep the normal curves in your back at all times. Don’t: • do not sit on a low soft couch with a deep seat. It will force you to sit with your hips lower than your knees and will round your back. You will loose the normal curve in your back. • do not place your legs straight out in front of you while sitting (e.g. Sitting in the bath tub). Standing do: • if you must stand for a long period of time, keep one leg up on a foot stool. • adapt work heights. Don’t: • avoid half bent positions. Lifting avoid lifting if you can. Do: • use the correct lifting technique. Keep your back straight when lifting. Never stoop or bend forward. Stand close to the load, have a firm footing and wide stance. Kneel on one knee, keeping the back straight. Have a secure grip on the load and lift by straightening your knees. Do a steady lift. Shift your feet to turn and do not twist your back. Don’t: • do not jerk when you lift. • do not bend over the object you are lifting. Lying do: • sleep on a good firm surface. • if your bed sags, use slats or plywood supports between the mattress and base to firm it. You also can place the mattress on the floor, a simple but temporary solution. • you may be more comfortable at night when you use a pillow for support. Don’t: • do not sleep on your stomach unless advised to do so by your doctor or physical therapist. Bending forward do: • keep the natural curves of your back when doing these and other activities: making a bed, vacuuming, sweeping or mopping the floor, weeding the garden or raking leaves. Coughing and sneezing do: • bend backwards to increase the curve of your back while you cough or sneeze. Driving a car do: • drive the car as little as possible. It is better to be a passenger than to drive yourself. • move the seat forward to the steering wheel. Your seat must be close enough to the wheel to keep the natural curves of your back. If your hips are lower than your knees in this position, raise yourself by sitting on a pillow. Exercises for low back pain 1. Bridges •lie on the ground and bend the knees, placing the feet flat on the floor hip-width apart. •press the feet into the floor, keeping the arms by the sides. •raise the buttocks off the ground until the body forms a straight line from the shoulders to the knees. •squeeze the buttocks with the shoulders remaining on the floor. •lower the buttocks to the ground and rest for a few seconds. •repeat 15 times and then rest for 1 minute. •do 3 sets of 15 repetitions. 2.lying lateral leg lifts •lie on one side with the legs together. •keep the lower leg slightly bent. •draw the bellybutton into the spine to engage the core muscles. •raise the top leg about 18 inches, keeping it straight and extended. •hold the position for 2 seconds. •repeat 10 times. •turn onto the other side of the body and repeat, lifting the other leg. •perform 3 sets on each side. 3.supermans •lie face down on the ground and stretch both arms out in front of the body, keeping the legs stretched out and flat on the ground. •raise both the hands and feet, aiming to create a gap of about 6 inches between them and the floor. •try to pull in the bellybutton, lifting it off the floor to engage the core muscles. •keep the head straight and look at the floor to avoid neck injury. •stretch the hands and feet outward as far as possible. •hold the position for 2 seconds. •return to the starting position. •repeat 10 times. 4.partial curls •lie back on the floor and bend the knees, keeping the feet flat and hip-width apart. •cross the hands over the chest. •breathe in deeply. •on the breath out, engage the abdominal muscles by pulling in the stomach. •gently raise the head and shoulders 2 inches off the ground while keeping the neck in line with the spine. •hold for 5 seconds then return to the starting position. •repeat the exercise 10 times. •perform 3 sets. 5.knee-to-chest stretches •lie on the back on the floor. •bend the knees, keeping both feet flat on the floor. •use both hands to pull one knee in toward the chest. •hold the knee against the chest for 5 seconds, keeping the abdominals tight and pressing the spine into the floor. •return to the starting position. •repeat with the opposite leg. •repeat with each leg 2–3 times twice a day. 6.lower back rotational stretches •lie back on the floor with bent knees and feet flat on the ground. •keeping the shoulders firmly on the floor, gently roll both bent knees over to one side. •hold the position for 5–10 seconds. •return to the starting position. •gently roll the bent knees over to the opposite side, hold, and then return to the starting position. •repeat 2–3 times on each side twice a day. 7.seated lower back rotational stretches •sit on a stool or chair without arms, keeping the feet flat on the floor. •twist at the core to the right, keeping the hips square and the spine tall. •position the hands behind the head or place the left hand on the right knee to support the stretch. •hold the position for 10 seconds. •repeat the exercise on the left-hand side. •repeat on each side 3–5 times twice a day. Posture when standing: make sure you have a neutral pelvic position. Stand upright, head facing forward, back straight, and balance your weight evenly on both feet. Keep your legs straight and your head in line with your spine. Posture when sitting: a good seat for working should have good back support, arm rests and a swivel base. When sitting, try to keep your knees and hips level and keep your feet flat on the floor, or use a footstool. You should ideally be able to sit upright with support in the small of your back. If you are using a keyboard, make sure your elbows are at right-angles and that your forearms are horizontal. Shoes: flat shoes place less of a strain on the back. Driving: it is important to have proper support for your back. Make sure the wing mirrors are properly positioned so you do not need to twist. The pedals should be squarely in front of your feet. If you are on a long journey, have plenty of breaks. Get angle. Out of the car and walk around. Bed: you should have a mattress that keeps your spine straight, while at the same time supporting the weight of your shoulders and buttocks. Use a pillow, but not one that forces your neck into a steep.

Impression: mild disc bulges of c3-c4 through c5-c6 disc causing mild indentation of the anterior subarachnoid space. A ...
Ask Free Question
Do’s and don’ts for neck pain: do’s •do turn to one side while getting up from supine position. •use hot pack for your neck. •use towel roll under the neck during supine lying. •use pillow of normal thickness in side lying position. •do isometrics for neck. •arms should be supported in one of the three positions:•™ hands in pocket ™ •hands on thighs/or on table. •™ hand behind back with elbow straight. •in order to avoid holding the head in the same position for long periods, take break while driving, watching tv or working on a computer. •use a seat belt when in a car. •use cervical collar in case of giddiness. •retraction of shoulders every hour: move shoulders backward. Don’t’s •don’t sleep straight. •don t’ bend your neck. •avoid hanging of arms. •avoid sitting sitting for prolonged prolonged period of time in stressful stressful postures postures. •do not lift heavy weights on head or back. •do not drive for long hours; take breaks. •avoid habit of holding the telephone on one shoulder and leaning at it for long time. •do not take many pillows below the neck and shoulder while sleeping, •in order to turn around, do not twist your neck or the body; instead turn around by moving your feet first. Cervical spondylosis– chronic condition with radiating pain this is cervical pain (neck pain) and that's the reason the pain radiates until the shoulder blades. If you keep ice that would help and along side you can do hot water fermentation. You shall use cervical collar which would help you to reduce the radiating pain ie. Due to the nerve compression. You have to go for traction and also you can do ift. Please consult the near by therapist for quick relief. Since you have pain for more than 10 years it is suggestible to go for cervical muscle strengthening exercise. Use collar will definitely be helpful for him to maintain the good posture. And also cervical pillow can be used which might make you to have better posture of the shoulder neck and arm. Neck tilt: from the sitting position, tilt your head down so your chin touches your chest. Hold this position for 5 second s. Return to the starting position and repeat. Do this five times. Side-to-side neck tilt. From the same starting position, tilt you neck toward one shoulder, leading with your ear. Hold for 5 seconds and then return to the starting position. Do this five times on each side. Neck turn. Look straight ahead, then turn your head to one side, keeping your chin at the same level. Do this five times on each side. Neck stretch. Holding the rest of your body straight, push your chin forward, stretching your throat. Hold for 5 seconds. From the same starting position, push your chin backward and hold for 5 seconds. Do the forward and backward stretch five times each. If any of these exercises cause severe pain or weakness in your hands or arms, stop right away and talk with your doctor. We suggest you to wear cervical collar which will help you to improve the cervical angle and also it definitely helps you to improve the neck posture due to which your neck pain is triggered more. The importance of wearing cervical collar is to give good stability to the neck and also it definitely prevents you to have excess neck movements which makes the condition worse. If you wear cervical collar you cannot turn your neck as you like which itself will help you to have better functioning of the cervical spine. This cervical soft collar what we are suggesting for you is available at our clinic. If you want you can buy from us, if you are far away from chennai we can send you by courier. The reason why we are conveying you to buy from us is we can demonstrate over the videocall (using whatsapp) and also we can monitor you throughout when to wear it and how long to wear it. And also if you find any difficulty wearing the brace you can also revert back to us for few more suggestions and we can propose you good solution how to go about it.
Mild disc bulges of c3-c4 through c5-c6 disc causing mild indentation of the anterior subarachnoid space. A small perine ...
Ask Free Question
Do’s and don’ts for neck pain: do’s •do turn to one side while getting up from supine position. •use hot pack for your neck. •use towel roll under the neck during supine lying. •use pillow of normal thickness in side lying position. •do isometrics for neck. •arms should be supported in one of the three positions:•™ hands in pocket ™ •hands on thighs/or on table. •™ hand behind back with elbow straight. •in order to avoid holding the head in the same position for long periods, take break while driving, watching tv or working on a computer. •use a seat belt when in a car. •use cervical collar in case of giddiness. •retraction of shoulders every hour: move shoulders backward. Don’t’s •don’t sleep straight. •don t’ bend your neck. •avoid hanging of arms. •avoid sitting sitting for prolonged prolonged period of time in stressful stressful postures postures. •do not lift heavy weights on head or back. •do not drive for long hours; take breaks. •avoid habit of holding the telephone on one shoulder and leaning at it for long time. •do not take many pillows below the neck and shoulder while sleeping, •in order to turn around, do not twist your neck or the body; instead turn around by moving your feet first. Cervical spondylosis– chronic condition with radiating pain this is cervical pain (neck pain) and that's the reason the pain radiates until the shoulder blades. If you keep ice that would help and along side you can do hot water fermentation. You shall use cervical collar which would help you to reduce the radiating pain ie. Due to the nerve compression. You have to go for traction and also you can do ift. Please consult the near by therapist for quick relief. Since you have pain for more than 10 years it is suggestible to go for cervical muscle strengthening exercise. Use collar will definitely be helpful for him to maintain the good posture. And also cervical pillow can be used which might make you to have better posture of the shoulder neck and arm. Neck tilt: from the sitting position, tilt your head down so your chin touches your chest. Hold this position for 5 second s. Return to the starting position and repeat. Do this five times. Side-to-side neck tilt. From the same starting position, tilt you neck toward one shoulder, leading with your ear. Hold for 5 seconds and then return to the starting position. Do this five times on each side. Neck turn. Look straight ahead, then turn your head to one side, keeping your chin at the same level. Do this five times on each side. Neck stretch. Holding the rest of your body straight, push your chin forward, stretching your throat. Hold for 5 seconds. From the same starting position, push your chin backward and hold for 5 seconds. Do the forward and backward stretch five times each. If any of these exercises cause severe pain or weakness in your hands or arms, stop right away and talk with your doctor. We suggest you to wear cervical collar which will help you to improve the cervical angle and also it definitely helps you to improve the neck posture due to which your neck pain is triggered more. The importance of wearing cervical collar is to give good stability to the neck and also it definitely prevents you to have excess neck movements which makes the condition worse. If you wear cervical collar you cannot turn your neck as you like which itself will help you to have better functioning of the cervical spine. This cervical soft collar what we are suggesting for you is available at our clinic. If you want you can buy from us, if you are far away from chennai we can send you by courier. The reason why we are conveying you to buy from us is we can demonstrate over the videocall (using whatsapp) and also we can monitor you throughout when to wear it and how long to wear it. And also if you find any difficulty wearing the brace you can also revert back to us for few more suggestions and we can propose you good solution how to go about it.
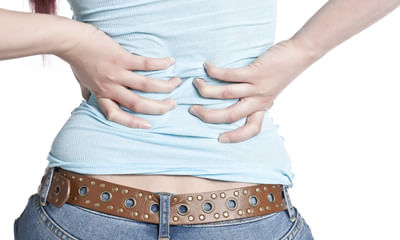
Having severe back spinal pain since 1 year so did an mri l.s spine and doc findings are:- diffuse annular disc bulge wi ...

Ask Free Question
Below are exercises that strengthen the lower back and help manage lower back pain: 1. Bridges—lie on the ground and bend the knees, placing the feet flat on the floor hip-width apart. Press the feet into the floor, keeping the arms by the sides. Raise the buttocks off the ground until the body forms a straight line from the shoulders to the knees. Squeeze the buttocks with the shoulders remaining on the floor. Lower the buttocks to the ground and rest for a few seconds.Repeat 15 times and then rest for 1 minute.Do 3 sets of 15 repetitions.2. Knee-to-chest stretches— lie on the back on the floor. Bend the knees, keeping both feet flat on the floor. Use both hands to pull one knee in toward the chest. Hold the knee against the chest for 5 seconds, keeping the abdominals tight and pressing the spine into the floor. Return to the starting position.Repeat with the opposite leg.Repeat with each leg 2–3 times twice a day. 3. Lower back rotational stretches—lie back on the floor with bent knees and feet flat on the ground. Keeping the shoulders firmly on the floor, gently roll both bent knees over to one side. Hold the position for 5–10 seconds. Return to the starting position. Gently roll the bent knees over to the opposite side, hold, and then return to the starting position. Repeat 2–3 times on each side twice a day. 4. Draw-in maneuvers— lie back on the floor with knees bent and feet flat, keeping the arms by the sides. Breathe in deeply. While breathing out, pull the bellybutton toward the spine, tightening the abdominal muscles and keeping the hips still. Hold the position for 5 seconds. Repeat 5 times. 5. Pelvic tilts— lie back on the floor with knees bent and feet flat, keeping the arms by the sides. Gently arch the lower back and push the stomach out. Hold for 5 seconds, then relax. Flatten the back and pull the bellybutton in toward the floor. Hold for 5 seconds, then relax. Increase the number of repetitions daily, building up to 30. 6. Lying lateral leg lifts— lie on one side with the legs together. Keep the lower leg slightly bent. Draw the bellybutton into the spine to engage the core muscles. Raise the top leg about 18 inches, keeping it straight and extended. Hold the position for 2 seconds. Repeat 10 times. Turn onto the other side of the body and repeat, lifting the other leg. Perform 3 sets on each side. 7. Cat stretches— get onto the hands and knees with the knees hip-width apart. Arch the back, pulling the bellybutton up toward the spine. Slowly relax the muscles and allow the abdomen to sag toward the floor. Return to the starting position. Repeat 3–5 times twice a day. 8. Supermans— lie face down on the ground and stretch both arms out in front of the body, keeping the legs stretched out and flat on the ground. Raise both the hands and feet, aiming to create a gap of about 6 inches between them and the floor. Try to pull in the bellybutton, lifting it off the floor to engage the core muscles. Keep the head straight and look at the floor to avoid neck injury. Stretch the hands and feet outward as far as possible. Hold the position for 2 seconds. Return to the starting position. Repeat 10 times. For this homeopathic treatment is very effective consult online with details.
My pain started from 2 fingers of right hand around 1.5 years ago and has reached to both my arms and upper back. Docs t ...
Ask Free Question
Hi spine problems are sometimes frustrating. They donât get better soon, as never doesnât listen to you. They need time and patience. Sometimes it never get better. You need to keep your options open. Regarding your scan, you do have problem, doesnât sound severe compression. Other compression of nerves will happen as coincidence. Like cubital tunnel syndrome if little and ring finger involved, if index and middle finger involved means carpal tunnel syndrome. Once someone correct these, things will improve. Wish you all the best. Get it checked by orthopaedic surgeon. Update me.