Swollen Red Patch On Leg
My right knee is swollen and it got fluid inside it. It's been 4 months when I first consulted with a doctor, took his m ...


Ask Free Question
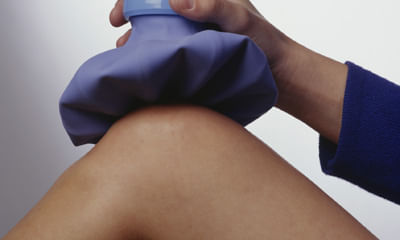
Knee pain the importance of buying braces and splints from us – orthopaedic support braces we suggest you to wear knee brace which is available at our clinic. If you want you can buy from us, if you are far away from chennai we can send you by courier. The reason why we are conveying you to buy from us is we can demonstrate over the videocall (using whatsapp) and also we can monitor you throughout when to wear it and how long to wear it. And also if you find any difficulty wearing the brace you can also revert back to us for few more suggestions and we can propose you good solution how to go about it. Resisted terminal knee extension: make a loop with a piece of elastic tubing by tying a knot in both ends. Close the knot in a door at knee height. Step into the loop with your injured leg so the tubing is around the back of your knee. Lift the other foot off the ground and hold onto a chair for balance, if needed. Bend the knee with tubing about 45 degrees. Slowly straighten your leg, keeping your thigh muscle tight as you do this. Repeat 15 times. Do 2 sets of 15. If you need an easier way to do this, stand on both legs for better support while you do the exercise. Standing calf stretch: stand facing a wall with your hands on the wall at about eye level. Keep as arthritis is very common that you get generally bilaterally. Ice therapy would definitely help to reduce the inflammation. We also advise you to use knee cap which would help to prevent the knee from damaging further and also to maintain the quadriceps muscle tone 1. Heel and calf stretch 2. Quadriceps stretch to do this stretch: 1. Stand next to a wall or use a chair for support. Your feet should be shoulder-width apart. 2. Bend one knee so your foot goes up toward your glutes. 3. Grab your ankle and gently pull it toward your glutes as far as you can comfortably. 4. Hold for 30 seconds. 5. Return to the starting position and change legs. 6. Repeat 2 times on each side. Knee pain: resisted terminal knee extension: make a loop with a piece of elastic tubing by tying a knot in both ends. Close the knot in a door at knee height. Step into the loop with your injured leg so the tubing is around the back of your knee. Lift the other foot off the ground and hold onto a chair for balance, if needed. Bend the knee with tubing about 45 degrees. Slowly straighten your leg, keeping your thigh muscle tight as you do this. Repeat 15 times. Do 2 sets of 15. If you need an easier way to do this, stand on both legs for better support while you do the exercise. Standing calf stretch: stand facing a wall with your hands on the wall at about eye level. Keep as arthritis is very common that you get generally bilaterally. Ice therapy would definitely help to reduce the inflammation. We also advise you to use knee cap which would help to prevent the knee from damaging further and also to maintain the quadriceps muscle tone ice therapy would definitely help to reduce the inflammation. We also advise you to use knee cap which would help to prevent the knee from damaging further and also to maintain the quadriceps muscle tone. Stiffness have developed due to weakness of the ligaments &inflammed cartilage. Specific knee exercises will also help ie. Keeping ball underneath the knee and keep pressing it. That's the simple exercise which will help you to strengthen the knee.

Edema problem on right leg and creatinine 1.5 with slow pitting and reddish swelling. ...

Ask Free Question
Edema in the right leg with associated symptoms like slow pitting and reddish swelling, coupled with a creatinine level of 1.5, can be indicative of underlying health issues that need medical attention. Here's a brief overview of what these symptoms might mean: edema: edema refers to swelling caused by excess fluid trapped in your body's tissues. In the legs, it can be due to a variety of reasons, including venous insufficiency, lymphatic issues, or other localized problems. Pitting edema: if the swelling leaves an indent when you press on it (known as pitting), this can be a sign of certain types of fluid retention, often related to circulatory or lymphatic system issues. Reddish swelling: redness and warmth in the swollen area could indicate inflammation or infection. It could also suggest a blood clot, especially if it's localized to one leg. Elevated creatinine levels: a creatinine level of 1.5 is higher than normal for most adults, suggesting impaired kidney function. The kidneys are responsible for filtering waste products from your blood and maintaining fluid balance. Impaired kidney function can lead to fluid retention and edema. Given these symptoms, it's important to seek medical evaluation as soon as possible. The combination of edema, changes in skin color, and elevated creatinine levels can point to significant health issues like kidney disease, deep vein thrombosis, or other circulatory system disorders. A healthcare provider can conduct the necessary examinations and tests, such as blood tests, doppler ultrasound, or other imaging studies, to determine the underlying cause and appropriate treatment. In the meantime, here are some general measures that might help manage symptoms: elevate the leg: keeping the leg elevated above heart level when possible can help reduce swelling. Compression stockings: these can aid in reducing swelling and improving blood flow. Stay hydrated: proper hydration can help kidney function and reduce the risk of blood clots. Limit salt intake: excess salt can contribute to fluid retention. Avoid prolonged standing or sitting: moving around regularly can help with circulation.
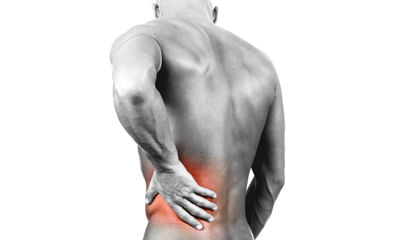
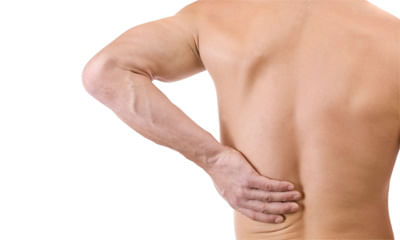
Hello sir ,i am vilika swu ,22 years old ,i was having pain in the back from long time n wen I went for ultrasound I had ...
Ask Free Question
You need to diagnose whether the back pain is originally due to back issues or it is due to kidney issues. Kidney pain vs. Back pain because your kidneys are located toward your back and= underneath your ribcage, it may be hard to tell if the pain you’re experiencing in that area is coming from your back or your kidney. The symptoms you’re having can help you figure out which is the source of the pain. The location, type, and severity of the pain are some of the things that will be different depending on whether the pain is from a problem in your kidneys or your back. How to identify kidney painkidney pain is most often caused by a kidney infection or a stone in the tubes coming out of your kidney. If the pain is coming from your kidney, it will have these features: where the pain is located kidney pain is felt in your flank, which is the area on either side of your spine between the bottom of your ribcage and your hips. It usually occurs in one side of your body, but it can occur in both sides. Type of pain kidney pain is usually sharp if you have a kidney stone and a dull ache if you have an infection. Most often it will be constant. It won’t get worse with movement or go away by itself without treatment. If you’re passing a kidney stone, the pain may fluctuate as the stone moves. Radiation of the pain sometimes the pain spreads (radiates) to your inner thigh or lower abdomen. Severity of the pain kidney pain is classified according to how bad it is — severe or mild. A kidney stone usually causes severe pain, and the pain from an infection is usually mild. Things that make it better or worse typically, nothing makes the pain better until the problem is corrected, such as by passing the stone. Unlike back pain, it usually won’t change with movement. Accompanying symptoms if you have a kidney infection or a kidney stone, you may also experience: •fever and chills •nausea and vomiting •cloudy or dark urine •an urgent need to urinate •pain when you urinate •a recent infection in your bladder •blood in your urine (this can happen with an infection or kidney stones) •small kidney stones that look like gravel in your urine how to identify back pain back pain is more common than kidney pain and is usually caused by a problem in the muscles, bones, or nerves in your back. Has the following features: where the pain is located back pain can occur anywhere on your back, but it’s most commonly located in your lower back or one of your buttocks. Type of pain muscle pain feels like a dull ache. If a nerve has been injured or irritated, the pain is a sharp burning sensation that may travel down your buttock to your lower leg or even your foot. Muscle pain may affect one or both sides, but nerve pain usually only affects one side. Radiation of the pain nerve pain may spread to your lower leg. Pain from a muscle usually stays in the back. Severity of the pain back pain is described as acute or chronic based on how long you’ve had it. Acute pain lasts days to weeks, subacute pain lasts six weeks to three months, and chronic pain lasts longer than three months. Things that make it better or worse back pain may get worse with movement or if you sit or stand for a long time. It may get better if you switch positions or walk around. Accompanying symptoms other symptoms you may experience with back pain include: •the painful spot looking swollen and feeling tender to the touch •a muscle spasm in the painful area •numbness or weakness in one or both of your legs (if the pain is due to a nerve issue) if you find you have back pain and can’t hold your urine or bowel movements, something is pressing on your spinal nerves, and you should be evaluated immediately. This condition, called caudaequina syndrome, can cause severe long-term damage to your spinal nerves if not treated right away. 6 imbalances that cause pain—and how to fix them "pain is a medical condition and a medical issue, says brett jones, owner of applied strength in pittsburgh who is certified for the functional movement screen, a system of tests and cor rective exercise strategies. "it's a warning sign. The pain is there to tell you something's wrong.
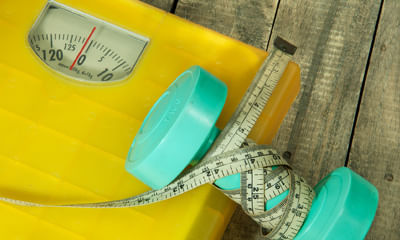
I am from chennai. I'm going to gym for past 6 months trying to lose weight. Usually when I train my muscle I get sorene ...

Ask Free Question
The symptoms that you mentioned can also be due to poor muscle recovery and dehydration. But if you still have doubts you can definitely go for basic kidney function test. If they shows any abnormality then we can go for a specific test that you have mentioned. But if no abnormality is seen then I would suggest to have better food intake and stay hydrated take some out of rest so that your body can recover well. You can anytime consult digestion and we can also do some genetic testing that will show how prone are you to some kind of diseases.
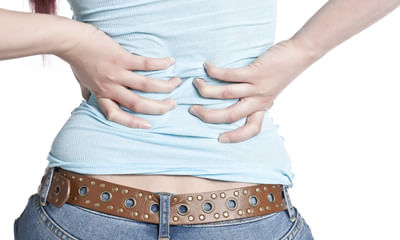
I slip and fall on my hips, my weight is 120 kg I have lover back pain and left hip pain but I can walk but when I bent ...
Ask Free Question
Back pain back pain exercises; kindly do these exercises. Back pain is described as acute or chronic based on how long you’ve had it. Acute pain lasts days to weeks, subacute pain lasts six weeks to three months, and chronic pain lasts longer than three months. Things that make it better or worse back pain may get worse with movement or if you sit or stand for a long time. It may get better if you switch positions or walk around. Other symptoms you may experience with back pain include: •the painful spot looking swollen and feeling tender to the touch •a muscle spasm in the painful area •numbness or weakness in one or both of your legs (if the pain is due to a nerve issue) if you find you have back pain and can’t hold your urine or bowel movements, something is pressing on your spinal nerves, and you should be evaluated immediately. This condition, called cauda equina syndrome, can cause severe long-term damage to your spinal nerves if not treated right away. 6 imbalances that cause pain—and how to fix them "pain is a medical condition and a medical issue, says brett jones, owner of applied strength in pittsburgh who is certified for the functional movement screen, a system of tests and cor rective exercise strategies. "it's a warning sign. The pain is there to tell you something's wrong. And that warning sign could be more serious than "you're going too hard. Jones and the other coaches consulted for this piece all had a horror story to tell-when pain in a client meant a more serious condition such as a nerve issue, thyroid issue, or even cancer. The point: if you experience regular pain while exercising-or when you're not-go to the doctor. If you've been cleared by a doc and you're still feeling discomfort, try these simple tests to see what's truly causing the pain-it could be related to an imbalance in a completely different part of your body. The good news: with these drills, stretches, and corrective exercises, you may be able to fix them-no doctors necessary. 1. Standing extension how it helps – this standing extension helps reverse what you do on a daily basis (hunching)… since most bulging discs and herniated discs are caused by poor posture and repeated flexion of the spine (esp bending fwd in bad posture), this stretch helps push the disc back to neutral position. How to do it – begin this exercise by standing up with good posture. Now take both hands and place them on both sides of your lower back. Now with the help of your hands push your pelvis forward and extend your spine back. Follow the extension with your neck so that you end up facing the ceiling. – start with 10 repetitions and do 2-3 sets. – this one is particularly great to do when you need a break from sitting at your desk. ** this should not cause any pain. If you feel pain during it is not a good one for you. In that case, stop and try some of the other exercises below instead. 2. Half cobra pose (prone lumbar extension) how it helps – the half cobra stretch helps to push the disc material back towards the center of the inter-vertebral disc to allow for improved healing. The goal of repeated lower back extension is the “centralization of symptoms”, which basically means pain that travels down the affected leg to the foot should come back up closer to the low back – which will in turn alleviate the pain. How to do it – begin this exercise by lying on your stomach (prone position) and slowly prop yourself up on your elbows while keeping your hips in contact with the floor. – hold the prop-up position for 10-15 seconds before returning to the prone position (lying face down). – gradually increase to holding the end position for 30 seconds. Aim for 10 repetitions of this stretch. ** initially, you may not be able to tolerate this position very well, so make sure you start slowly and carefully. If there’s any pain, try a different exercise instead. 3. Full cobra pose (advanced extension) how it helps – this stretch is based on the same principle as the half cobra pose above. This advanced extension helps to push disc material back towards the center of the intervertebral disc, with the goal of alleviating pain symptoms. How to do it – once you’ve mastered the half cobra pose, you can increase the difficulty by moving to the advanced version of this stretch. Begin this exercise by lying on your stomach in the prone position (lying facing down) and slowly press up on your hands while keeping your pelvis in contact with the floor and lower back relaxed. – hold the prop-up position for 10 seconds. Aim for 10 repetitions of this stretch. – eventually try to hold this pose for longer if it feels good (20-30 seconds). ** if you feel pain during this exercise, it is not a good one for you. In that case, stop and try some of the other exercises instead. 4. Cat-cow how it helps – this is one of the most popular herniated disc exercises. By combining two yoga poses, the cat-cow stretch can help to relieve pressure on the herniated disc by opening the intervertebral disc space. It also improves mobility of the spine, which may help to relieve disc herniation pain and speed recovery. How to do it – begin this stretch on your hands and knees. Inhale and let your stomach “drop” towards the floor as you look up towards the ceiling. – follow this by exhaling and slowly rounding your spine while pressing into the floor with your hands and slightly curving your neck to look at your feet. – aim for 10 repetitions of this stretch and do 2-3 sets. How it helps – this exercise will help strengthen and stabilize your lower back and deep spine muscles. This will help you to maintain a good posture and avoid future episodes of herniated discs. How to do it: – begin on your hands and knees with your hands positioned under your shoulders and knees positioned under your hips. – raise your left arm and reach it forwards until it is aligned with your torso; at the same time, kick your right leg backwards until is it aligned with your torso. – hold this position for 2-3 seconds before slowly returning to the starting position. – repeat with your right arm and left leg. – alternate sides for 10 repetitions and do 2-3 sets. ** ensure that your head, neck, and back maintain a neutral alignment to minimize stress on your neck. 5.plank: how it helps – just like the bird dog, this “core” exercise will help bring your pelvis into right position by strengthening the deep spinal muscles and glutes (butt muscles). How to do it – begin lying on your stomach with your forearms against the mat. – engage your core and lift your body so that you are resting on your forearms and toes. – start with 10 second holds and work up to 30 second holds, do 2-3 sets. ** ensure to keep your back straight throughout the entire exercise – spine in neutral position. Thoracic expansion if you’re using a chair, sit facing forward and allow your upper body to fall over the back of the chair. Extend your arms above your head for a deeper stretch. Hold either position for 10 seconds. 1. Plank the world record for the longest plank is 8 hours. Luckily, you don’t need to hold it that long for the exercise to have an effect! in fact. You can hold it for 10-15 seconds. • the plank is similar to a push-up position, but instead of resting on your hands, you rest on your elbows and bring them directly underneath your chest. • after kneeling, lean forward and place your elbows on the ground directly below your shoulders. • lift your knees off of the floor and push your feet back. Ensure your back is straight and keep your neck aligned with the rest of your spine. • hold the position and tighten your core muscles for the desired time. 2. Side plank just like the original plank, but only balancing on one side. • lie on the floor on your side, facing sideways with your feet together. • lift up your body until you are supporting yourself with your elbow, directly below your shoulder. • raise your hips until your body is in a straight line and tighten your core muscles; your body should create a slant from your shoulders to your feet. • hold this position without dropping your hips. • repeat on the opposite side. 3. Pelvic tilt with exercise ball sit on a ball that allows your legs to be at a 90-degree angle with your feet flat on the floor. • keep your shoulders back and spine straight. • tilt your hips forward and flex your abdominals tight. • tilt your hips backward as you stick your tailbone out. • move back and forth slowly, keeping your shoulders back. • repeat 10 times for 3 sets. 4. Superman lie on your stomach, face down, with your arms out in front of you. • lift arms, legs, and chest off the floor simultaneously while keeping your hips grounded. • hold for a minimum of two seconds. • lower back down slowly. • repeat 10 times for 3 sets. 6. Crunches lie flat on your back, placing your feet flat on the floor with your legs bent. • fold your arms across your chest and lift your torso up until your head, neck, and torso are off the ground. • hold for a moment before lowering back down. • repeat. 6. Quadruped arm opposite leg raises • kneel on the floor, lean forward, and place your hands palm-down on the floor. • make sure your back is straight, your knees are below your hips, and that your palms are directly below your shoulders. • raise one arm as you raise the opposite leg until both are aligned straight out from your body, parallel to your spine.
My legs were swollen nd severe pain. I was asked to take nicip tablet, along with dorjoint plus and cipcal after taking, ...
Ask Free Question
If you have leg pain then you have to rule out the casues for having leg pain. First of all check your weight and your haemoglobin levels, as anaemia always leads to the symptoms of being tired and also having leg pain though there are no issues with the knee joint or back pain. Since you met with an accident probably you would've had blood loss and also you must be having mineral or calcium deficiency that is one reason to feel very rigid or stiff in that area. Hot water fermentation that would help to reduce the muscle strain. Keep ice in the area where you have pain/or where the muscle is injured.Rest avoid using your muscle for a few days, especially if movement causes an increase in pain. But too much rest can cause muscles to become weak. This can prolong the healing process. After two days, slowly begin using the affected muscle group, taking care not to overdo it. Ice apply ice immediately after injuring your muscle. This will minimize swelling. Don’t put ice directly on your skin. Use an ice pack or wrap ice in a towel. Keep the ice on your muscle for about 20 minutes. Repeat every hour on the first day. For the next several days, apply ice every four hours. Compression to reduce swelling, wrap the affected area with an elastic bandage until swelling comes down. Be careful not to wrap the area too tightly. Doing so can reduce your blood circulation. Elevation whenever possible, keep the injured muscle raised above the level of your heart.
Sometime I have leg pain sometimes headache sometimes back pain and sleep problem also. Sexual problem is also there. I ...
Ask Free Question
Back pain back pain exercises; kindly do these exercises. Back pain is described as acute or chronic based on how long you’ve had it. Acute pain lasts days to weeks, subacute pain lasts six weeks to three months, and chronic pain lasts longer than three months. Things that make it better or worse back pain may get worse with movement or if you sit or stand for a long time. It may get better if you switch positions or walk around. Other symptoms you may experience with back pain include: •the painful spot looking swollen and feeling tender to the touch •a muscle spasm in the painful area •numbness or weakness in one or both of your legs (if the pain is due to a nerve issue) if you find you have back pain and can’t hold your urine or bowel movements, something is pressing on your spinal nerves, and you should be evaluated immediately. This condition, called cauda equina syndrome, can cause severe long-term damage to your spinal nerves if not treated right away. 6 imbalances that cause pain—and how to fix them "pain is a medical condition and a medical issue, says brett jones, owner of applied strength in pittsburgh who is certified for the functional movement screen, a system of tests and cor rective exercise strategies. "it's a warning sign. The pain is there to tell you something's wrong. And that warning sign could be more serious than "you're going too hard. Jones and the other coaches consulted for this piece all had a horror story to tell-when pain in a client meant a more serious condition such as a nerve issue, thyroid issue, or even cancer. The point: if you experience regular pain while exercising-or when you're not-go to the doctor. If you've been cleared by a doc and you're still feeling discomfort, try these simple tests to see what's truly causing the pain-it could be related to an imbalance in a completely different part of your body. The good news: with these drills, stretches, and corrective exercises, you may be able to fix them-no doctors necessary. 1. Standing extension how it helps – this standing extension helps reverse what you do on a daily basis (hunching)… since most bulging discs and herniated discs are caused by poor posture and repeated flexion of the spine (esp bending fwd in bad posture), this stretch helps push the disc back to neutral position. How to do it – begin this exercise by standing up with good posture. Now take both hands and place them on both sides of your lower back. Now with the help of your hands push your pelvis forward and extend your spine back. Follow the extension with your neck so that you end up facing the ceiling. – start with 10 repetitions and do 2-3 sets. – this one is particularly great to do when you need a break from sitting at your desk. ** this should not cause any pain. If you feel pain during it is not a good one for you. In that case, stop and try some of the other exercises below instead. 2. Half cobra pose (prone lumbar extension) how it helps – the half cobra stretch helps to push the disc material back towards the center of the inter-vertebral disc to allow for improved healing. The goal of repeated lower back extension is the “centralization of symptoms”, which basically means pain that travels down the affected leg to the foot should come back up closer to the low back – which will in turn alleviate the pain. How to do it – begin this exercise by lying on your stomach (prone position) and slowly prop yourself up on your elbows while keeping your hips in contact with the floor. – hold the prop-up position for 10-15 seconds before returning to the prone position (lying face down). – gradually increase to holding the end position for 30 seconds. Aim for 10 repetitions of this stretch. ** initially, you may not be able to tolerate this position very well, so make sure you start slowly and carefully. If there’s any pain, try a different exercise instead. 3. Full cobra pose (advanced extension) how it helps – this stretch is based on the same principle as the half cobra pose above. This advanced extension helps to push disc material back towards the center of the intervertebral disc, with the goal of alleviating pain symptoms. How to do it – once you’ve mastered the half cobra pose, you can increase the difficulty by moving to the advanced version of this stretch. Begin this exercise by lying on your stomach in the prone position (lying facing down) and slowly press up on your hands while keeping your pelvis in contact with the floor and lower back relaxed. – hold the prop-up position for 10 seconds. Aim for 10 repetitions of this stretch. – eventually try to hold this pose for longer if it feels good (20-30 seconds). ** if you feel pain during this exercise, it is not a good one for you. In that case, stop and try some of the other exercises instead. 4. Cat-cow how it helps – this is one of the most popular herniated disc exercises. By combining two yoga poses, the cat-cow stretch can help to relieve pressure on the herniated disc by opening the intervertebral disc space. It also improves mobility of the spine, which may help to relieve disc herniation pain and speed recovery. How to do it – begin this stretch on your hands and knees. Inhale and let your stomach “drop” towards the floor as you look up towards the ceiling. – follow this by exhaling and slowly rounding your spine while pressing into the floor with your hands and slightly curving your neck to look at your feet. – aim for 10 repetitions of this stretch and do 2-3 sets. How it helps – this exercise will help strengthen and stabilize your lower back and deep spine muscles. This will help you to maintain a good posture and avoid future episodes of herniated discs. How to do it: – begin on your hands and knees with your hands positioned under your shoulders and knees positioned under your hips. – raise your left arm and reach it forwards until it is aligned with your torso; at the same time, kick your right leg backwards until is it aligned with your torso. – hold this position for 2-3 seconds before slowly returning to the starting position. – repeat with your right arm and left leg. – alternate sides for 10 repetitions and do 2-3 sets. ** ensure that your head, neck, and back maintain a neutral alignment to minimize stress on your neck. 5.plank: how it helps – just like the bird dog, this “core” exercise will help bring your pelvis into right position by strengthening the deep spinal muscles and glutes (butt muscles). How to do it – begin lying on your stomach with your forearms against the mat. – engage your core and lift your body so that you are resting on your forearms and toes. – start with 10 second holds and work up to 30 second holds, do 2-3 sets. ** ensure to keep your back straight throughout the entire exercise – spine in neutral position. Thoracic expansion if you’re using a chair, sit facing forward and allow your upper body to fall over the back of the chair. Extend your arms above your head for a deeper stretch. Hold either position for 10 seconds. 1. Plank the world record for the longest plank is 8 hours. Luckily, you don’t need to hold it that long for the exercise to have an effect! in fact. You can hold it for 10-15 seconds. • the plank is similar to a push-up position, but instead of resting on your hands, you rest on your elbows and bring them directly underneath your chest. • after kneeling, lean forward and place your elbows on the ground directly below your shoulders. • lift your knees off of the floor and push your feet back. Ensure your back is straight and keep your neck aligned with the rest of your spine. • hold the position and tighten your core muscles for the desired time. 2. Side plank just like the original plank, but only balancing on one side. • lie on the floor on your side, facing sideways with your feet together. • lift up your body until you are supporting yourself with your elbow, directly below your shoulder. • raise your hips until your body is in a straight line and tighten your core muscles; your body should create a slant from your shoulders to your feet. • hold this position without dropping your hips. • repeat on the opposite side. 3. Pelvic tilt with exercise ball sit on a ball that allows your legs to be at a 90-degree angle with your feet flat on the floor. • keep your shoulders back and spine straight. • tilt your hips forward and flex your abdominals tight. • tilt your hips backward as you stick your tailbone out. • move back and forth slowly, keeping your shoulders back. • repeat 10 times for 3 sets. 4. Superman lie on your stomach, face down, with your arms out in front of you. • lift arms, legs, and chest off the floor simultaneously while keeping your hips grounded. • hold for a minimum of two seconds. • lower back down slowly. • repeat 10 times for 3 sets. 6. Crunches lie flat on your back, placing your feet flat on the floor with your legs bent. • fold your arms across your chest and lift your torso up until your head, neck, and torso are off the ground. • hold for a moment before lowering back down. • repeat. 6. Quadruped arm opposite leg raises • kneel on the floor, lean forward, and place your hands palm-down on the floor. • make sure your back is straight, your knees are below your hips, and that your palms are directly below your shoulders. • raise one arm as you raise the opposite leg until both are aligned straight out from your body, parallel to your spine. • slowly lower both your arm and leg until you are back in the starting position. • switch arm and leg, and repeat. 7. Dead bug lie flat on the floor on your back. • lift your arms straight up from your body, reaching through the air. • raise one leg until it is at a 90-degree angle from your body. • slowly lower until it is in the starting position. • switch legs and repeat. 8. Hip bridge lie on your back with your knees bent and raised, your feet flat on the floor, and your arms at your sides. • keep your feet hip-distance apart and try to keep your leg in vertical alignment with your knee. • flex your glutes and push through your heels to raise your hips upward. Try to make a diagonal line from your shoulders to your knees. • hold for a short moment before lowering back down. • repeat 10 times for 3 sets.

My daughter is 30 years old and weight is 73 kg. She has lot of pain in back and legs and very difficulty in bending dow ...
Ask Free Question
Back pain back pain exercises; kindly do these exercises. Back pain is described as acute or chronic based on how long you’ve had it. Acute pain lasts days to weeks, subacute pain lasts six weeks to three months, and chronic pain lasts longer than three months. Things that make it better or worse back pain may get worse with movement or if you sit or stand for a long time. It may get better if you switch positions or walk around. Other symptoms you may experience with back pain include: •the painful spot looking swollen and feeling tender to the touch •a muscle spasm in the painful area •numbness or weakness in one or both of your legs (if the pain is due to a nerve issue) if you find you have back pain and can’t hold your urine or bowel movements, something is pressing on your spinal nerves, and you should be evaluated immediately. This condition, called cauda equina syndrome, can cause severe long-term damage to your spinal nerves if not treated right away. 6 imbalances that cause pain—and how to fix them "pain is a medical condition and a medical issue, says brett jones, owner of applied strength in pittsburgh who is certified for the functional movement screen, a system of tests and cor rective exercise strategies. "it's a warning sign. The pain is there to tell you something's wrong. And that warning sign could be more serious than "you're going too hard. Jones and the other coaches consulted for this piece all had a horror story to tell-when pain in a client meant a more serious condition such as a nerve issue, thyroid issue, or even cancer. The point: if you experience regular pain while exercising-or when you're not-go to the doctor. If you've been cleared by a doc and you're still feeling discomfort, try these simple tests to see what's truly causing the pain-it could be related to an imbalance in a completely different part of your body. The good news: with these drills, stretches, and corrective exercises, you may be able to fix them-no doctors necessary. 1. Standing extension how it helps – this standing extension helps reverse what you do on a daily basis (hunching)… since most bulging discs and herniated discs are caused by poor posture and repeated flexion of the spine (esp bending fwd in bad posture), this stretch helps push the disc back to neutral position. How to do it – begin this exercise by standing up with good posture. Now take both hands and place them on both sides of your lower back. Now with the help of your hands push your pelvis forward and extend your spine back. Follow the extension with your neck so that you end up facing the ceiling. – start with 10 repetitions and do 2-3 sets. – this one is particularly great to do when you need a break from sitting at your desk. ** this should not cause any pain. If you feel pain during it is not a good one for you. In that case, stop and try some of the other exercises below instead. 2. Half cobra pose (prone lumbar extension) how it helps – the half cobra stretch helps to push the disc material back towards the center of the inter-vertebral disc to allow for improved healing. The goal of repeated lower back extension is the “centralization of symptoms”, which basically means pain that travels down the affected leg to the foot should come back up closer to the low back – which will in turn alleviate the pain. How to do it – begin this exercise by lying on your stomach (prone position) and slowly prop yourself up on your elbows while keeping your hips in contact with the floor. – hold the prop-up position for 10-15 seconds before returning to the prone position (lying face down). – gradually increase to holding the end position for 30 seconds. Aim for 10 repetitions of this stretch. ** initially, you may not be able to tolerate this position very well, so make sure you start slowly and carefully. If there’s any pain, try a different exercise instead. 3. Full cobra pose (advanced extension) how it helps – this stretch is based on the same principle as the half cobra pose above. This advanced extension helps to push disc material back towards the center of the intervertebral disc, with the goal of alleviating pain symptoms. How to do it – once you’ve mastered the half cobra pose, you can increase the difficulty by moving to the advanced version of this stretch. Begin this exercise by lying on your stomach in the prone position (lying facing down) and slowly press up on your hands while keeping your pelvis in contact with the floor and lower back relaxed. – hold the prop-up position for 10 seconds. Aim for 10 repetitions of this stretch. – eventually try to hold this pose for longer if it feels good (20-30 seconds). ** if you feel pain during this exercise, it is not a good one for you. In that case, stop and try some of the other exercises instead. 4. Cat-cow how it helps – this is one of the most popular herniated disc exercises. By combining two yoga poses, the cat-cow stretch can help to relieve pressure on the herniated disc by opening the intervertebral disc space. It also improves mobility of the spine, which may help to relieve disc herniation pain and speed recovery. How to do it – begin this stretch on your hands and knees. Inhale and let your stomach “drop” towards the floor as you look up towards the ceiling. – follow this by exhaling and slowly rounding your spine while pressing into the floor with your hands and slightly curving your neck to look at your feet. – aim for 10 repetitions of this stretch and do 2-3 sets. How it helps – this exercise will help strengthen and stabilize your lower back and deep spine muscles. This will help you to maintain a good posture and avoid future episodes of herniated discs. How to do it: – begin on your hands and knees with your hands positioned under your shoulders and knees positioned under your hips. – raise your left arm and reach it forwards until it is aligned with your torso; at the same time, kick your right leg backwards until is it aligned with your torso. – hold this position for 2-3 seconds before slowly returning to the starting position. – repeat with your right arm and left leg. – alternate sides for 10 repetitions and do 2-3 sets. ** ensure that your head, neck, and back maintain a neutral alignment to minimize stress on your neck. 5.plank: how it helps – just like the bird dog, this “core” exercise will help bring your pelvis into right position by strengthening the deep spinal muscles and glutes (butt muscles). How to do it – begin lying on your stomach with your forearms against the mat. – engage your core and lift your body so that you are resting on your forearms and toes. – start with 10 second holds and work up to 30 second holds, do 2-3 sets. ** ensure to keep your back straight throughout the entire exercise – spine in neutral position. Thoracic expansion if you’re using a chair, sit facing forward and allow your upper body to fall over the back of the chair. Extend your arms above your head for a deeper stretch. Hold either position for 10 seconds. 1. Plank the world record for the longest plank is 8 hours. Luckily, you don’t need to hold it that long for the exercise to have an effect! in fact. You can hold it for 10-15 seconds. • the plank is similar to a push-up position, but instead of resting on your hands, you rest on your elbows and bring them directly underneath your chest. • after kneeling, lean forward and place your elbows on the ground directly below your shoulders. • lift your knees off of the floor and push your feet back. Ensure your back is straight and keep your neck aligned with the rest of your spine. • hold the position and tighten your core muscles for the desired time. 2. Side plank just like the original plank, but only balancing on one side. • lie on the floor on your side, facing sideways with your feet together. • lift up your body until you are supporting yourself with your elbow, directly below your shoulder. • raise your hips until your body is in a straight line and tighten your core muscles; your body should create a slant from your shoulders to your feet. • hold this position without dropping your hips. • repeat on the opposite side. 3. Pelvic tilt with exercise ball sit on a ball that allows your legs to be at a 90-degree angle with your feet flat on the floor. • keep your shoulders back and spine straight. • tilt your hips forward and flex your abdominals tight. • tilt your hips backward as you stick your tailbone out. • move back and forth slowly, keeping your shoulders back. • repeat 10 times for 3 sets. 4. Superman lie on your stomach, face down, with your arms out in front of you. • lift arms, legs, and chest off the floor simultaneously while keeping your hips grounded. • hold for a minimum of two seconds. • lower back down slowly. • repeat 10 times for 3 sets. 6. Crunches lie flat on your back, placing your feet flat on the floor with your legs bent. • fold your arms across your chest and lift your torso up until your head, neck, and torso are off the ground. • hold for a moment before lowering back down. • repeat. 6. Quadruped arm opposite leg raises • kneel on the floor, lean forward, and place your hands palm-down on the floor. • make sure your back is straight, your knees are below your hips, and that your palms are directly below your shoulders. • raise one arm as you raise the opposite leg until both are aligned straight out from your body, parallel to your spine. • slowly lower both your arm and leg until you are back in the starting position. • switch arm and leg, and repeat. 7. Dead bug lie flat on the floor on your back. • lift your arms straight up from your body, reaching through the air. • raise one leg until it is at a 90-degree angle from your body. • slowly lower until it is in the starting position. • switch legs and repeat. 8. Hip bridge lie on your back with your knees bent and raised, your feet flat on the floor, and your arms at your sides. • keep your feet hip-distance apart and try to keep your leg in vertical alignment with your knee. • flex your glutes and push through your heels to raise your hips upward. Try to make a diagonal line from your shoulders to your knees. • hold for a short moment before lowering back down. • repeat 10 times for 3 sets.

Mere papa ko back pain ho rha hai acidity ya kuch aur nhi pata ek baar doctor se consult karke laye the acid problem keh ...
Ask Free Question
Back pain exercises; kindly do these exercises. Back pain is described as acute or chronic based on how long you’ve had it. Acute pain lasts days to weeks, subacute pain lasts six weeks to three months, and chronic pain lasts longer than three months. Things that make it better or worse back pain may get worse with movement or if you sit or stand for a long time. It may get better if you switch positions or walk around. Other symptoms you may experience with back pain include: •the painful spot looking swollen and feeling tender to the touch •a muscle spasm in the painful area •numbness or weakness in one or both of your legs (if the pain is due to a nerve issue) if you find you have back pain and can’t hold your urine or bowel movements, something is pressing on your spinal nerves, and you should be evaluated immediately. This condition, called cauda equina syndrome, can cause severe long-term damage to your spinal nerves if not treated right away. 6 imbalances that cause pain—and how to fix them "pain is a medical condition and a medical issue, says brett jones, owner of applied strength in pittsburgh who is certified for the functional movement screen, a system of tests and cor rective exercise strategies. "it's a warning sign. The pain is there to tell you something's wrong. And that warning sign could be more serious than "you're going too hard. Jones and the other coaches consulted for this piece all had a horror story to tell-when pain in a client meant a more serious condition such as a nerve issue, thyroid issue, or even cancer. The point: if you experience regular pain while exercising-or when you're not-go to the doctor. If you've been cleared by a doc and you're still feeling discomfort, try these simple tests to see what's truly causing the pain-it could be related to an imbalance in a completely different part of your body. The good news: with these drills, stretches, and corrective exercises, you may be able to fix them-no doctors necessary. 1. Standing extension how it helps – this standing extension helps reverse what you do on a daily basis (hunching)… since most bulging discs and herniated discs are caused by poor posture and repeated flexion of the spine (esp bending fwd in bad posture), this stretch helps push the disc back to neutral position. How to do it – begin this exercise by standing up with good posture. Now take both hands and place them on both sides of your lower back. Now with the help of your hands push your pelvis forward and extend your spine back. Follow the extension with your neck so that you end up facing the ceiling. – start with 10 repetitions and do 2-3 sets. – this one is particularly great to do when you need a break from sitting at your desk. ** this should not cause any pain. If you feel pain during it is not a good one for you. In that case, stop and try some of the other exercises below instead. 2. Half cobra pose (prone lumbar extension) how it helps – the half cobra stretch helps to push the disc material back towards the center of the inter-vertebral disc to allow for improved healing. The goal of repeated lower back extension is the “centralization of symptoms”, which basically means pain that travels down the affected leg to the foot should come back up closer to the low back – which will in turn alleviate the pain. How to do it – begin this exercise by lying on your stomach (prone position) and slowly prop yourself up on your elbows while keeping your hips in contact with the floor. – hold the prop-up position for 10-15 seconds before returning to the prone position (lying face down). – gradually increase to holding the end position for 30 seconds. Aim for 10 repetitions of this stretch. ** initially, you may not be able to tolerate this position very well, so make sure you start slowly and carefully. If there’s any pain, try a different exercise instead. 3. Full cobra pose (advanced extension) how it helps – this stretch is based on the same principle as the half cobra pose above. This advanced extension helps to push disc material back towards the center of the intervertebral disc, with the goal of alleviating pain symptoms. How to do it – once you’ve mastered the half cobra pose, you can increase the difficulty by moving to the advanced version of this stretch. Begin this exercise by lying on your stomach in the prone position (lying facing down) and slowly press up on your hands while keeping your pelvis in contact with the floor and lower back relaxed. – hold the prop-up position for 10 seconds. Aim for 10 repetitions of this stretch. – eventually try to hold this pose for longer if it feels good (20-30 seconds). ** if you feel pain during this exercise, it is not a good one for you. In that case, stop and try some of the other exercises instead. 4. Cat-cow how it helps – this is one of the most popular herniated disc exercises. By combining two yoga poses, the cat-cow stretch can help to relieve pressure on the herniated disc by opening the intervertebral disc space. It also improves mobility of the spine, which may help to relieve disc herniation pain and speed recovery. How to do it – begin this stretch on your hands and knees. Inhale and let your stomach “drop” towards the floor as you look up towards the ceiling. – follow this by exhaling and slowly rounding your spine while pressing into the floor with your hands and slightly curving your neck to look at your feet. – aim for 10 repetitions of this stretch and do 2-3 sets. How it helps – this exercise will help strengthen and stabilize your lower back and deep spine muscles. This will help you to maintain a good posture and avoid future episodes of herniated discs. How to do it: – begin on your hands and knees with your hands positioned under your shoulders and knees positioned under your hips. – raise your left arm and reach it forwards until it is aligned with your torso; at the same time, kick your right leg backwards until is it aligned with your torso. – hold this position for 2-3 seconds before slowly returning to the starting position. – repeat with your right arm and left leg. – alternate sides for 10 repetitions and do 2-3 sets. ** ensure that your head, neck, and back maintain a neutral alignment to minimize stress on your neck. 5.plank: how it helps – just like the bird dog, this “core” exercise will help bring your pelvis into right position by strengthening the deep spinal muscles and glutes (butt muscles). How to do it – begin lying on your stomach with your forearms against the mat. – engage your core and lift your body so that you are resting on your forearms and toes. – start with 10 second holds and work up to 30 second holds, do 2-3 sets. ** ensure to keep your back straight throughout the entire exercise – spine in neutral position. Thoracic expansion if you’re using a chair, sit facing forward and allow your upper body to fall over the back of the chair. Extend your arms above your head for a deeper stretch. Hold either position for 10 seconds. 1. Plank the world record for the longest plank is 8 hours. Luckily, you don’t need to hold it that long for the exercise to have an effect! in fact. You can hold it for 10-15 seconds. • the plank is similar to a push-up position, but instead of resting on your hands, you rest on your elbows and bring them directly underneath your chest. • after kneeling, lean forward and place your elbows on the ground directly below your shoulders. • lift your knees off of the floor and push your feet back. Ensure your back is straight and keep your neck aligned with the rest of your spine. • hold the position and tighten your core muscles for the desired time. 2. Side plank just like the original plank, but only balancing on one side. • lie on the floor on your side, facing sideways with your feet together. • lift up your body until you are supporting yourself with your elbow, directly below your shoulder. • raise your hips until your body is in a straight line and tighten your core muscles; your body should create a slant from your shoulders to your feet. • hold this position without dropping your hips. • repeat on the opposite side. 3. Pelvic tilt with exercise ball sit on a ball that allows your legs to be at a 90-degree angle with your feet flat on the floor. • keep your shoulders back and spine straight. • tilt your hips forward and flex your abdominals tight. • tilt your hips backward as you stick your tailbone out. • move back and forth slowly, keeping your shoulders back. • repeat 10 times for 3 sets. 4. Superman lie on your stomach, face down, with your arms out in front of you. • lift arms, legs, and chest off the floor simultaneously while keeping your hips grounded. • hold for a minimum of two seconds. • lower back down slowly. • repeat 10 times for 3 sets. 6. Crunches lie flat on your back, placing your feet flat on the floor with your legs bent. • fold your arms across your chest and lift your torso up until your head, neck, and torso are off the ground. • hold for a moment before lowering back down. • repeat. 6. Quadruped arm opposite leg raises • kneel on the floor, lean forward, and place your hands palm-down on the floor. • make sure your back is straight, your knees are below your hips, and that your palms are directly below your shoulders. • raise one arm as you raise the opposite leg until both are aligned straight out from your body, parallel to your spine.

I have suffering lower back pain. Its like genetic in our family. My brothers and father have that too. Nowadays, its no ...
Ask Free Question
Kindly do these exercises. Back pain is described as acute or chronic based on how long you’ve had it. Acute pain lasts days to weeks, subacute pain lasts six weeks to three months, and chronic pain lasts longer than three months. Things that make it better or worse back pain may get worse with movement or if you sit or stand for a long time. It may get better if you switch positions or walk around. Other symptoms you may experience with back pain include: •the painful spot looking swollen and feeling tender to the touch •a muscle spasm in the painful area •numbness or weakness in one or both of your legs (if the pain is due to a nerve issue) if you find you have back pain and can’t hold your urine or bowel movements, something is pressing on your spinal nerves, and you should be evaluated immediately. This condition, called cauda equina syndrome, can cause severe long-term damage to your spinal nerves if not treated right away. 6 imbalances that cause pain—and how to fix them "pain is a medical condition and a medical issue, says brett jones, owner of applied strength in pittsburgh who is certified for the functional movement screen, a system of tests and cor rective exercise strategies. "it's a warning sign. The pain is there to tell you something's wrong. And that warning sign could be more serious than "you're going too hard. Jones and the other coaches consulted for this piece all had a horror story to tell-when pain in a client meant a more serious condition such as a nerve issue, thyroid issue, or even cancer. The point: if you experience regular pain while exercising-or when you're not-go to the doctor. If you've been cleared by a doc and you're still feeling discomfort, try these simple tests to see what's truly causing the pain-it could be related to an imbalance in a completely different part of your body. The good news: with these drills, stretches, and corrective exercises, you may be able to fix them-no doctors necessary.