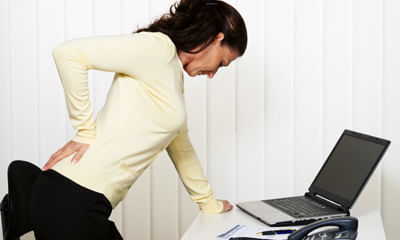
Stomach Pain In Between Ribs
Hi, it remains mild pain frequently below my left ribs. Please advise me and prescribe some medicine. ...


Ask Free Question
Rib pain might be due to gastric pain you can drink hot water which will help you to get rid out of the gas formed in the stomach. It might be due to any mild injury to the ribs too for which you need to keep ice packs probably twice a day with 8 hours gap which will help you to get relieved with pain.

I have a pain for past one month near lower left rib or can say diaphragm. It hurts while stretching or tender to touch. ...

Ask Free Question
Follow these herbal combinations for complete cure sootshekhar ras 1 tablet twice a day pittari avleh 10 gm twice a day send your abdomen ultrasound report.

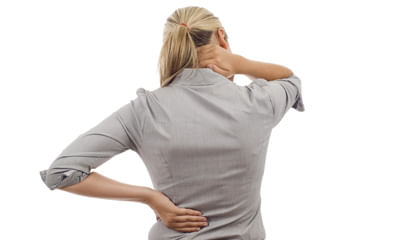
Hello, I am having a sharp pain in the left mid side of my back under the rib cage at specific point when deep breathing ...
Ask Free Question
. Standing extension how it helps – this standing extension helps reverse what you do on a daily basis (hunching)… since most bulging discs and herniated discs are caused by poor posture and repeated flexion of the spine (esp bending fwd in bad posture), this stretch helps push the disc back to neutral position. How to do it – begin this exercise by standing up with good posture. Now take both hands and place them on both sides of your lower back. Now with the help of your hands push your pelvis forward and extend your spine back. Follow the extension with your neck so that you end up facing the ceiling. – start with 10 repetitions and do 2-3 sets. – this one is particularly great to do when you need a break from sitting at your desk. ** this should not cause any pain. If you feel pain during it is not a good one for you. In that case, stop and try some of the other exercises below instead. 2. Half cobra pose (prone lumbar extension) how it helps – the half cobra stretch helps to push the disc material back towards the center of the inter-vertebral disc to allow for improved healing. The goal of repeated lower back extension is the “centralization of symptoms”, which basically means pain that travels down the affected leg to the foot should come back up closer to the low back – which will in turn alleviate the pain. How to do it – begin this exercise by lying on your stomach (prone position) and slowly prop yourself up on your elbows while keeping your hips in contact with the floor. – hold the prop-up position for 10-15 seconds before returning to the prone position (lying face down). – gradually increase to holding the end position for 30 seconds. Aim for 10 repetitions of this stretch. ** initially, you may not be able to tolerate this position very well, so make sure you start slowly and carefully. If there’s any pain, try a different exercise instead. 3. Full cobra pose (advanced extension) how it helps – this stretch is based on the same principle as the half cobra pose above. This advanced extension helps to push disc material back towards the center of the intervertebral disc, with the goal of alleviating pain symptoms. How to do it – once you’ve mastered the half cobra pose, you can increase the difficulty by moving to the advanced version of this stretch. Begin this exercise by lying on your stomach in the prone position (lying facing down) and slowly press up on your hands while keeping your pelvis in contact with the floor and lower back relaxed. – hold the prop-up position for 10 seconds. Aim for 10 repetitions of this stretch. – eventually try to hold this pose for longer if it feels good (20-30 seconds). ** if you feel pain during this exercise, it is not a good one for you. In that case, stop and try some of the other exercises instead. 4. Cat-cow how it helps – this is one of the most popular herniated disc exercises. By combining two yoga poses, the cat-cow stretch can help to relieve pressure on the herniated disc by opening the intervertebral disc space. It also improves mobility of the spine, which may help to relieve disc herniation pain and speed recovery. How to do it – begin this stretch on your hands and knees. Inhale and let your stomach “drop” towards the floor as you look up towards the ceiling. – follow this by exhaling and slowly rounding your spine while pressing into the floor with your hands and slightly curving your neck to look at your feet. – aim for 10 repetitions of this stretch and do 2-3 sets. How it helps – this exercise will help strengthen and stabilize your lower back and deep spine muscles. This will help you to maintain a good posture and avoid future episodes of herniated discs. How to do it: – begin on your hands and knees with your hands positioned under your shoulders and knees positioned under your hips. – raise your left arm and reach it forwards until it is aligned with your torso; at the same time, kick your right leg backwards until is it aligned with your torso. – hold this position for 2-3 seconds before slowly returning to the starting position. – repeat with your right arm and left leg. – alternate sides for 10 repetitions and do 2-3 sets. ** ensure that your head, neck, and back maintain a neutral alignment to minimize stress on your neck. 5.plank: how it helps – just like the bird dog, this “core” exercise will help bring your pelvis into right position by strengthening the deep spinal muscles and glutes (butt muscles). How to do it – begin lying on your stomach with your forearms against the mat. – engage your core and lift your body so that you are resting on your forearms and toes. – start with 10 second holds and work up to 30 second holds, do 2-3 sets. ** ensure to keep your back straight throughout the entire exercise – spine in neutral position. Thoracic expansion if you’re using a chair, sit facing forward and allow your upper body to fall over the back of the chair. Extend your arms above your head for a deeper stretch. Hold either position for 10 seconds. 1. Plank the world record for the longest plank is 8 hours. Luckily, you don’t need to hold it that long for the exercise to have an effect! in fact. You can hold it for 10-15 seconds. • the plank is similar to a push-up position, but instead of resting on your hands, you rest on your elbows and bring them directly underneath your chest. • after kneeling, lean forward and place your elbows on the ground directly below your shoulders. • lift your knees off of the floor and push your feet back. Ensure your back is straight and keep your neck aligned with the rest of your spine. • hold the position and tighten your core muscles for the desired time. 2. Side plank just like the original plank, but only balancing on one side. • lie on the floor on your side, facing sideways with your feet together. • lift up your body until you are supporting yourself with your elbow, directly below your shoulder. • raise your hips until your body is in a straight line and tighten your core muscles; your body should create a slant from your shoulders to your feet. • hold this position without dropping your hips. • repeat on the opposite side. 3. Pelvic tilt with exercise ball sit on a ball that allows your legs to be at a 90-degree angle with your feet flat on the floor. • keep your shoulders back and spine straight. • tilt your hips forward and flex your abdominals tight. • tilt your hips backward as you stick your tailbone out. • move back and forth slowly, keeping your shoulders back. • repeat 10 times for 3 sets. 4. Superman lie on your stomach, face down, with your arms out in front of you. • lift arms, legs, and chest off the floor simultaneously while keeping your hips grounded. • hold for a minimum of two seconds. • lower back down slowly. • repeat 10 times for 3 sets. 6. Crunches lie flat on your back, placing your feet flat on the floor with your legs bent. • fold your arms across your chest and lift your torso up until your head, neck, and torso are off the ground. • hold for a moment before lowering back down. • repeat. 6. Quadruped arm opposite leg raises • kneel on the floor, lean forward, and place your hands palm-down on the floor. • make sure your back is straight, your knees are below your hips, and that your palms are directly below your shoulders. • raise one arm as you raise the opposite leg until both are aligned straight out from your body, parallel to your spine. • slowly lower both your arm and leg until you are back in the starting position. • switch arm and leg, and repeat. 7. Dead bug lie flat on the floor on your back. • lift your arms straight up from your body, reaching through the air. • raise one leg until it is at a 90-degree angle from your body. • slowly lower until it is in the starting position. • switch legs and repeat. 8. Hip bridge lie on your back with your knees bent and raised, your feet flat on the floor, and your arms at your sides. • keep your feet hip-distance apart and try to keep your leg in vertical alignment with your knee. • flex your glutes and push through your heels to raise your hips upward. Try to make a diagonal line from your shoulders to your knees. • hold for a short moment before lowering back down. • repeat 10 times for 3 sets.
I have a question please. If someone has rounded shoulders and an anterior pelvic tilt, will it make them shorter, and b ...
Ask Free Question
1.cat-camel on hands and knees, maintain tight abdominals with head straight (photo 1). Take a deep breath in and lift your lower rib cage, round your back and relax your neck (photo 2). As you breathe out, lower your chest towards the floor, looking slightly upward. Return to beginning position with tight abdominals. Repeat ten (10) times per set. Do two (2) sets per session. Do one (1) session per day. •bracing. Bracing may prevent a spinal curve from getting worse, reduce pain, and improve mobility. The right bracing strategy depends on the type of scoliosis a person has, so talk to a doctor before trying a brace. •choosing the right furniture. An ergonomic chair or mattress may better support the spine and back, reducing pain. •massage. Some people find that massage helps with scoliosis pain 2.plank the world record for the longest plank is 8 hours. Luckily, you don’t need to hold it that long for the exercise to have an effect! in fact. You can hold it for 10-15 seconds. •the plank is similar to a push-up position, but instead of resting on your hands, you rest on your elbows and bring them directly underneath your chest. •after kneeling, lean forward and place your elbows on the ground directly below your shoulders. •lift your knees off of the floor and push your feet back. Ensure your back is straight and keep your neck aligned with the rest of your spine. •hold the position and tighten your core muscles for the desired time. 3. Side plank just like the original plank, but only balancing on one side. •lie on the floor on your side, facing sideways with your feet together. •lift up your body until you are supporting yourself with your elbow, directly below your shoulder. •raise your hips until your body is in a straight line and tighten your core muscles; your body should create a slant from your shoulders to your feet. •hold this position without dropping your hips. •repeat on the opposite side. 4. Pelvic tilt with exercise ball sit on a ball that allows your legs to be at a 90-degree angle with your feet flat on the floor. •keep your shoulders back and spine straight. •tilt your hips forward and flex your abdominals tight. •tilt your hips backward as you stick your tailbone out. •move back and forth slowly, keeping your shoulders back. •repeat 10 times for 3 sets. 5. Superman lie on your stomach, face down, with your arms out in front of you. •lift arms, legs, and chest off the floor simultaneously while keeping your hips grounded. •hold for a minimum of two seconds. •lower back down slowly. •repeat 10 times for 3 sets. 6.Crunches lie flat on your back, placing your feet flat on the floor with your legs bent. •fold your arms across your chest and lift your torso up until your head, neck, and torso are off the ground. •hold for a moment before lowering back down. •repeat. 7. Quadruped arm opposite leg raises •kneel on the floor, lean forward, and place your hands palm-down on the floor. •make sure your back is straight, your knees are below your hips, and that your palms are directly below your shoulders. •raise one arm as you raise the opposite leg until both are aligned straight out from your body, parallel to your spine. •slowly lower both your arm and leg until you are back in the starting position. •switch arm and leg, and repeat. 8. Dead bug lie flat on the floor on your back. •lift your arms straight up from your body, reaching through the air. •raise one leg until it is at a 90-degree angle from your body. •slowly lower until it is in the starting position. •switch legs and repeat. 9. Hip bridge lie on your back with your knees bent and raised, your feet flat on the floor, and your arms at your sides. •keep your feet hip-distance apart and try to keep your leg in vertical alignment with your knee. •flex your glutes and push through your heels to raise your hips upward. Try to make a diagonal line from your shoulders to your knees. •hold for a short moment before lowering back down. •repeat 10 times for 3 sets.
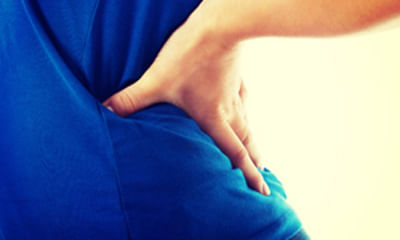
Slightly pain at left side lower last rib. Which body part is affected kidney, liver, spleen, pancreas, gall bladder, st ...

Ask Free Question
Better do a usg whole abdomen secondly if the pain is in bony area - you may require -ray chest pa also. Continue with the medicines take complete rest.
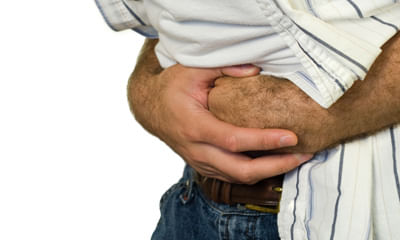
I have slightly pain just below the left side rib at corner. Food doesn't digest properly as a result 2 days later black ...

Ask Free Question
Hello dear black stool with blood can be due to gastrointestinal bleeding for confirm diagnosis require gastroscopy or colonoscopy I suggest you to make these test and any further assistance you can consult with me directly.

Left side ribs sticks out than right one and during night time I feel discomfort sleeping to right side and not in the d ...
Ask Free Question
Diaphragmatic breathing step 1: sit upright in a chair and place one hand on your upper chest and the other on your abdomen. Step 2: inhale slowly and focus on pushing your stomach into your hand. Try to make sure your upper hand remains motionless. Step 3: tighten your stomach muscles as you exhale slowly do not lift, wherever possible, and avoid strenuous exercise. Chest infections are a very common problem after minor rib injuries. It is vital that at least five minutes of deep breathing exercises are undertaken every hour while the pain persists to try to avoid an infection.
Hello, i'm 25 and I currently feel pains at my left back ribs when I stretch. I don't know what the cause could be. Also ...
Ask Free Question
1. Standing extension how it helps – this standing extension helps reverse what you do on a daily basis (hunching)… since most bulging discs and herniated discs are caused by poor posture and repeated flexion of the spine (esp bending fwd in bad posture), this stretch helps push the disc back to neutral position. How to do it – begin this exercise by standing up with good posture. Now take both hands and place them on both sides of your lower back. Now with the help of your hands push your pelvis forward and extend your spine back. Follow the extension with your neck so that you end up facing the ceiling. – start with 10 repetitions and do 2-3 sets. – this one is particularly great to do when you need a break from sitting at your desk. ** this should not cause any pain. If you feel pain during it is not a good one for you. In that case, stop and try some of the other exercises below instead. 2. Half cobra pose (prone lumbar extension) how it helps – the half cobra stretch helps to push the disc material back towards the center of the inter-vertebral disc to allow for improved healing. The goal of repeated lower back extension is the “centralization of symptoms”, which basically means pain that travels down the affected leg to the foot should come back up closer to the low back – which will in turn alleviate the pain. How to do it – begin this exercise by lying on your stomach (prone position) and slowly prop yourself up on your elbows while keeping your hips in contact with the floor. – hold the prop-up position for 10-15 seconds before returning to the prone position (lying face down). – gradually increase to holding the end position for 30 seconds. Aim for 10 repetitions of this stretch. ** initially, you may not be able to tolerate this position very well, so make sure you start slowly and carefully. If there’s any pain, try a different exercise instead. 3. Full cobra pose (advanced extension) how it helps – this stretch is based on the same principle as the half cobra pose above. This advanced extension helps to push disc material back towards the center of the intervertebral disc, with the goal of alleviating pain symptoms. How to do it – once you’ve mastered the half cobra pose, you can increase the difficulty by moving to the advanced version of this stretch. Begin this exercise by lying on your stomach in the prone position (lying facing down) and slowly press up on your hands while keeping your pelvis in contact with the floor and lower back relaxed. – hold the prop-up position for 10 seconds. Aim for 10 repetitions of this stretch. – eventually try to hold this pose for longer if it feels good (20-30 seconds). ** if you feel pain during this exercise, it is not a good one for you. In that case, stop and try some of the other exercises instead. 4. Cat-cow how it helps – this is one of the most popular herniated disc exercises. By combining two yoga poses, the cat-cow stretch can help to relieve pressure on the herniated disc by opening the intervertebral disc space. It also improves mobility of the spine, which may help to relieve disc herniation pain and speed recovery. How to do it – begin this stretch on your hands and knees. Inhale and let your stomach “drop” towards the floor as you look up towards the ceiling. – follow this by exhaling and slowly rounding your spine while pressing into the floor with your hands and slightly curving your neck to look at your feet. – aim for 10 repetitions of this stretch and do 2-3 sets. How it helps – this exercise will help strengthen and stabilize your lower back and deep spine muscles. This will help you to maintain a good posture and avoid future episodes of herniated discs. How to do it: – begin on your hands and knees with your hands positioned under your shoulders and knees positioned under your hips. – raise your left arm and reach it forwards until it is aligned with your torso; at the same time, kick your right leg backwards until is it aligned with your torso. – hold this position for 2-3 seconds before slowly returning to the starting position. – repeat with your right arm and left leg. – alternate sides for 10 repetitions and do 2-3 sets. ** ensure that your head, neck, and back maintain a neutral alignment to minimize stress on your neck. 5.plank: how it helps – just like the bird dog, this “core” exercise will help bring your pelvis into right position by strengthening the deep spinal muscles and glutes (butt muscles). How to do it – begin lying on your stomach with your forearms against the mat. – engage your core and lift your body so that you are resting on your forearms and toes. – start with 10 second holds and work up to 30 second holds, do 2-3 sets. Ensure to keep your back straight throughout the entire exercise – spine in neutral position. Thoracic expansion if you’re using a chair, sit facing forward and allow your upper body to fall over the back of the chair. Extend your arms above your head for a deeper stretch. Hold either position for 10 seconds. Side plank just like the original plank, but only balancing on one side. • lie on the floor on your side, facing sideways with your feet together. • lift up your body until you are supporting yourself with your elbow, directly below your shoulder. • raise your hips until your body is in a straight line and tighten your core muscles; your body should create a slant from your shoulders to your feet. • hold this position without dropping your hips. • repeat on the opposite side. 3. Pelvic tilt with exercise ball sit on a ball that allows your legs to be at a 90-degree angle with your feet flat on the floor. • keep your shoulders back and spine straight. • tilt your hips forward and flex your abdominals tight. • tilt your hips backward as you stick your tailbone out. • move back and forth slowly, keeping your shoulders back. • repeat 10 times for 3 sets. 4. Superman lie on your stomach, face down, with your arms out in front of you. • lift arms, legs, and chest off the floor simultaneously while keeping your hips grounded. • hold for a minimum of two seconds. • lower back down slowly. • repeat 10 times for 3 sets. 6. Crunches lie flat on your back, placing your feet flat on the floor with your legs bent. • fold your arms across your chest and lift your torso up until your head, neck, and torso are off the ground. • hold for a moment before lowering back down. • repeat. 6. Quadruped arm opposite leg raises • kneel on the floor, lean forward, and place your hands palm-down on the floor. • make sure your back is straight, your knees are below your hips, and that your palms are directly below your shoulders. • raise one arm as you raise the opposite leg until both are aligned straight out from your body, parallel to your spine. • slowly lower both your arm and leg until you are back in the starting position. • switch arm and leg, and repeat. 7. Dead bug lie flat on the floor on your back. • lift your arms straight up from your body, reaching through the air. • raise one leg until it is at a 90-degree angle from your body. • slowly lower until it is in the starting position. • switch legs and repeat. 8. Hip bridge lie on your back with your knees bent and raised, your feet flat on the floor, and your arms at your sides. • keep your feet hip-distance apart and try to keep your leg in vertical alignment with your knee. • flex your glutes and push through your heels to raise your hips upward. Try to make a diagonal line from your shoulders to your knees. • hold for a short moment before lowering back down. • repeat 10 times for 3 sets.
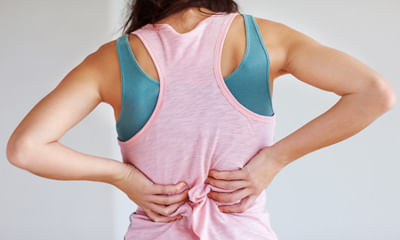
I always get pain on my ribs and stomach and my upper back, what do you think I can do. ...

Ask Free Question
Since when r you having this?What r other symptoms that you r experiencing? By doing what like walking, exertion, eating or empty stomach- it increases or decreases in intensity. For how much time it remains? Is there stiffness also? How is your appetite?R you constipated or having loose stools? Any problem in urine?I need details of the case. In the meanwhile follow this1. Take your breakfast every day. Don't skip it. U should eat whatever your mother or grandparent eat in bfast. I mean to say whatever is your traditional food. If punjabi eat paratha, if belongs to south then take idli/ dosa etc. 2. Don't overeat 3. Don't take tea empty stomach. Eat something like a banana (if you are not diabetic) or any seasonal fruit or soaked almonds and a glass of plain water first thing in the morning (preferably within 10 mins of waking up). No only biscuits or rusk will not do. 4. Have light meals every 2 hours (in addition to your breakfast, lunch n dinner) e.g. Nariyal paani, chaach, a handful of mixed dry fruits, a handful of peanuts, any fresh n seasonal fruit (eat whole fruit not juice), a cup of curd/milk etc 5. Take simple food like rice n dal in dinner. Finish your dinner at least 2 hours before going to sleep. 6. Maintain active life style7. Avoid fast foods, spicy n fried foods, carbonated beverages 8. Take a lot of green vegetables n fruit. 9. Drink lot of water.10. Everyday preferably sleep on same time 11. Take 1tsp of ghee in bfast, lunch n dinner.
I feel painless pressure under my right rib cage for over a year. I had an ultrasound which showed no abnormalities. A c ...
Ask Free Question
Keep ice which will definitely help you to become better. It can also be due to low hemoglobin levels in the body. Anaemia always leads to the symptoms of being tired and also having rib pain. You can lie down with elevated arms in the cot which will help you to get relaxed and also the tidal volume of the lungs will get improved.