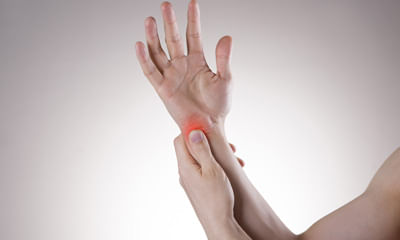
Neck Pain Nerve Irritation
I want to confirm if the rash breakout some with vesicles in my neck, right shoulder and upper chest only are vzv. 79 ag ...


Ask Free Question
Herpes zoster, commonly known as shingles, is a viral infection caused by the varicella-zoster virus, which also causes chickenpox. Here's some information about it: 1. **causes:** herpes zoster occurs when the varicella-zoster virus reactivates in your body after a previous chickenpox infection. It can remain dormant in nerve cells for years before reactivating. 2. **symptoms:** shingles typically causes a painful rash that usually appears as a band or strip on one side of the body. Other symptoms can include itching, burning, fever, headache, and fatigue. 3. **transmission:** shingles itself is not directly contagious, but the virus can be spread to individuals who haven't had chickenpox or been vaccinated against it through direct contact with the shingles rash. This can cause chickenpox in those individuals, not shingles. 4. **complications:** shingles can lead to complications like postherpetic neuralgia (persistent pain after the rash heals), skin infections, and in rare cases, eye or neurological problems. 5. **treatment:** antiviral medications can help reduce the severity and duration of shingles if taken early. Pain relief medications, calamine lotion, and cool compresses may also provide relief from symptoms. 6. **vaccination:** there are vaccines available to prevent shingles, such as zostavax and shingrix. These vaccines are recommended for older adults to reduce the risk of developing shingles. If you suspect you have shingles or need more specific information, it's important to consult a healthcare professional for a proper diagnosis and treatment.


From 4-5 year I have 24 hour full body pain and fatigue and all tests are normal. 4-5 months ago aiims doctor diagnosed ...

Ask Free Question
Also called: fibrositis self-carephysical exercise aerobic activity for 20–30 minutes 5 days a week improves cardiovascular health. If injured, pursuing an activity that avoids the injured muscle group or joint can help maintain physical function while recovering. Stress management pursuing an enjoyable activity or verbalising frustration to reduce stress and improve mental health. Relaxation techniques deep breathing, meditation, yoga, rhythmic exercise and other activities that reduce symptoms of stress hydrotherapy using water to relieve pain, treat diseases and maintain health. For example, mineral baths and hot tubs. Stretching stretching exercises can improve flexibility and improve physical function. Graded exercise therapy physical exercise that starts very slowly and gradually increases over time. Massage relaxes tense muscles. Heat therapy using heat is an excellent way to help relax muscles and encourage blood flow to areas that are particularly painful. This can easily be done at home using dry or damp hot towels. Simply hold the towel against the affected area until you feel relief. Ultrasound an ultrasound uses sound waves to produce heat which improves blood flow to deep muscle tissue. It can be used to relieve pain, stiffness, spasms, and inflammation widespread muscle pain and tenderness. Symptoms requires a medical diagnosis widespread muscle pain and tenderness are the most common symptoms. People may experience: pain areas: in the muscles, abdomen, back, or neck pain types: can be chronic, diffuse, sharp, or severe pain circumstances: can occur at night gastrointestinal: constipation, nausea, or passing excessive amounts of gas whole body: fatigue, feeling tired, or malaise muscular: muscle tenderness, delayed onset muscle soreness, or muscle spasms sensory: pins and needles, sensitivity to cold, or sensitivity to pain mood: anxiety, mood swings, or nervousness sleep: difficulty falling asleep or sleep disturbances cognitive: forgetfulness or lack of concentration hand: sensation of coldness or tingling also common: depression, flare, headache, irritability, joint stiffness, painful menstruation, or tingling feet treatment consists of self care and therapy medication, talk therapy and stress reduction may help in controlling the symptoms. Self-carephysical exercise aerobic activity for 20–30 minutes 5 days a week improves cardiovascular health. If injured, pursuing an activity that avoids the injured muscle group or joint can help maintain physical function while recovering. Stress management pursuing an enjoyable activity or verbalising frustration to reduce stress and improve mental health. Relaxation techniques deep breathing, meditation, yoga, rhythmic exercise and other activities that reduce symptoms of stress therapies support group a forum for counseling and sharing experiences among people with a similar condition or goal, such as depression or weight loss. Biofeedback controlling the body's heartbeat, brainwaves, breathing and blood pressure by monitoring them with sensors. Cognitive behavioral therapy a talk therapy focused on modifying negative thoughts, behaviours and emotional responses associated with psychological distress. Hydrotherapy using water to relieve pain, treat diseases and maintain health. For example, mineral baths and hot tubs. Chiropractic treatment techniques adjusting the spine and massaging the back muscles to relieve pain. Stretching stretching exercises can improve flexibility and improve physical function. Graded exercise therapy physical exercise that starts very slowly and gradually increases over time. Massage relaxes tense muscles. Acupuncture insertion of needles into specific points on the body to relieve pain and treat other conditions. A form of traditional chinese medicine. Medications selective serotonin reuptake inhibitor (ssri) eases symptoms of depressed mood and anxiety. Analgesic relieves pain. Nonsteroidal anti-inflammatory drug relieves pain, decreases inflammation and reduces fever. Nerve pain medication blocks pain caused by damaged nerves. Muscle relaxant reduces muscle tension and helps relieve muscle pain and discomfort. Fibromyalgia medications can help reduce the pain of fibromyalgia and improve sleep. Common choices include: •pain relievers. Over-the-counter pain relievers such as acetaminophen (tylenol, others), ibuprofen (advil, motrin ib, others) or naproxen sodium (aleve, others) may be helpful. Your doctor might suggest a prescription pain reliever such as tramadol (ultram). Narcotics are not advised, because they can lead to dependence and may even worsen the pain over time. •antidepressants. Duloxetine (cymbalta) and milnacipran (savella) may help ease the pain and fatigue associated with fibromyalgia. Your doctor may prescribe amitriptyline or the muscle relaxant cyclobenzaprine to help promote sleep. •anti-seizure drugs. Medications designed to treat epilepsy are often useful in reducing certain types of pain. Gabapentin (neurontin) is sometimes helpful in reducing fibromyalgia symptoms, while pregabalin (lyrica) was the first drug approved by the food and drug administration to treat fibromyalgia. Therapy a variety of different therapies can help reduce the effect that fibromyalgia has on your body and your life. Examples include: •physical therapy. A physical therapist can teach you exercises that will improve your strength, flexibility and stamina. Water-based exercises might be particularly helpful. •occupational therapy. An occupational therapist can help you make adjustments to your work area or the way you perform certain tasks that will cause less stress on your body.

I am having sever pain in upper limbs below my shoulders as a result of which I am unable to move, use hands in a limite ...
Ask Free Question
It is called as periarthritis shoulder and for that you can do hotwater fermentation and ice therapy at home. You shall also take physiotherapy treatment called shortwave diathermy which would help you to get relieved with pain. After sleep getting up in the morning will be painful if you work in the computers for long which will definitely affect the neck and shoulder as the constant posture makes the joint to become stiffened. That's why you get usually pain in shoulder joints & in the back. •mobility exercises rest. Avoid doing things that require you to bend at the hip or put a lot of pressure on the hip. Avoid sleeping on the side of your hip that is painful and sitting for long periods of time •cold and heat. Treating pain with heat and cold may help. Wrap an ice pack or a bag of frozen vegetables in a towel to ice your hip. A warm bath or shower may also help reduce your pain and prepare your muscles for stretching. •stretch. Gently stretching your body may reduce hip pain, especially if the cause is a strain or pinched nerve. Posture when standing: make sure you have a neutral pelvic position. Stand upright, head facing forward, back straight, and balance your weight evenly on both feet. Keep your legs straight and your head in line with your spine. Posture when sitting: a good seat for working should have good back support, arm rests and a swivel base. When sitting, try to keep your knees and hips level and keep your feet flat on the floor, or use a footstool. You should ideally be able to sit upright with support in the small of your back. If you are using a keyboard, make sure your elbows are at right-angles and that your forearms are horizontal. Shoes: flat shoes place less of a strain on the back. Driving: it is important to have proper support for your back. Make sure the wing mirrors are properly positioned so you do not need to twist. The pedals should be squarely in front of your feet. If you are on a long journey, have plenty of breaks. Get angle. Out of the car and walk around. Bed: you should have a mattress that keeps your spine straight, while at the same time supporting the weight of your shoulders and buttocks. Use a pillow, but not one that forces your neck into a steep. Standing arm swings to do this exercise: 1.Stand tall with your arms by your sides. 2.Engage your core and swing your arms forward until they’re as high as you can go. Make sure you don’t raise your shoulders. 3.Return your arms to the starting position and repeat. 4.Do this movement for 30 to 60 seconds. Shoulder pass-through to do this exercise: 1.Stand with your feet shoulder-width apart and your arms in front of your body. 2.Hold a stick, like a broomstick or pvc pipe, with an overhand grip. Your arms will be wider than shoulder-width. Make sure the stick or pipe is parallel to the floor. 3.Engage your core and slowly raise the broomstick or pipe above your head, keeping your arms straight. Only go as far as comfortable. 4.Hold the pose for a few seconds. 5.Return to the starting position. 6.Repeat 5 times. High-to-low rows to do this exercise: 1.Secure a resistance band to a sturdy object above shoulder height. 2.Kneel down on one knee and grab the band with the opposite hand. The other hand can rest at your side. 3.Pull the band toward your body while keeping your torso and arm straight. Focus on squeezing the shoulder blades together. 4.Return to the starting position and repeat. 5.Do 2–3 sets of 10 repetitions on each side. Reverse fly to do this exercise: 1.Hold a dumbbell in each hand. 2.Stand with your feet shoulder-width apart, knees slightly bent. 3.Engage your core and bend forward at the waist. Keep your back straight. Your arms will be extended. 4.Raise your arms away from your body. Focus on squeezing your shoulder blades together. Stop when you get to shoulder height. 5.Slowly return to the starting position and repeat. 6.Do 3 sets of 10 repetitions. Rotation with dumbbell o do this exercise: 1.Stand with your feet shoulder-width apart while holding a light dumbbell in your right hand. 2.Raise your arm so your elbow is at shoulder height. The front of your hand will be facing the ground. 3.Rotate your shoulder to bring your arm and weight up so your hand is raised toward the ceiling. 4.Slowly return to the starting position and repeat before changing sides. 5.Do 2–3 sets of 12 repetitions on each arm. Mobility stretches cross-arm stretch to do this stretch: 1.Stand with your feet slightly less than shoulder-width apart and bring your right arm up to a little less than shoulder height. 2.Place your left hand on your right elbow and gently pull your right arm across your body using the left hand to support your arm. 3.Hold this position for up to 30 seconds. 4.Repeat on the opposite side. 5.Do each side 3–5 times. Sleeper stretch to do this stretch: 1.Lie on the affected side. If you have no injury or pain, choose a side to start with. Your shoulder should be stacked underneath you. 2.Bring your elbow straight out from your shoulder and bend this arm, so your fingers are pointing toward the ceiling. This is the starting position. 3.Gently guide this arm toward the floor using the unaffected arm. Stop when you feel a stretch in the back of your affected shoulder. 4.Hold this position for up to 30 seconds. 5.Do 3 repetitions before changing sides. Doorway stretch to do this stretch: 1.Stand in a doorway with elbows and arms forming a 90-degree angle. Your feet should be in a split stance. 2.Bring your right arm up to shoulder height and place your palm and forearm on the doorway. 3.Gently lean into the stretch, only going as far as comfortable. 4.Hold the stretch for up to 30 seconds. 5.Change sides and repeat. Perform on each side 2–3 times. Chest expansion to do this stretch: 1.Stand tall with your feet together. 2.Hold the end of a towel or exercise band in each hand, with your arms behind your body. 3.Use the towel or band to help move your shoulder blades together and open your chest. This will cause you to look toward the ceiling. 4.Hold this pose for up to 30 seconds. 5.Repeat 3–5 times. Strenghtening exercises 1.pendulum stretch do this exercise first. Relax your shoulders. Stand and lean over slightly, allowing the affected arm to hang down. Swing the arm in a small circle — about a foot in diameter. Perform 10 revolutions in each direction, once a day. As your symptoms improve, increase the diameter of your swing, but never force it. When you're ready for more, increase the stretch by holding a light weight (three to five pounds) in the swinging arm. 2. Towel stretch hold one end of a three-foot-long towel behind your back and grab the opposite end with your other hand. Hold the towel in a horizontal position. Use your good arm to pull the affected arm upward to stretch it. You can also do an advanced version of this exercise with the towel draped over your good shoulder. Hold the bottom of the towel with the affected arm and pull it toward the lower back with the unaffected arm. Do this 10 to 20 times a day. 3. Finger walk face a wall three-quarters of an arm's length away. Reach out and touch the wall at waist level with the fingertips of the affected arm. With your elbow slightly bent, slowly walk your fingers up the wall, spider-like, until you've raised your arm as far as you comfortably can. Your fingers should be doing the work, not your shoulder muscles. Slowly lower the arm (with the help of the good arm, if necessary) and repeat. Perform this exercise 10 to 20 times a day. 4. Cross-body reachsit or stand. Use your good arm to lift your affected arm at the elbow, and bring it up and across your body, exerting gentle pressure to stretch the shoulder. Hold the stretch for 15 to 20 seconds. Do this 10 to 20 times per day. 5. Armpit stretch using your good arm, lift the affected arm onto a shelf about breast-high. Gently bend your knees, opening up the armpit. Deepen your knee bend slightly, gently stretching the armpit, and then straighten. With each knee bend, stretch a little further, but don't force it. Do this 10 to 20 times each day. Starting to strengthen as your range of motion improves, add rotator cuff–strengthening exercises. Be sure to warm up your shoulder and do your stretching exercises before you perform strengthening exercises. 6. Outward rotationhold a rubber exercise band between your hands with your elbows at a 90-degree angle close to your sides. Rotate the lower part of the affected arm outward two or three inches and hold for five seconds. Repeat 10 to 15 times, once a day. 7. Inward rotation stand next to a closed door, and hook one end of a rubber exercise band around the doorknob. Hold the other end with the hand of the affected arm, holding your elbow at a 90-degree angle. Pull the band toward your body two or three inches and hold for five seconds. Repeat 10 to 15 times, once a day. Shoulder exercises and stretches regular exercises and stretches can keep your shoulder strong and flexible. A few things to remember before swinging in to exercises: •stop any exercise if you have more shoulder pain. It may be too soon for you to try. •watch your form. Exercising incorrectly can also cause or worsen shoulder problems. •warm up, even before deep stretching. Light shoulder rolls, gentle movements, or even a warm shower are all ways to warm up your muscles before exercise and stretching. Pendulum stretch for range of motion•stand and bend at the waist. •let your arm on the injured side hang straight down. •keep your neck relaxed. •move your arm in a circle up to 20 times. •do once or more times in a day. Overhead shoulder stretch•sit or stand to do this shoulder stretch. •intertwine your fingers in front of you. •bend your elbows and raise your arms above your head. You can also place your hands on your head or behind it. •gently squeeze your shoulder blades together to move your elbows back. •continue for up to 20 repetitions. Repeat 5 to 10 times a day.Do’s and don’ts for shoulder pain do’s do the prescribed exercise regularly to maintain strength, flexibility and range of motion. Do keep the affected arm supported. Use an ice pack for pain relief. Apply the ice pack 3-4 times a day for 10 minutes. Don’ts don't sleep on the affected side. Don't lift heavyweight with the affected arm. Don't jerk your shoulder to avoid stress. Don't use the arm to push yourself up in bed or from a chair. Don't participate in contact sports or do any repetitive heavy lifting. We suggest you to wear shoulder support brace which is available in two different sizes which makes the patient to feel comfortable as it maintains the shoulder in anatomical position and the short lever is maintained. The reason to maintain the short lever in the shoulder joint is it helps the shoulder to prevent the movements which itself is the key to have better progression of healing in the shoulder region. This is suggested for the following conditions. This shoulder support brace what we are suggesting for you is available at our clinic. If you want you can buy from us, if you are far away from chennai we can send you by courier. The reason why we are conveying you to buy from us is we can demonstrate over the videocall (using whatsapp) and also we can monitor you throughout when to wear it and how long to wear it. And also if you find any difficulty wearing the brace you can also revert back to us for few more suggestions and we can propose you good solution how to go about it. Pa shoulder: do’s: •exercise regularly and immediately follow a physical therapy program. •use an ice pack for pain relief. Apply the ice pack 3-4 times a day for 10 minutes. •take pain relievers as directed by your shoulder doctor. Don’ts: •don’t stop moving your shoulders entirely because of the pain. •do not do activities that involve sudden movements, such as heavy lifting on the affected side. As your body recovers, continue to make gentle movements, but avoid irritating and moving your shoulders. •doesn’t sleep on a sore shoulder •don’t miss your workout routine and physical therapy. •don’t neglect your diet. Frozen shoulder is associated with general health. Frozen shoulder is strongly associated with many low-grade systemic inflammatory conditions. Your body needs healthy, anti-inflammatory food to recover. •stop smoking and drinking alcohol. No it will definitely help you to come out of pain. You can consume preferably one tablet per day and not more than that. Drink lot of hot water during your cycle time as there might be gastric trouble during menstrual cycle. We cannot give suggestions about homeopathy medicine as we are physiotherapists. I have given the following suggestions and protocols for your other pain in the back, heel and shoulder.

I have shoulder pain for more than 3 months some time pain move in whole arm what can I do doctor. ...
Ask Free Question
After sleep getting up in the morning will be painful if you work in the computers for long which will definitely affect the neck and shoulder as the constant posture makes the joint to become stiffened. That's why you get usually pain in shoulder joints & in the back. Shoulder pain •mobility exercises rest. Avoid doing things that require you to bend at the hip or put a lot of pressure on the hip. Avoid sleeping on the side of your hip that is painful and sitting for long periods of time •cold and heat. Treating pain with heat and cold may help. Wrap an ice pack or a bag of frozen vegetables in a towel to ice your hip. A warm bath or shower may also help reduce your pain and prepare your muscles for stretching. •stretch. Gently stretching your body may reduce hip pain, especially if the cause is a strain or pinched nerve. 1. Knee lift1.Lie on the back, extending both legs flat along the floor. 2.Keeping the left leg straight, pull the right knee up toward the chest. 3.Place both hands on top of the knee to help pull it in toward the chest. 4.Hold the stretch for 10 seconds. 5.Let go of the knee and gently lower the leg back toward the floor. 6.Repeat this exercise 5–10 times on each knee. 2.double hip rotation 1.Lie flat on the back. Then, bend the knees and bring them toward the body until the feet are flat on the floor. 2.Gently rotate the knees to the left, lowering them toward the floor. Rotate the head to face the right while keeping the shoulders against the floor. 3.Hold this position for 20–30 seconds. 4.Slowly return both the head and knees to the starting position. 5.Repeat on the opposite side. 3.bridging 1.Lie on the back, bending both legs at the knee and placing the feet flat on the floor. Keep the arms by the sides of the body with the palms facing downward. If necessary, place a small pillow underneath the neck and head for support. 2.Slowly lift the pelvis and lower back upward. Be sure to keep the shoulders and upper body on the floor. 3.Hold the position for 5 seconds. 4.Gradually lower the back and pelvis toward the floor, starting at the top of the spine. Roll down through the spine until the entire back is flat against the floor again. 5.Repeat this exercise 5–10 times. 4.butterfly stretch 1.Sit on the ground, bend your legs, and bring the soles of your feet together so they touch, letting your knees fall out to the sides. 2.Bring your heels as close to your body as you can and lean forward into the stretch, using your elbows to gently push your knees toward the ground. 5.side lying leg raise 1.Lay on your right side with your legs straight and stacked on top of each other, propping yourself up with your elbow. If you’re using an exercise band, position it just above your knees. 2.Keeping your hips stacked, engage your core and lift your left leg straight up as far as you can. Slowly lower back down. Repeat on other side. 6.hip flexion 1.Stand upright. 2.Extend one arm out to the side and hold on to a sturdy surface, such as a wall, table, or chair, for support. 3.Slowly raise the right knee to the level of the hip or as far as is comfortable while keeping the left leg straight. 4.Only hold this position for a second before placing the left foot back on the floor. 5.Repeat with the left knee. 6.Do 5–10 repetitions of this exercise. 7.hip extension 1.Stand upright with the legs straight and the feet shoulder-width apart. 2.Extend both arms out in front and hold on to a chair, table, or wall for support. 3.Keeping the right leg straight, lift the left leg backward without bending the knee. 4.Lift the leg as far as possible without causing discomfort, then clench the buttock tightly and hold the position for 5 seconds. Repeat this stretch 5–10 times on each leg. To increase the resistance, try attaching small weights to the legs. 8.hip abduction 1.Stand upright. 2.Extend the left arm out to the side and hold on to something solid, such as a chair, table, or wall. 3.Starting with the feet together, lift the right leg out to the right side. Keep the left leg straight and avoid rotating the hips. 4.Hold the position for 5 seconds and then slowly return the leg to the starting position. Do this exercise 5–10 times on one leg, then repeat it on the other side. Posture when standing: make sure you have a neutral pelvic position. Stand upright, head facing forward, back straight, and balance your weight evenly on both feet. Keep your legs straight and your head in line with your spine. Posture when sitting: a good seat for working should have good back support, arm rests and a swivel base. When sitting, try to keep your knees and hips level and keep your feet flat on the floor, or use a footstool. You should ideally be able to sit upright with support in the small of your back. If you are using a keyboard, make sure your elbows are at right-angles and that your forearms are horizontal. Shoes: flat shoes place less of a strain on the back. Driving: it is important to have proper support for your back. Make sure the wing mirrors are properly positioned so you do not need to twist. The pedals should be squarely in front of your feet. If you are on a long journey, have plenty of breaks. Get angle. Out of the car and walk around. Bed: you should have a mattress that keeps your spine straight, while at the same time supporting the weight of your shoulders and buttocks. Use a pillow, but not one that forces your neck into a steep. Standing arm swings to do this exercise: 1.Stand tall with your arms by your sides. 2.Engage your core and swing your arms forward until they’re as high as you can go. Make sure you don’t raise your shoulders. 3.Return your arms to the starting position and repeat. 4.Do this movement for 30 to 60 seconds. Shoulder pass-through to do this exercise: 1.Stand with your feet shoulder-width apart and your arms in front of your body. 2.Hold a stick, like a broomstick or pvc pipe, with an overhand grip. Your arms will be wider than shoulder-width. Make sure the stick or pipe is parallel to the floor. 3.Engage your core and slowly raise the broomstick or pipe above your head, keeping your arms straight. Only go as far as comfortable. 4.Hold the pose for a few seconds. 5.Return to the starting position. 6.Repeat 5 times. High-to-low rows to do this exercise: 1.Secure a resistance band to a sturdy object above shoulder height. 2.Kneel down on one knee and grab the band with the opposite hand. The other hand can rest at your side. 3.Pull the band toward your body while keeping your torso and arm straight. Focus on squeezing the shoulder blades together. 4.Return to the starting position and repeat. 5.Do 2–3 sets of 10 repetitions on each side. Reverse fly to do this exercise: 1.Hold a dumbbell in each hand. 2.Stand with your feet shoulder-width apart, knees slightly bent. 3.Engage your core and bend forward at the waist. Keep your back straight. Your arms will be extended. 4.Raise your arms away from your body. Focus on squeezing your shoulder blades together. Stop when you get to shoulder height. 5.Slowly return to the starting position and repeat. 6.Do 3 sets of 10 repetitions. Rotation with dumbbell o do this exercise: 1.Stand with your feet shoulder-width apart while holding a light dumbbell in your right hand. 2.Raise your arm so your elbow is at shoulder height. The front of your hand will be facing the ground. 3.Rotate your shoulder to bring your arm and weight up so your hand is raised toward the ceiling. 4.Slowly return to the starting position and repeat before changing sides. 5.Do 2–3 sets of 12 repetitions on each arm. Mobility stretches cross-arm stretch to do this stretch: 1.Stand with your feet slightly less than shoulder-width apart and bring your right arm up to a little less than shoulder height. 2.Place your left hand on your right elbow and gently pull your right arm across your body using the left hand to support your arm. 3.Hold this position for up to 30 seconds. 4.Repeat on the opposite side. 5.Do each side 3–5 times. Sleeper stretch to do this stretch: 1.Lie on the affected side. If you have no injury or pain, choose a side to start with. Your shoulder should be stacked underneath you. 2.Bring your elbow straight out from your shoulder and bend this arm, so your fingers are pointing toward the ceiling. This is the starting position. 3.Gently guide this arm toward the floor using the unaffected arm. Stop when you feel a stretch in the back of your affected shoulder. 4.Hold this position for up to 30 seconds. 5.Do 3 repetitions before changing sides. Doorway stretch to do this stretch: 1.Stand in a doorway with elbows and arms forming a 90-degree angle. Your feet should be in a split stance. 2.Bring your right arm up to shoulder height and place your palm and forearm on the doorway. 3.Gently lean into the stretch, only going as far as comfortable. 4.Hold the stretch for up to 30 seconds. 5.Change sides and repeat. Perform on each side 2–3 times. Chest expansion to do this stretch: 1.Stand tall with your feet together. 2.Hold the end of a towel or exercise band in each hand, with your arms behind your body. 3.Use the towel or band to help move your shoulder blades together and open your chest. This will cause you to look toward the ceiling. 4.Hold this pose for up to 30 seconds. 5.Repeat 3–5 times. Strenghtening exercises 1.pendulum stretch do this exercise first. Relax your shoulders. Stand and lean over slightly, allowing the affected arm to hang down. Swing the arm in a small circle — about a foot in diameter. Perform 10 revolutions in each direction, once a day. As your symptoms improve, increase the diameter of your swing, but never force it. When you're ready for more, increase the stretch by holding a light weight (three to five pounds) in the swinging arm. 2. Towel stretch hold one end of a three-foot-long towel behind your back and grab the opposite end with your other hand. Hold the towel in a horizontal position. Use your good arm to pull the affected arm upward to stretch it. You can also do an advanced version of this exercise with the towel draped over your good shoulder. Hold the bottom of the towel with the affected arm and pull it toward the lower back with the unaffected arm. Do this 10 to 20 times a day. 3. Finger walk face a wall three-quarters of an arm's length away. Reach out and touch the wall at waist level with the fingertips of the affected arm. With your elbow slightly bent, slowly walk your fingers up the wall, spider-like, until you've raised your arm as far as you comfortably can. Your fingers should be doing the work, not your shoulder muscles. Slowly lower the arm (with the help of the good arm, if necessary) and repeat. Perform this exercise 10 to 20 times a day. 4. Cross-body reachsit or stand. Use your good arm to lift your affected arm at the elbow, and bring it up and across your body, exerting gentle pressure to stretch the shoulder. Hold the stretch for 15 to 20 seconds. Do this 10 to 20 times per day. 5. Armpit stretch using your good arm, lift the affected arm onto a shelf about breast-high. Gently bend your knees, opening up the armpit. Deepen your knee bend slightly, gently stretching the armpit, and then straighten. With each knee bend, stretch a little further, but don't force it. Do this 10 to 20 times each day. Starting to strengthen as your range of motion improves, add rotator cuff–strengthening exercises. Be sure to warm up your shoulder and do your stretching exercises before you perform strengthening exercises. 6. Outward rotationhold a rubber exercise band between your hands with your elbows at a 90-degree angle close to your sides. Rotate the lower part of the affected arm outward two or three inches and hold for five seconds. Repeat 10 to 15 times, once a day. 7. Inward rotation stand next to a closed door, and hook one end of a rubber exercise band around the doorknob. Hold the other end with the hand of the affected arm, holding your elbow at a 90-degree angle. Pull the band toward your body two or three inches and hold for five seconds. Repeat 10 to 15 times, once a day. Shoulder exercises and stretches regular exercises and stretches can keep your shoulder strong and flexible. A few things to remember before swinging in to exercises: •stop any exercise if you have more shoulder pain. It may be too soon for you to try. •watch your form. Exercising incorrectly can also cause or worsen shoulder problems. •warm up, even before deep stretching. Light shoulder rolls, gentle movements, or even a warm shower are all ways to warm up your muscles before exercise and stretching. Pendulum stretch for range of motion•stand and bend at the waist. •let your arm on the injured side hang straight down. •keep your neck relaxed. •move your arm in a circle up to 20 times. •do once or more times in a day. Overhead shoulder stretch•sit or stand to do this shoulder stretch. •intertwine your fingers in front of you. •bend your elbows and raise your arms above your head. You can also place your hands on your head or behind it. •gently squeeze your shoulder blades together to move your elbows back. •continue for up to 20 repetitions. Repeat 5 to 10 times a day.Do’s and don’ts for shoulder pain do’s do the prescribed exercise regularly to maintain strength, flexibility and range of motion. Do keep the affected arm supported. Use an ice pack for pain relief. Apply the ice pack 3-4 times a day for 10 minutes. Don’ts don't sleep on the affected side. Don't lift heavyweight with the affected arm. Don't jerk your shoulder to avoid stress. Don't use the arm to push yourself up in bed or from a chair. Don't participate in contact sports or do any repetitive heavy lifting. We suggest you to wear shoulder support brace which is available in two different sizes which makes the patient to feel comfortable as it maintains the shoulder in anatomical position and the short lever is maintained. The reason to maintain the short lever in the shoulder joint is it helps the shoulder to prevent the movements which itself is the key to have better progression of healing in the shoulder region. This is suggested for the following conditions. This shoulder support brace what we are suggesting for you is available at our clinic. If you want you can buy from us, if you are far away from chennai we can send you by courier. The reason why we are conveying you to buy from us is we can demonstrate over the videocall (using whatsapp) and also we can monitor you throughout when to wear it and how long to wear it. And also if you find any difficulty wearing the brace you can also revert back to us for few more suggestions and we can propose you good solution how to go about it. Pa shoulder: do’s: •exercise regularly and immediately follow a physical therapy program. •use an ice pack for pain relief. Apply the ice pack 3-4 times a day for 10 minutes. •take pain relievers as directed by your shoulder doctor. Don’ts: •don’t stop moving your shoulders entirely because of the pain. •do not do activities that involve sudden movements, such as heavy lifting on the affected side. As your body recovers, continue to make gentle movements, but avoid irritating and moving your shoulders. •doesn’t sleep on a sore shoulder •don’t miss your workout routine and physical therapy. •don’t neglect your diet. Frozen shoulder is associated with general health. Frozen shoulder is strongly associated with many low-grade systemic inflammatory conditions. Your body needs healthy, anti-inflammatory food to recover. •stop smoking and drinking alcohol. No it will definitely help you to come out of pain. You can consume preferably one tablet per day and not more than that. Drink lot of hot water during your cycle time as there might be gastric trouble during menstrual cycle. We cannot give suggestions about homeopathy medicine as we are physiotherapists. I have given the following suggestions and protocols for your other pain in the back, heel and shoulder.
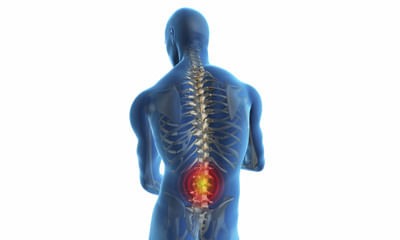
My father was 52 years old he have a back pain in 1 days but before 4 months he was the renal patients. But he will reco ...
Ask Free Question
First of all check your weight and your haemoglobin levels, as anaemia always leads to the symptoms of being tired and also having back pain. Because your kidneys are located toward your back and= underneath your ribcage, it may be hard to tell if the pain you’re experiencing in that area is coming from your back or your kidney. The symptoms you’re having can help you figure out which is the source of the pain. The location, type, and severity of the pain are some of the things that will be different depending on whether the pain is from a problem in your kidneys or your back. How to identify kidney painkidney pain is most often caused by a kidney infection or a stone in the tubes coming out of your kidney. If the pain is coming from your kidney, it will have these features: where the pain is located kidney pain is felt in your flank, which is the area on either side of your spine between the bottom of your ribcage and your hips. It usually occurs in one side of your body, but it can occur in both sides. Type of pain kidney pain is usually sharp if you have a kidney stone and a dull ache if you have an infection. Most often it will be constant. It won’t get worse with movement or go away by itself without treatment. If you’re passing a kidney stone, the pain may fluctuate as the stone moves. Radiation of the pain sometimes the pain spreads (radiates) to your inner thigh or lower abdomen. Severity of the pain kidney pain is classified according to how bad it is — severe or mild. A kidney stone usually causes severe pain, and the pain from an infection is usually mild. Things that make it better or worse typically, nothing makes the pain better until the problem is corrected, such as by passing the stone. Unlike back pain, it usually won’t change with movement. Accompanying symptoms if you have a kidney infection or a kidney stone, you may also experience: •fever and chills •nausea and vomiting •cloudy or dark urine •an urgent need to urinate •pain when you urinate •a recent infection in your bladder •blood in your urine (this can happen with an infection or kidney stones) •small kidney stones that look like gravel in your urine how to identify back pain back pain is more common than kidney pain and is usually caused by a problem in the muscles, bones, or nerves in your back. Has the following features: where the pain is located back pain can occur anywhere on your back, but it’s most commonly located in your lower back or one of your buttocks. Type of pain muscle pain feels like a dull ache. If a nerve has been injured or irritated, the pain is a sharp burning sensation that may travel down your buttock to your lower leg or even your foot. Muscle pain may affect one or both sides, but nerve pain usually only affects one side. Radiation of the pain nerve pain may spread to your lower leg. Pain from a muscle usually stays in the back. Severity of the pain back pain is described as acute or chronic based on how long you’ve had it. Acute pain lasts days to weeks, subacute pain lasts six weeks to three months, and chronic pain lasts longer than three months. Things that make it better or worse back pain may get worse with movement or if you sit or stand for a long time. It may get better if you switch positions or walk around. Accompanying symptoms other symptoms you may experience with back pain include: •the painful spot looking swollen and feeling tender to the touch •a muscle spasm in the painful area •numbness or weakness in one or both of your legs (if the pain is due to a nerve issue) if you find you have back pain and can’t hold your urine or bowel movements, something is pressing on your spinal nerves, and you should be evaluated immediately. This condition, called caudaequina syndrome, can cause severe long-term damage to your spinal nerves if not treated right away. 6 imbalances that cause pain—and how to fix them "pain is a medical condition and a medical issue, says brett jones, owner of applied strength in pittsburgh who is certified for the functional movement screen, a system of tests and cor rective exercise strategies. "it's a warning sign. The pain is there to tell you something's wrong. And that warning sign could be more serious than "you're going too hard. Jones and the other coaches consulted for this piece all had a horror story to tell-when pain in a client meant a more serious condition such as a nerve issue, thyroid issue, or even cancer. The point: if you experience regular pain while exercising-or when you're not-go to the doctor. If you've been cleared by a doc and you're still feeling discomfort, try these simple tests to see what's truly causing the pain-it could be related to an imbalance in a completely different part of your body. The good news: with these drills, stretches, and corrective exercises, you may be able to fix them-no doctors necessary.
ankylosing spondylitis on medicine from past 4 months, doing great but when I have sex with my wife. My lower back and r ...
Ask Free Question
Back pain can affect people of any age, for different reasonsas people get older, the chance of developing lower back pain increases, due to factors such as previous occupation and degenerative disk disease. Lower back pain may be linked to the bony lumbar spine, discs between the vertebrae, ligaments around the spine and discs, spinal cord and nerves, lower back muscles, abdominal and pelvic internal organs, and the skin around the lumbar area. •acute pain starts suddenly and lasts for up to 6 weeks. •chronic or long-term pain develops over a longer period, lasts for over 3 months, and causes ongoing problems. Home advise: •resting from strenuous activity can help, but moving around will ease stiffness, reduce pain, and prevent muscles from weakening. •applying heat, ice, ultrasound, and electrical stimulation — as well as some muscle-release techniques to the back muscles and soft tissues — may help alleviate pain. •as the pain improves, the physical therapist may introduce some flexibility and strength exercises for the back and abdominal muscles. Techniques for improving posture may also help. •the patient will be encouraged to practice the techniques regularly, even after the pain has gone, to prevent back pain recurrence. Regular exercise helps build strength and control body weight. Guided, low-impact aerobic activities can boost heart health without straining or jerking the back. Before starting any exercise program, talk to a health care professional. There are two main types of exercise that people can do to reduce the risk of back pain: •core-strengthening exercises work the abdominal and back muscles, helping to strengthen muscles that protect the back. •flexibility training aims at improving core flexibility, including the spine, hips, and upper legs. We suggest you to wear lumbosacral corset (belt) which is available at our clinic. If you want you can buy from us, if you are far away from chennai we can send you by courier. The reason why we are conveying you to buy from us is we can demonstrate over the videocall (using whatsapp) and also we can monitor you throughout when to wear it and how long to wear it. And also if you find any difficulty wearing the brace you can also revert back to us for few more suggestions and we can propose you good solution how to go about it. Uses of lumbosacral corset (belt) a lumbosacral corset adds pressure to the intra-abdominal area. This adds stability to the spine. It is prescribed to people suffering from moderate to severe pain. Other benefits of using a lumbar spine belt are: 1.helps in a certain degree of immobilization of facet joints. 2.reduces pain to allow continuation of normal activities. 3.speeds up the healing process. 4.the pressure exerted by a lumbar spine belt helps in stretching the erector spine muscles. 5.this belt can also be used to support the lower back while exercising. Ohelps prevent rolling oprovides stability to lumbar and sacral regions of the back ocan be used when performing actions like lifting and handling heavy items ocan also be used when playing sports orestricts back movement to aid treatment of back problems do’s and don’ts sitting do: • sit as little as possible and then only for short periods. • place a supportive towel roll at the belt line of the back especially when sitting in a car. • when getting up from sitting, keep the normal curves in your back. Move to the front of the seat and stand up by straightening your legs. Avoid bending forward at the waist. • try to keep the normal curves in your back at all times. Don’t: • do not sit on a low soft couch with a deep seat. It will force you to sit with your hips lower than your knees and will round your back. You will loose the normal curve in your back. • do not place your legs straight out in front of you while sitting (e.g. Sitting in the bath tub). Standingdo: • if you must stand for a long period of time, keep one leg up on a foot stool. • adapt work heights. Don’t: • avoid half bent positions. Lifting avoid lifting if you can. Do: • use the correct lifting technique. Keep your back straight when lifting. Never stoop or bend forward. Stand close to the load, have a firm footing and wide stance. Kneel on one knee, keeping the back straight. Have a secure grip on the load and lift by straightening your knees. Do a steady lift. Shift your feet to turn and do not twist your back. Don’t: • do not jerk when you lift. • do not bend over the object you are lifting. Lying do: • sleep on a good firm surface. • if your bed sags, use slats or plywood supports between the mattress and base to firm it. You also can place the mattress on the floor, a simple but temporary solution. • you may be more comfortable at night when you use a pillow for support. Don’t: • do not sleep on your stomach unless advised to do so by your doctor or physical therapist. Bending forward do: • keep the natural curves of your back when doing these and other activities: making a bed, vacuuming, sweeping or mopping the floor, weeding the garden or raking leaves. Coughing and sneezing do: • bend backwards to increase the curve of your back while you cough or sneeze. Driving a car do: • drive the car as little as possible. It is better to be a passenger than to drive yourself. • move the seat forward to the steering wheel. Your seat must be close enough to the wheel to keep the natural curves of your back. If your hips are lower than your knees in this position, raise yourself by sitting on a pillow. Exercises for low back pain safety guidelines • an increase in your low back pain can be expected with these exercises. This is acceptable as long as your leg symptoms are not increasing. • if while doing these exercises, your pain worsens or you have new pain or symptoms, stop the exercises and discuss your symptoms with your doctor or physical therapist. • stop exercising and let your doctor or physical therapist know right away if you have any change in your bowel or bladder control or any increase in weakness in your leg or foot. Exercises ‰ •press-ups: keep your back and buttocks relaxed and use your arms to press up. Concentrate on keeping your hips down and push up your upper body as high as possible. •double knee to chest: grasp both your knees with your hands and pull toward your shoulders. Hold the stretch for 1 second. Let your knees return, but keep them bent at arms length. ‰ •lumbar spine stretches: lie on your back. Bring your knees towards your chest. Rotate your knees towards the pain. •side-lying position: lie on your side and face forward. Have both arms straight in front and bend your knees. Turn your head as you move your top arm across your body as far as you can. Keep your arm in place and turn your head back to the starting position. Look back again and turn your head farther if you can. Bring your head and arm back to the starting position. Relax and repeat 10 times on each side. •hamstring stretch: lie on your back with your legs out straight. Raise your leg up and put your hands around the upper leg for support. Slowly straighten the raised knee until you feel a stretch in the back of the upper leg. Hold, then relax and repeat 10 times on each leg. •standing arch: stand with your feet apart and hands on the small of your back with fingers pointing backwards. Bend backwards at the waist, supporting the trunk with your hands. Keep your knees straight. Hold for 5 seconds. Repeat 3 to 5 times. Side glides: stand at a right angle to the wall about 2 feet o eliminate your pain improve your muscular endurance and strength attain better posture, balance, body awareness and co-ordination improve your balance and flexibility learn to lift properly. posture when standing: make sure you have a neutral pelvic position. Stand upright, head facing forward, back straight, and balance your weight evenly on both feet. Keep your legs straight and your head in line with your spine. Posture when sitting: a good seat for working should have good back support, arm rests and a swivel base. When sitting, try to keep your knees and hips level and keep your feet flat on the floor, or use a footstool. You should ideally be able to sit upright with support in the small of your back. If you are using a keyboard, make sure your elbows are at right-angles and that your forearms are horizontal. Shoes: flat shoes place less of a strain on the back. Driving: it is important to have proper support for your back. Make sure the wing mirrors are properly positioned so you do not need to twist. The pedals should be squarely in front of your feet. If you are on a long journey, have plenty of breaks. Get out of the car and walk around. Bed: you should have a mattress that keeps your spine straight, while at the same time supporting the weight of your shoulders and buttocks. Use a pillow, but not one that forces your neck into a steep angle.

I have severe low back that radiates through legs. Can't even stand or sit for 5 min. Since I have 8 month baby it's rea ...

Ask Free Question
It can be because of sciatica. Do these exercises to relieve sciatica pain url/health/back-pain/sciatic-stretches#sitting-pigeon-pose 1. Reclining pigeon pose— pigeon pose is a common yoga pose. It works to open the hips. There are multiple versions of this stretch. The first is a starting version known as the reclining pigeon pose. If you are just starting your treatment, you should try the reclining pose first. While on your back, bring your right leg up to a right angle. Clasp both hands behind the thigh, locking your fingers. Lift your left leg and place your right ankle on top of the left knee. Hold the position for a moment. This helps stretch the tiny piriformis muscle, which sometimes becomes inflamed and presses against the sciatic nerve, causing pain. Do the same exercise with the other leg. Once you can do the reclining version without pain, work with your physical therapist on the sitting and forward versions of pigeon pose. 2. Sitting pigeon pose— sit on the floor with your legs stretched out straight in front of you. Bend your right leg, putting your right ankle on top of the left knee. Lean forward and allow your upper body to reach toward your thigh. Hold for 15 to 30 seconds. This stretches the glutes and lower back. Repeat on the other side.3. Forward pigeon pose— kneel on the floor on all fours. Pick up your right leg and move it forward on the ground in front of your body. Your lower leg should be on the ground, horizontal to the body. Your right foot should be in front of your right knee while your right knee stays to the right. Stretch the left leg out all the way behind you on the floor, with the top of the foot on the ground and toes pointing back. Shift your body weight gradually from your arms to your legs so that your legs are supporting your weight. Sit up straight with your hands on either side of your legs. Take a deep breath. While exhaling, lean your upper body forward over your front leg. Support your weight with your arms as much as possible. Repeat on the other side. 4. Knee to opposite shoulder— this simple stretch helps relieve sciatica pain by loosening your gluteal and piriformis muscles, which can become inflamed and press against the sciatic nerve. Lie on your back with your legs extended and your feet flexed upward. Bend your right leg and clasp your hands around the knee. Gently pull your right leg across your body toward your left shoulder. Hold it there for 30 seconds. Remember to pull your knee only as far as it will comfortably go. You should feel a relieving stretch in your muscle, not pain. Push your knee so your leg returns to its starting position. Repeat for a total of 3 reps, and then switch legs. 5. Sitting spinal stretch— sciatica pain is triggered when vertebrae in the spine compress. This stretch helps create space in the spine to relieve pressure on the sciatic nerve. Sit on the ground with your legs extended straight out with your feet flexed upward. Bend your right knee and place your foot flat on the floor on the outside of your opposite knee. Place your left elbow on the outside of your right knee to help you gently turn your body toward the right. Hold for 30 seconds and repeat three times, then switch sides. 6. Standing hamstring stretch— this stretch can help ease pain and tightness in the hamstring caused by sciatica. Place your right foot on an elevated surface at or below your hip level. This could be a chair, ottoman, or step on a staircase. Flex your foot so your toes and leg are straight. If your knee tends to hyperextend, keep a slight bend in it. Bend your body forward slightly toward your foot. The further you go, the deeper the stretch. Do not push so far that you feel pain. Release the hip of your raised leg downward as opposed to lifting it up. If you need help easing your hip down, loop a yoga strap or long exercise band over your right thigh and under your left foot. Hold for at least 30 seconds, and then repeat on the other side. For this homeopathic treatment is very effective for more details you can consult me.
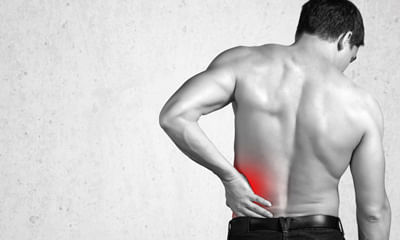
I am 28 years female and I am suffering from back pain should I plan for pregnancy? Please help me. ...
Ask Free Question
Because your kidneys are located toward your back and underneath your ribcage, it may be hard to tell if the pain you’re experiencing in that area is coming from your back or your kidney. The symptoms you’re having can help you figure out which is the source of the pain. The location, type, and severity of the pain are some of the things that will be different depending on whether the pain is from a problem in your kidneys or your back. How to identify kidney painkidney pain is most often caused by a kidney infection or a stone in the tubes coming out of your kidney. If the pain is coming from your kidney, it will have these features: where the pain is located kidney pain is felt in your flank, which is the area on either side of your spine between the bottom of your ribcage and your hips. It usually occurs in one side of your body, but it can occur in both sides. Type of pain kidney pain is usually sharp if you have a kidney stone and a dull ache if you have an infection. Most often it will be constant. It won’t get worse with movement or go away by itself without treatment. If you’re passing a kidney stone, the pain may fluctuate as the stone moves. Radiation of the pain sometimes the pain spreads (radiates) to your inner thigh or lower abdomen. Severity of the pain kidney pain is classified according to how bad it is — severe or mild. A kidney stone usually causes severe pain, and the pain from an infection is usually mild. Things that make it better or worse typically, nothing makes the pain better until the problem is corrected, such as by passing the stone. Unlike back pain, it usually won’t change with movement. Accompanying symptoms if you have a kidney infection or a kidney stone, you may also experience: •fever and chills •nausea and vomiting •cloudy or dark urine •an urgent need to urinate •pain when you urinate •a recent infection in your bladder •blood in your urine (this can happen with an infection or kidney stones) •small kidney stones that look like gravel in your urine how to identify back pain back pain is more common than kidney pain and is usually caused by a problem in the muscles, bones, or nerves in your back. Has the following features: where the pain is located back pain can occur anywhere on your back, but it’s most commonly located in your lower back or one of your buttocks. Type of pain muscle pain feels like a dull ache. If a nerve has been injured or irritated, the pain is a sharp burning sensation that may travel down your buttock to your lower leg or even your foot. Muscle pain may affect one or both sides, but nerve pain usually only affects one side. Radiation of the pain nerve pain may spread to your lower leg. Pain from a muscle usually stays in the back. Severity of the pain back pain is described as acute or chronic based on how long you’ve had it. Acute pain lasts days to weeks, subacute pain lasts six weeks to three months, and chronic pain lasts longer than three months. Things that make it better or worse back pain may get worse with movement or if you sit or stand for a long time. It may get better if you switch positions or walk around. Accompanying symptoms other symptoms you may experience with back pain include: •the painful spot looking swollen and feeling tender to the touch •a muscle spasm in the painful area •numbness or weakness in one or both of your legs (if the pain is due to a nerve issue) if you find you have back pain and can’t hold your urine or bowel movements, something is pressing on your spinal nerves, and you should be evaluated immediately. This condition, called cauda equina syndrome, can cause severe long-term damage to your spinal nerves if not treated right away. 6 imbalances that cause pain—and how to fix them "pain is a medical condition and a medical issue, says brett jones, owner of applied strength in pittsburgh who is certified for the functional movement screen, a system of tests and cor rective exercise strategies. "it's a warning sign. The pain is there to tell you something's wrong. And that warning sign could be more serious than "you're going too hard. Jones and the other coaches consulted for this piece all had a horror story to tell-when pain in a client meant a more serious condition such as a nerve issue, thyroid issue, or even cancer. The point: if you experience regular pain while exercising-or when you're not-go to the doctor. If you've been cleared by a doc and you're still feeling discomfort, try these simple tests to see what's truly causing the pain-it could be related to an imbalance in a completely different part of your body. The good news: with these drills, stretches, and corrective exercises, you may be able to fix them-no doctors necessary. Neck pain and headaches? Could be your shoulders. If you're experiencing these symptoms and have been cleared by a doctor, check out the height of your shoulders, says aaron brooks, a biomechanics expert and owner of perfect postures in auburndale, ma. "look in the mirror and see if one shoulder is higher or lower than the other, he says. If one of your shoulders is higher than the other, you'll be strengthening one more than the other, and it may wind up pulled forward more than the other-resulting an inward rotation of that hand. "when you do a row or a press, that side's going to get pinched. There's less room in the shoulder. You can wind up with bursitis or tendonitis. Or headaches and neck pain. Fix it: if the mirror test shows they're uneven, try this single-arm doorway stretch, brooks says. To do it, stand inside the threshold of a door, and place your right forearm inside the door on the right side of the jamb, palm against the jamb at about shoulder height. In this position, twist your chest slightly through the door to stretch your chest-alternately, you can take a step forward with your right foot, keeping your left foot in the threshold. This stretch will open your chest muscles and create room in your shoulder for movement. Pair that stretch with this mid-back strengthening exercise: grab a resistance band and stretch it in front of your chest so that your arms are straight out to the sides from your shoulders, palms facing up. At the full extension of your arms, the band should be stretched out. Return to clap your hands in front, and repeat the movement. Pair these two moves-in this order-three times per week. Shoulders even? Your headaches could be from a forward-leaning head. If you don't see an imbalance in the height of your shoulders, turn to the side, says robert taylor, owner of smarter team training in baltimore. If your head is jutting far forward of your shoulders, it could ultimately decrease the amount of blood flow to your head and neck. "the head leans forward, the spine leans forward, and it puts unnecessary stress on the lower spine too, he says. With the decreased blood flow to your thinking cap, you could get headaches. Fix it: increase blood flow up top and return your head to its natural, up-tall position by strength training your neck, taylor says. Try this one-arm shrug to even things out: sit on an upright bench, like one you'd use for a shoulder press. Holding a dumbbell in your right hand, place your left hand under your left butt cheek and grab the side of the seat. Let your right hand hang down straight by your side and pull your shoulder blades back and together. Now raise your right shoulder up towards your ear-raise it straight up instead of rolling your shoulder. Hold for a beat at the top, and then return to the start position. Complete a set of 10, and repeat on the other side. Knee pain when you run? Could be your hips. "the knee has two bad neighbors-the hip and the ankle, jones says. The pain you feel in your knee could very well be tightness or immobility in those bad neighbors. "they sweep all their leaves into the knee's yard. Everyone blames the knee, but it's the neighbors. To see if your hips have a proper level of mobility, lay on your back in a doorway so that the middle of your kneecap is right on the threshold. Relax your arms at your sides, palms up. Bring your feet together, toes pointed at the ceiling. Pull your toes towards your shins to create a 90-degree angle at the ankle. Keep one leg straight and still as you slowly raise the other leg until either your knee bends on your raising leg, or your bottom foot bends or turns out to the side. "see if the knobby part of your ankle can make it past the door frame, jones says. If it does, your hips are plenty mobile-check the ankle test below to see if that's causing some knee issues. If either ankle can't make it, foam roll your hips and glutes, and then work on this stretch using a belt or strap for instant improvement. Fix it: lying in the same position as during the test, wrap a strap or belt around one foot and raise it until you just start to feel a stretch-not to the level where it's all the stretch you can take, but just the beginning of the stretch, jones says. Once here, bring your other leg up to meet it. Return the non-strapped leg to the floor. At this point, you may find that the strapped leg can come up a little higher. When it does, bring the non-strapped leg up to meet it again. Continue until you no longer feel progress in the strapped leg, and switch. Hips moving ok? Check your ankles. If your hips are mobile (and even if they're not), ankle mobility can also lead to knee pain, says mike perry, owner of skill of strength in north chelmsford, mass. Who is certified in the functional movement screen. To see how mobile your ankles are (or aren't), assume a one-knee position facing a wall. Your knees should both form 90-degree angles, and the toe of your planted foot should be about four inches from the wall. In this position, perry says, try to glide your knee over the pinky toe to touch the wall without lifting your heel. If you can reach the wall, your ankle is gliding correctly. If your foot comes up before your knee touches the wall, your calves are "incredibly tight, perry says. Fix it: to help remedy this issue, foam roll your calves and try this variation on that ankle test from brett jones. Assume the same half-kneeling position, and place the point of a broomstick on the pinky toe of your planted foot. Hold the stick so it's touching the outside of your knee. With the stick in this position, keeping your knee from flaring out to the side, glide the knee forward slowly, stopping when your heel leaves the ground. If you perform this as a drill, jones says, you can see as much as half an inch of improvement in the first session. If you feel pain during the drill, stop and consult a physician. Lower-back tightness? Might be your hips. As with knee pain, back discomfort often isn't a back problem at all, brooks says. If one side of your pelvis is higher than the other, it can result in back pain, hip pain, groin pain, or even knee pain. "if you try to do a lunge, the knee on the high side will cave in and the hip will angle inward, brooks says. The repercussions of this change over time can be knee pain, a patella tear, a medial meniscus injury, or hip bursitis. But back to your back-the unevenness of your hips can pull on your lower back, causing that tightness while sitting all day. Fix it: if you notice your hips are uneven, try this hip abduction exercise. Lie on your back with knees bent and feet flat on the floor, hip-width apart (the classic sit-up position). Wrap a small resistance band around your knees so that it's already a little tight while your knees are together. Now press out against the strap to separate your knees until they form a v-shape, holding at the outermost edge of the press for a few moments. This move helps to fix the hip imbalance because "in the lying position, the muscles that are causing the pelvis to be out of alignment are shut off, brooks says. Repeat for 2 sets of 20 reps, 3 times per week. Tail bone pain the lower end of the vertebral column is inflamed and that bone is called coccyx bone and the condition is called coccydynia. The conservative management would be to keep ice in that inflamed area during one time in a day and also to sit in a hot water bowl where the penetration of the heat would help to reduce the inflammation. And to reduce the weight falling on the inflammed surface we suggest patients to use air cushion pillow (also called as doughnut pillow) where in the buttock's weight will not fall exactly on the painful tail bone and that would automatically reduce the pain. For this the best treatment would be to undergo ultrasonic therapy in one of the nearby physiotherapy clinics.

Hello, my neck injured while doing exercise. It lead a pain in neck and head ,stiffness in shoulder, weakness in arm. I ...
Ask Free Question
Do’s and don’ts for neck pain: do’s •do turn to one side while getting up from supine position. •use hot pack for your neck. •use towel roll under the neck during supine lying. •use pillow of normal thickness in side lying position. •do isometrics for neck. •arms should be supported in one of the three positions:•™ hands in pocket ™ •hands on thighs/or on table. •™ hand behind back with elbow straight. •in order to avoid holding the head in the same position for long periods, take break while driving, watching tv or working on a computer. •use a seat belt when in a car. •use cervical collar in case of giddiness. •retraction of shoulders every hour: move shoulders backward. Don’t’s •don’t sleep straight. •don t’ bend your neck. •avoid hanging of arms. •avoid sitting sitting for prolonged prolonged period of time in stressful stressful postures postures. •do not lift heavy weights on head or back. •do not drive for long hours; take breaks. •avoid habit of holding the telephone on one shoulder and leaning at it for long time. •do not take many pillows below the neck and shoulder while sleeping, •in order to turn around, do not twist your neck or the body; instead turn around by moving your feet first. Cervical spondylosis – chronic condition with radiating pain this is cervical pain (neck pain) and that's the reason the pain radiates until the shoulder blades. If you keep ice that would help and along side you can do hot water fermentation. You shall use cervical collar which would help you to reduce the radiating pain ie. Due to the nerve compression. You have to go for traction and also you can do ift. Please consult the near by therapist for quick relief. Since you have pain for more than 10 years it is suggestible to go for cervical muscle strengthening exercise. Use collar will definitely be helpful for him to maintain the good posture. And also cervical pillow can be used which might make you to have better posture of the shoulder neck and arm. Neck tilt: from the sitting position, tilt your head down so your chin touches your chest. Hold this position for 5 second s. Return to the starting position and repeat. Do this five times. Side-to-side neck tilt. From the same starting position, tilt you neck toward one shoulder, leading with your ear. Hold for 5 seconds and then return to the starting position. Do this five times on each side. Neck turn. Look straight ahead, then turn your head to one side, keeping your chin at the same level. Do this five times on each side. Neck stretch. Holding the rest of your body straight, push your chin forward, stretching your throat. Hold for 5 seconds. From the same starting position, push your chin backward and hold for 5 seconds. Do the forward and backward stretch five times each. If any of these exercises cause severe pain or weakness in your hands or arms, stop right away and talk with your doctor.We suggest you to wear cervical collar which will help you to improve the cervical angle and also it definitely helps you to improve the neck posture due to which your neck pain is triggered more. The importance of wearing cervical collar is to give good stability to the neck and also it definitely prevents you to have excess neck movements which makes the condition worse. If you wear cervical collar you cannot turn your neck as you like which itself will help you to have better functioning of the cervical spine. This cervical soft collar what we are suggesting for you is available at our clinic. If you want you can buy from us, if you are far away from chennai we can send you by courier. The reason why we are conveying you to buy from us is we can demonstrate over the videocall (using whatsapp) and also we can monitor you throughout when to wear it and how long to wear it. And also if you find any difficulty wearing the brace you can also revert back to us for few more suggestions and we can propose you good solution how to go about it.

I'm getting savior shoulder pain when was in standing position for 15 minutes or doing walking for 15 minutes. I consult ...
Ask Free Question
1.pendulum stretch do this exercise first. Relax your shoulders. Stand and lean over slightly, allowing the affected arm to hang down. Swing the arm in a small circle — about a foot in diameter. Perform 10 revolutions in each direction, once a day. As your symptoms improve, increase the diameter of your swing, but never force it. When you're ready for more, increase the stretch by holding a light weight (three to five pounds) in the swinging arm. 2. Towel stretch hold one end of a three-foot-long towel behind your back and grab the opposite end with your other hand. Hold the towel in a horizontal position. Use your good arm to pull the affected arm upward to stretch it. You can also do an advanced version of this exercise with the towel draped over your good shoulder. Hold the bottom of the towel with the affected arm and pull it toward the lower back with the unaffected arm. Do this 10 to 20 times a day. 3. Finger walk face a wall three-quarters of an arm's length away. Reach out and touch the wall at waist level with the fingertips of the affected arm. With your elbow slightly bent, slowly walk your fingers up the wall, spider-like, until you've raised your arm as far as you comfortably can. Your fingers should be doing the work, not your shoulder muscles. Slowly lower the arm (with the help of the good arm, if necessary) and repeat. Perform this exercise 10 to 20 times a day. 4. Cross-body reach sit or stand. Use your good arm to lift your affected arm at the elbow, and bring it up and across your body, exerting gentle pressure to stretch the shoulder. Hold the stretch for 15 to 20 seconds. Do this 10 to 20 times per day. 5. Armpit stretch using your good arm, lift the affected arm onto a shelf about breast-high. Gently bend your knees, opening up the armpit. Deepen your knee bend slightly, gently stretching the armpit, and then straighten. With each knee bend, stretch a little further, but don't force it. Do this 10 to 20 times each day. Starting to strengthen as your range of motion improves, add rotator cuff–strengthening exercises. Be sure to warm up your shoulder and do your stretching exercises before you perform strengthening exercises. 6. Outward rotationhold a rubber exercise band between your hands with your elbows at a 90-degree angle close to your sides. Rotate the lower part of the affected arm outward two or three inches and hold for five seconds. Repeat 10 to 15 times, once a day. 7. Inward rotation stand next to a closed door, and hook one end of a rubber exercise band around the doorknob. Hold the other end with the hand of the affected arm, holding your elbow at a 90-degree angle. Pull the band toward your body two or three inches and hold for five seconds. Repeat 10 to 15 times, once a day. Shoulder exercises and stretches regular exercises and stretches can keep your shoulder strong and flexible. A few things to remember before swinging in to exercises: •stop any exercise if you have more shoulder pain. It may be too soon for you to try. •watch your form. Exercising incorrectly can also cause or worsen shoulder problems. •warm up, even before deep stretching. Light shoulder rolls, gentle movements, or even a warm shower are all ways to warm up your muscles before exercise and stretching. Pendulum stretch for range of motion•stand and bend at the waist. •let your arm on the injured side hang straight down. •keep your neck relaxed. •move your arm in a circle up to 20 times. •do once or more times in a day. Overhead shoulder stretch•sit or stand to do this shoulder stretch. •intertwine your fingers in front of you. •bend your elbows and raise your arms above your head. You can also place your hands on your head or behind it. •gently squeeze your shoulder blades together to move your elbows back. •continue for up to 20 repetitions. Repeat 5 to 10 times a day.Do’s and don’ts for shoulder pain do’s: do the prescribed exercise regularly to maintain strength, flexibility and range of motion. Do keep the affected affected arm supported supported. Don’ts: do not sleep on the affected affected side. Do not lift heavyweight with the affected arm. Do not jerk your shoulder shoulder to avoid stress. ¾ don't use the arm to push yourself up in bed or from a chair because this requires forceful contraction of muscles. Don't participate in contact sports or do any repetitive heavy lifting. We suggest you to wear shoulder support brace which is available in two different sizes which makes the patient to feel comfortable as it maintains the shoulder in anatomical position and the short lever is maintained. The reason to maintain the short lever in the shoulder joint is it helps the shoulder to prevent the movements which itself is the key to have better progression of healing in the shoulder region. This is suggested for the following conditions do’s: •exercise regularly and immediately follow a physical therapy program. •use an ice pack for pain relief. Apply the ice pack 3-4 times a day for 10 minutes. •take pain relievers as directed by your shoulder doctor. •consult a shoulder specialist if conservative frozen shoulder treatment fails to return the shoulder to normal. •do follow the directions of doctors for pain relief. •do your mobility exercises on both sides. •do pay attention to your sleep. •a good night’s sleep can aid in proper inflammatory processes and help heal damaged tissue. Growth hormone is released during sleep at night and helps recovery. Don’ts: •don’t stop moving your shoulders entirely because of the pain. •do not do activities that involve sudden movements, such as heavy lifting on the affected side. As your body recovers, continue to make gentle movements, but avoid irritating and moving your shoulders. •doesn’t sleep on a sore shoulder •don’t miss your workout routine and physical therapy. •don’t neglect your diet. Frozen shoulder is associated with general health. Frozen shoulder is strongly associated with many low-grade systemic inflammatory conditions. Your body needs healthy, anti-inflammatory food to recover. •do not be afraid. You are not alone. •stop smoking and drinking alcohol.