Mri Scan Of Lumbar Spine
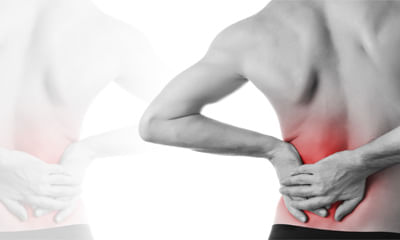
Doctor, I had an accident in 2014, after taking x-ray, I got l1 compression. After taking 2 months bed rest, it got redu ...


Ask Free Question
Physical examination a thorough physical examination reveals much about the patient's health and general fitness. The physical part of the exam includes a review of the patient's medical and family history. Often laboratory tests such as complete blood count and urinalysis are ordered. The physical exam may include: •palpation (exam by touch) determines spinal abnormalities, areas of tenderness, and muscle spasm. •range of motion measures the degree to which a patient can perform movement of flexion, extension, lateral bending, and spinal rotation. •a neurologic evaluation assesses the patient's symptoms including pain, numbness, paresthesias (e.g. Tingling), extremity sensation and motor function, muscle spasm, weakness, and bowel/bladder changes. Particular attention may be given to the extremities. Either a ct scan or mri study may be required if there is evidence of neurologic dysfunction. Physical therapy which teaches the patient to strengthen the paravertebral and abdominal muscles which lend support to the spine. General exercises which help build flexibility, increase range of motion and strength. A corset or a brace could be used to provide support; cervical collars may be used to alleviate pain by restricting movement. Hot or cold packs on the affected area, ultrasound and electric stimulation are some of the other treatments which are used. Management of acute symptoms rest and support- with acute joint symptoms, a lumbar corset may be helpful to provide rest to inflamed facet joints. When acute symptoms decrease, discontinue corset by gradually increasing the time without the corset. Often the most comfortable position is flexion, esp. If there are neurologic signs due to decrease in the foraminal space from joint swelling or osteophytes. Education of posture- head, neck and shoulders should be supported by the back rest of chair with a small pillow in the lumbar spine, the feet supported and the arm resting on arm rests or on a pillow in the lap. Modalities- hot or cold packs on the affected area, ultrasound and electric stimulation are some of the other treatments which are used to decrease pain and reduce muscle spasm. Relaxation- by soft tissue techniques. Teach self relaxationtechniques, e.g like deep breathing exercises and physiological relaxation (laura mitchell method) and hydrotherapy. Traction- gentle intermittent joint distraction and gliding techniques may inhibit painful muscle responses and provide synovial fluid movement within the joint for healing. Gentle rom within the limits of pain. Management of subacute and chronic phase increase rom- free active exercises of lumbar spine. Pelvic tilting forward, backward in crook lying, quadriped, sitting and standing. Mobilization- restoration of intersegmental mobility by accessory pressure enables the patient to regain full functional painfree movement. Stretching exercises. Strengthening exercises.Posture correction.
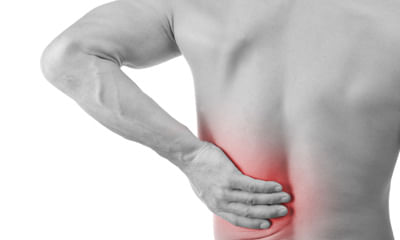

My dorsol lumbar spine spondylitic change and degenerative disic .muje kafi pain h janjanahat ke saath. ...

Ask Free Question
Follow up with orthopaedics/spine surgeon and physiotherapy regularly, orthopedics/spine surgeon will decide accordingly to disc bulge the further course, by looking at mri.
I am having lower back pain and left leg pain after lifting heavy object from one month. I was on zerodol mr, neruroborn ...

Ask Free Question
You have reduced space in the lumbar canal . You may require prolonged duration of physiotherapy for improving your condition
Want to understand mri screening of the whole spine cervical spine: loss of cervical lordosis. Multilevel marginal osteo ...
Ask Free Question
It is for the doctors to understand the mri screening to give proper treatment, your mri report says that you have cervical and lumbar oain radiating due to disc bulges and space increased one side and decreased from the other side which is compressing the nerves. Take proper treatment by consulting orthopaedic doctor and physical therapy treatment to get back to normal.

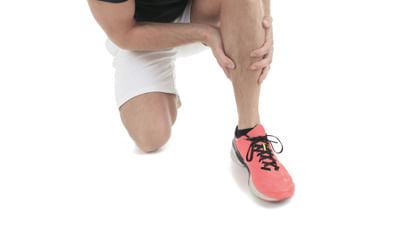
Plz help me from the pain! I am having pain at l5-s1 level and severe pain to my left leg due to which I am completely o ...
Ask Free Question
Herniated disc 1. Spinal decompression how it helps – spinal decompression should be the very first thing you do to treat a herniated or bulging disc because it essentially creates space between your vertebrae, and thus takes pressure off the discs. How to do it – use a bar or the top of a door (or anything you can hang from) and allow your body to “just hang”. – hang for 30 seconds and do 3 sets. – release very slowly from this so as not to cause any spasms. ** this should not cause any pain. If you feel pain during it is not a good one for you. In that case, stop and try some of the other exercises below instead. 2. Standing extension how it helps – this standing extension helps reverse what you do on a daily basis (hunching)… since most bulging discs and herniated discs are caused by poor posture and repeated flexion of the spine (esp bending fwd in bad posture), this stretch helps push the disc back to neutral position. How to do it – begin this exercise by standing up with good posture. Now take both hands and place them on both sides of your lower back. Now with the help of your hands push your pelvis forward and extend your spine back. Follow the extension with your neck so that you end up facing the ceiling. – start with 10 repetitions and do 2-3 sets. – this one is particularly great to do when you need a break from sitting at your desk. ** this should not cause any pain. If you feel pain during it is not a good one for you. In that case, stop and try some of the other exercises below instead. 3. Half cobra pose (prone lumbar extension) how it helps – the half cobra stretch helps to push the disc material back towards the center of the inter-vertebral disc to allow for improved healing. The goal of repeated lower back extension is the “centralization of symptoms”, which basically means pain that travels down the affected leg to the foot should come back up closer to the low back – which will in turn alleviate the pain. How to do it – begin this exercise by lying on your stomach (prone position) and slowly prop yourself up on your elbows while keeping your hips in contact with the floor. – hold the prop-up position for 10-15 seconds before returning to the prone position (lying face down). – gradually increase to holding the end position for 30 seconds. Aim for 10 repetitions of this stretch. ** initially, you may not be able to tolerate this position very well, so make sure you start slowly and carefully. If there’s any pain, try a different exercise instead. 4. Full cobra pose (advanced extension) how it helps – this stretch is based on the same principle as the half cobra pose above. This advanced extension helps to push disc material back towards the center of the intervertebral disc, with the goal of alleviating pain symptoms. How to do it – once you’ve mastered the half cobra pose, you can increase the difficulty by moving to the advanced version of this stretch. Begin this exercise by lying on your stomach in the prone position (lying facing down) and slowly press up on your hands while keeping your pelvis in contact with the floor and lower back relaxed. – hold the prop-up position for 10 seconds. Aim for 10 repetitions of this stretch. – eventually try to hold this pose for longer if it feels good (20-30 seconds). ** if you feel pain during this exercise, it is not a good one for you. In that case, stop and try some of the other exercises instead. 5. Cat-cow how it helps – this is one of the most popular herniated disc exercises. By combining two yoga poses, the cat-cow stretch can help to relieve pressure on the herniated disc by opening the intervertebral disc space. It also improves mobility of the spine, which may help to relieve disc herniation pain and speed recovery. How to do it – begin this stretch on your hands and knees. Inhale and let your stomach “drop” towards the floor as you look up towards the ceiling. – follow this by exhaling and slowly rounding your spine while pressing into the floor with your hands and slightly curving your neck to look at your feet. – aim for 10 repetitions of this stretch and do 2-3 sets. How it helps – this exercise will help strengthen and stabilize your lower back and deep spine muscles. This will help you to maintain a good posture and avoid future episodes of herniated discs. How to do it: – begin on your hands and knees with your hands positioned under your shoulders and knees positioned under your hips. – raise your left arm and reach it forwards until it is aligned with your torso; at the same time, kick your right leg backwards until is it aligned with your torso. – hold this position for 2-3 seconds before slowly returning to the starting position. – repeat with your right arm and left leg. – alternate sides for 10 repetitions and do 2-3 sets. ** ensure that your head, neck, and back maintain a neutral alignment to minimize stress on your neck. 6.plank: how it helps – just like the bird dog, this “core” exercise will help bring your pelvis into right position by strengthening the deep spinal muscles and glutes (butt muscles). How to do it – begin lying on your stomach with your forearms against the mat. – engage your core and lift your body so that you are resting on your forearms and toes. – start with 10 second holds and work up to 30 second holds, do 2-3 sets. ** ensure to keep your back straight throughout the entire exercise – spine in neutral position. Thoracic expansion if you’re using a chair, sit facing forward and allow your upper body to fall over the back of the chair. Extend your arms above your head for a deeper stretch. Hold either position for 10 seconds and release. Repeat 3 times. 7.sitting spinal stretch sciatica pain is triggered when vertebrae in the spine compress. This stretch helps create space in the spine to relieve pressure on the sciatic nerve. 1.sit on the ground with your legs extended straight out with your feet flexed upward. 2.bend your right knee and place your foot flat on the floor on the outside of your opposite knee. 3.place your left elbow on the outside of your right knee to help you gently turn your body toward the right. 4.hold for 30 seconds and repeat three times, then switch sides. 8. Standing hamstring stretch this stretch can help ease pain and tightness in the hamstring caused by sciatica. 1.place your right foot on an elevated surface at or below your hip level. This could be a chair, ottoman, or step on a staircase. Flex your foot so your toes and leg are straight. If your knee tends to hyperextend, keep a slight bend in it. 2.bend your body forward slightly toward your foot. The further you go, the deeper the stretch. Do not push so far that you feel pain. 3.release the hip of your raised leg downward as opposed to lifting it up. If you need help easing your hip down, loop a yoga strap or long exercise band over your right thigh and under your left foot. 4.hold for at least 30 seconds, and then repeat on the other sideif you have low back pain and sciatica you can undergo intermittent pelvic traction where in your half of your body weight will be added in the electronic traction so that that would help you to reduce the pain, along with interferential therapy stimulations which would help you to get relieved from the radiating pain. 9.anterior pelvic tilt 1.lie on the back with the knees bent and feet flat on the floor, hip-width apart. 2.squeeze the buttocks and tilt the pelvis upward. 3.the back should feel as though it is flattening to the ground. 4.return to normal pelvis position. 5.repeat 10–12 times. Apply ice for the pain to get subsided immediately. If you cannot go immediately for the physiotherapy treatment. Ice can be kept in the low back where you have back pain. It is suggestible to wear lumbo sacral belt which would help you to build the abdominal muscle tone which itself would make you feel better. You can also wear mcr chappals which would help you to have less weight falling in the painful back. U have to take vitamin d rich foods. Likemilk, cheese, yogurt, brocoli, spinach. U need calcium consumption for increase the bone density. Lackof bone and bones crush inside the body vitamin d intake via supplements or exposure to low levels of sunlight. Vitamin d is used to absorb calcium in the bone and regulate calcium in the blood.this might be due to low calcium or vitamin d which has more impact on the bone density and also it makes one to feel that there is lack of bone strength or in a way the bones are brittle and almost breaking and they feel it is crushed in a way there are many bones breaking at the same time. You have to take vitamin d rich foods. Likemilk, cheese, yogurt, brocoli, spinach. U need calcium consumption for increase the bone density.
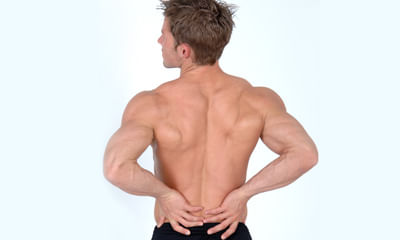
I have prolonged back pain that someday due to which I feel very tired. I have mri report and blood test reports for the ...
Ask Free Question
Back pain due to muscular pain it looks like a muscle pain kindly do some exercises that may help you to get rid of your pain and regular stretch may help you to relax the muscles of your back and lower limbs the exercises I personally recommend are listed below in the order I use with my patients. Exercise #1 in the early stages of a disc bulge, your body’s natural response is to tighten up and protect the spine and buttocks area. Because of this, one of the the simplest things you can do yourself to relieve radiating back pain caused my a disc bulge is stretching piriformis muscle. How to perform it: ● begin lying on your back with your knees bent and feet positioned flat on the floor ● place your right ankle over your left knee ● use your hands or a band to pull the left thigh towards your chest, and hold for 20 to 30 seconds ● repeat on the other leg ● aim for 3 repetitions on each side exercise #2: prone alternating leg raisesthe prone leg lift creates spinal extension helping push the jelly-like material back towards the center and reduce bulging disc. How to do it: ● lay face down with your palms on the floor under your forehead. ● straighten one leg then lift it a few inches off the ground with your toe pointed. ● lower your leg to the floor with your knee remaining straight. ● switch legs ● repeat 3 x 15 reps each side ● 3 x a day exercise #3: half cobra pose the half cobra pose creates spinal extension helping push the nucleus (jelly) back towards the center and reduce bulging disc. How to do it: ● begin this exercise by lying on your stomach (prone position) and slowly prop yourself up on your elbows while keeping your hips in contact with the floor. ● hold the prop-up position for 10-15 seconds before returning to the prone position (lying face down). ● gradually increase to holding the end position for 30 seconds. Aim for 10 repetitions of this stretch. ** initially, you may not be able to tolerate this position very well, so make sure you start slowly and carefully. Recommended: half cobra pose exercise video demo exercise #4: full cobra pose the full cobra pose creates even more spinal extension than half cobra helping push the nucleus (jelly) back towards the center and reduce bulging disc. How to do it: ● begin lying on the ground with your hands flat on the floor at the level of your shoulders ● slowly push your hands to raise your shoulder off of the ground until you feel a slight stretch ● increase your range of motion by exhaling as you push further into lumbar extension ● aim for 5 repetitions exercise #5: abdominal drawing maneuver a solid core foundation helps provide stability which in turn prevents re-injury and further injury from occurring. This will help reset the spine into neutral position. How to do it: ● lie on your back ● bend your knees ● contract your stomach muscle (abdominals) ● hold for 5 seconds ● release ● perform 3 x 20 sets daily.

I have below findings in my mri report what should I focus on? Mri lumbosacral spine: mild diffuse asymmetrical disc bul ...
Ask Free Question
Exercise #1 in the early stages of a disc bulge, your body’s natural response is to tighten up and protect the spine and buttocks area. Because of this, one of the the simplest things you can do yourself to relieve radiating back pain caused my a disc bulge is stretching piriformis muscle. How to perform it: ● begin lying on your back with your knees bent and feet positioned flat on the floor ● place your right ankle over your left knee ● use your hands or a band to pull the left thigh towards your chest, and hold for 20 to 30 seconds ● repeat on the other leg ● aim for 3 repetitions on each side exercise #2: prone alternating leg raisesthe prone leg lift creates spinal extension helping push the jelly-like material back towards the center and reduce bulging disc. How to do it: ● lay face down with your palms on the floor under your forehead. ● straighten one leg then lift it a few inches off the ground with your toe pointed. ● lower your leg to the floor with your knee remaining straight. ● switch legs ● repeat 3 x 15 reps each side ● 3 x a day exercise #3: half cobra pose the half cobra pose creates spinal extension helping push the nucleus (jelly) back towards the center and reduce bulging disc. How to do it: ● begin this exercise by lying on your stomach (prone position) and slowly prop yourself up on your elbows while keeping your hips in contact with the floor. ● hold the prop-up position for 10-15 seconds before returning to the prone position (lying face down). ● gradually increase to holding the end position for 30 seconds. Aim for 10 repetitions of this stretch. ** initially, you may not be able to tolerate this position very well, so make sure you start slowly and carefully. Recommended: half cobra pose exercise video demo exercise #4: full cobra pose the full cobra pose creates even more spinal extension than half cobra helping push the nucleus (jelly) back towards the center and reduce bulging disc. How to do it: ● begin lying on the ground with your hands flat on the floor at the level of your shoulders ● slowly push your hands to raise your shoulder off of the ground until you feel a slight stretch ● increase your range of motion by exhaling as you push further into lumbar extension ● aim for 5 repetitions exercise #5: abdominal drawing maneuver a solid core foundation helps provide stability which in turn prevents re-injury and further injury from occurring. This will help reset the spine into neutral position. How to do it: ● lie on your back ● bend your knees ● contract your stomach muscle (abdominals) ● hold for 5 seconds ● release ● perform 3 x 20 sets daily.
My mri scan show this what should I do? Mild diffuse asymmetrical disc bulge with small posture-central disc protrusion ...
Ask Free Question
Herniated disc 1. Spinal decompression how it helps – spinal decompression should be the very first thing you do to treat a herniated or bulging disc because it essentially creates space between your vertebrae, and thus takes pressure off the discs. How to do it – use a bar or the top of a door (or anything you can hang from) and allow your body to “just hang”. – hang for 30 seconds and do 3 sets. – release very slowly from this so as not to cause any spasms. ** this should not cause any pain. If you feel pain during it is not a good one for you. In that case, stop and try some of the other exercises below instead. 2. Standing extension how it helps – this standing extension helps reverse what you do on a daily basis (hunching)… since most bulging discs and herniated discs are caused by poor posture and repeated flexion of the spine (esp bending fwd in bad posture), this stretch helps push the disc back to neutral position. How to do it – begin this exercise by standing up with good posture. Now take both hands and place them on both sides of your lower back. Now with the help of your hands push your pelvis forward and extend your spine back. Follow the extension with your neck so that you end up facing the ceiling. – start with 10 repetitions and do 2-3 sets. – this one is particularly great to do when you need a break from sitting at your desk. ** this should not cause any pain. If you feel pain during it is not a good one for you. In that case, stop and try some of the other exercises below instead. 3. Half cobra pose (prone lumbar extension) how it helps – the half cobra stretch helps to push the disc material back towards the center of the inter-vertebral disc to allow for improved healing. The goal of repeated lower back extension is the “centralization of symptoms”, which basically means pain that travels down the affected leg to the foot should come back up closer to the low back – which will in turn alleviate the pain. How to do it – begin this exercise by lying on your stomach (prone position) and slowly prop yourself up on your elbows while keeping your hips in contact with the floor. – hold the prop-up position for 10-15 seconds before returning to the prone position (lying face down). – gradually increase to holding the end position for 30 seconds. Aim for 10 repetitions of this stretch. ** initially, you may not be able to tolerate this position very well, so make sure you start slowly and carefully. If there’s any pain, try a different exercise instead. 4. Full cobra pose (advanced extension) how it helps – this stretch is based on the same principle as the half cobra pose above. This advanced extension helps to push disc material back towards the center of the intervertebral disc, with the goal of alleviating pain symptoms. How to do it – once you’ve mastered the half cobra pose, you can increase the difficulty by moving to the advanced version of this stretch. Begin this exercise by lying on your stomach in the prone position (lying facing down) and slowly press up on your hands while keeping your pelvis in contact with the floor and lower back relaxed. – hold the prop-up position for 10 seconds. Aim for 10 repetitions of this stretch. – eventually try to hold this pose for longer if it feels good (20-30 seconds). ** if you feel pain during this exercise, it is not a good one for you. In that case, stop and try some of the other exercises instead. 5. Cat-cow how it helps – this is one of the most popular herniated disc exercises. By combining two yoga poses, the cat-cow stretch can help to relieve pressure on the herniated disc by opening the intervertebral disc space. It also improves mobility of the spine, which may help to relieve disc herniation pain and speed recovery. How to do it – begin this stretch on your hands and knees. Inhale and let your stomach “drop” towards the floor as you look up towards the ceiling. – follow this by exhaling and slowly rounding your spine while pressing into the floor with your hands and slightly curving your neck to look at your feet. – aim for 10 repetitions of this stretch and do 2-3 sets. How it helps – this exercise will help strengthen and stabilize your lower back and deep spine muscles. This will help you to maintain a good posture and avoid future episodes of herniated discs. How to do it: – begin on your hands and knees with your hands positioned under your shoulders and knees positioned under your hips. – raise your left arm and reach it forwards until it is aligned with your torso; at the same time, kick your right leg backwards until is it aligned with your torso. – hold this position for 2-3 seconds before slowly returning to the starting position. – repeat with your right arm and left leg. – alternate sides for 10 repetitions and do 2-3 sets. ** ensure that your head, neck, and back maintain a neutral alignment to minimize stress on your neck. 6.plank: how it helps – just like the bird dog, this “core” exercise will help bring your pelvis into right position by strengthening the deep spinal muscles and glutes (butt muscles). How to do it – begin lying on your stomach with your forearms against the mat. – engage your core and lift your body so that you are resting on your forearms and toes. – start with 10 second holds and work up to 30 second holds, do 2-3 sets. ** ensure to keep your back straight throughout the entire exercise – spine in neutral position. Thoracic expansion if you’re using a chair, sit facing forward and allow your upper body to fall over the back of the chair. Extend your arms above your head for a deeper stretch. Hold either position for 10 seconds and release. Repeat 3 times. 7.sitting spinal stretch sciatica pain is triggered when vertebrae in the spine compress. This stretch helps create space in the spine to relieve pressure on the sciatic nerve. 1.sit on the ground with your legs extended straight out with your feet flexed upward. 2.bend your right knee and place your foot flat on the floor on the outside of your opposite knee. 3.place your left elbow on the outside of your right knee to help you gently turn your body toward the right. 4.hold for 30 seconds and repeat three times, then switch sides. 8. Standing hamstring stretch this stretch can help ease pain and tightness in the hamstring caused by sciatica. 1.place your right foot on an elevated surface at or below your hip level. This could be a chair, ottoman, or step on a staircase. Flex your foot so your toes and leg are straight. If your knee tends to hyperextend, keep a slight bend in it. 2.bend your body forward slightly toward your foot. The further you go, the deeper the stretch. Do not push so far that you feel pain. 3.release the hip of your raised leg downward as opposed to lifting it up. If you need help easing your hip down, loop a yoga strap or long exercise band over your right thigh and under your left foot. 4.hold for at least 30 seconds, and then repeat on the other sideif you have low back pain and sciatica you can undergo intermittent pelvic traction where in your half of your body weight will be added in the electronic traction so that that would help you to reduce the pain, along with interferential therapy stimulations which would help you to get relieved from the radiating pain. 9.anterior pelvic tilt 1.lie on the back with the knees bent and feet flat on the floor, hip-width apart. 2.squeeze the buttocks and tilt the pelvis upward. 3.the back should feel as though it is flattening to the ground. 4.return to normal pelvis position. 5.repeat 10–12 times. Apply ice for the pain to get subsided immediately. If you cannot go immediately for the physiotherapy treatment. Ice can be kept in the low back where you have back pain. It is suggestible to wear lumbo sacral belt which would help you to build the abdominal muscle tone which itself would make you feel better. You can also wear mcr chappals which would help you to have less weight falling in the painful back. U have to take vitamin d rich foods. Likemilk, cheese, yogurt, brocoli, spinach. U need calcium consumption for increase the bone density. Lackof bone and bones crush inside the body vitamin d intake via supplements or exposure to low levels of sunlight. Vitamin d is used to absorb calcium in the bone and regulate calcium in the blood.this might be due to low calcium or vitamin d which has more impact on the bone density and also it makes one to feel that there is lack of bone strength or in a way the bones are brittle and almost breaking and they feel it is crushed in a way there are many bones breaking at the same time. You have to take vitamin d rich foods. Likemilk, cheese, yogurt, brocoli, spinach. U need calcium consumption for increase the bone density.
I am suffering from back pain from 1.5 year pain is only in lower back not in legs in mri my l4 l5 is 8.5 if I play cric ...

Ask Free Question
Back pain can have causes that aren't due to underlying disease. Examples include overuse such as working out or lifting too much, prolonged sitting and lying down, sleeping in an uncomfortable position or wearing a poorly fitting backpack. Doing exercises to strengthen the lower back can help alleviate and prevent lower back pain. It can also strengthen the core, leg, and arm muscles. Exercise also increases blood flow to the lower back area, which may reduce stiffness and speed up the healing process. Below are exercises that strengthen the lower back and help manage lower back pain: url/articles/323204. Php#seated-lower-back-rotational-stretches 1. Bridges—lie on the ground and bend the knees, placing the feet flat on the floor hip-width apart. Press the feet into the floor, keeping the arms by the sides. Raise the buttocks off the ground until the body forms a straight line from the shoulders to the knees. Squeeze the buttocks with the shoulders remaining on the floor. Lower the buttocks to the ground and rest for a few seconds.Repeat 15 times and then rest for 1 minute.Do 3 sets of 15 repetitions.2. Knee-to-chest stretches— lie on the back on the floor. Bend the knees, keeping both feet flat on the floor. Use both hands to pull one knee in toward the chest. Hold the knee against the chest for 5 seconds, keeping the abdominals tight and pressing the spine into the floor. Return to the starting position.Repeat with the opposite leg.Repeat with each leg 2–3 times twice a day. 3. Lower back rotational stretches—lie back on the floor with bent knees and feet flat on the ground. Keeping the shoulders firmly on the floor, gently roll both bent knees over to one side. Hold the position for 5–10 seconds. Return to the starting position. Gently roll the bent knees over to the opposite side, hold, and then return to the starting position. Repeat 2–3 times on each side twice a day. 4. Draw-in maneuvers— lie back on the floor with knees bent and feet flat, keeping the arms by the sides. Breathe in deeply. While breathing out, pull the bellybutton toward the spine, tightening the abdominal muscles and keeping the hips still. Hold the position for 5 seconds. Repeat 5 times. 5. Pelvic tilts— lie back on the floor with knees bent and feet flat, keeping the arms by the sides. Gently arch the lower back and push the stomach out. Hold for 5 seconds, then relax. Flatten the back and pull the bellybutton in toward the floor. Hold for 5 seconds, then relax. Increase the number of repetitions daily, building up to 30. 6. Lying lateral leg lifts— lie on one side with the legs together. Keep the lower leg slightly bent. Draw the bellybutton into the spine to engage the core muscles. Raise the top leg about 18 inches, keeping it straight and extended. Hold the position for 2 seconds. Repeat 10 times. Turn onto the other side of the body and repeat, lifting the other leg. Perform 3 sets on each side. 7. Cat stretches— get onto the hands and knees with the knees hip-width apart. Arch the back, pulling the bellybutton up toward the spine. Slowly relax the muscles and allow the abdomen to sag toward the floor. Return to the starting position. Repeat 3–5 times twice a day. 8. Supermans— lie face down on the ground and stretch both arms out in front of the body, keeping the legs stretched out and flat on the ground. Raise both the hands and feet, aiming to create a gap of about 6 inches between them and the floor. Try to pull in the bellybutton, lifting it off the floor to engage the core muscles. Keep the head straight and look at the floor to avoid neck injury. Stretch the hands and feet outward as far as possible. Hold the position for 2 seconds. Return to the starting position. Repeat 10 times. For this homeopathic treatment is very effective consult online with details.
Hii. I have radiating pain in my right leg and when I drive a bike or a two wheeler there is a pinching pain in my back ...
Ask Free Question
1. Spinal decompression how it helps – spinal decompression should be the very first thing you do to treat a herniated or bulging disc because it essentially creates space between your vertebrae, and thus takes pressure off the discs. How to do it – use a bar or the top of a door (or anything you can hang from) and allow your body to “just hang”. – hang for 30 seconds and do 3 sets. – release very slowly from this so as not to cause any spasms. ** this should not cause any pain. If you feel pain during it is not a good one for you. In that case, stop and try some of the other exercises below instead. 2. Standing extension how it helps – this standing extension helps reverse what you do on a daily basis (hunching)… since most bulging discs and herniated discs are caused by poor posture and repeated flexion of the spine (esp bending fwd in bad posture), this stretch helps push the disc back to neutral position. How to do it – begin this exercise by standing up with good posture. Now take both hands and place them on both sides of your lower back. Now with the help of your hands push your pelvis forward and extend your spine back. Follow the extension with your neck so that you end up facing the ceiling. – start with 10 repetitions and do 2-3 sets. – this one is particularly great to do when you need a break from sitting at your desk. ** this should not cause any pain. If you feel pain during it is not a good one for you. In that case, stop and try some of the other exercises below instead. 3. Half cobra pose (prone lumbar extension) how it helps – the half cobra stretch helps to push the disc material back towards the center of the inter-vertebral disc to allow for improved healing. The goal of repeated lower back extension is the “centralization of symptoms”, which basically means pain that travels down the affected leg to the foot should come back up closer to the low back – which will in turn alleviate the pain. How to do it – begin this exercise by lying on your stomach (prone position) and slowly prop yourself up on your elbows while keeping your hips in contact with the floor. – hold the prop-up position for 10-15 seconds before returning to the prone position (lying face down). – gradually increase to holding the end position for 30 seconds. Aim for 10 repetitions of this stretch. ** initially, you may not be able to tolerate this position very well, so make sure you start slowly and carefully. If there’s any pain, try a different exercise instead. 4. Full cobra pose (advanced extension) how it helps – this stretch is based on the same principle as the half cobra pose above. This advanced extension helps to push disc material back towards the center of the intervertebral disc, with the goal of alleviating pain symptoms. How to do it – once you’ve mastered the half cobra pose, you can increase the difficulty by moving to the advanced version of this stretch. Begin this exercise by lying on your stomach in the prone position (lying facing down) and slowly press up on your hands while keeping your pelvis in contact with the floor and lower back relaxed. – hold the prop-up position for 10 seconds. Aim for 10 repetitions of this stretch. – eventually try to hold this pose for longer if it feels good (20-30 seconds). ** if you feel pain during this exercise, it is not a good one for you. In that case, stop and try some of the other exercises instead. 5. Cat-cow how it helps – this is one of the most popular herniated disc exercises. By combining two yoga poses, the cat-cow stretch can help to relieve pressure on the herniated disc by opening the intervertebral disc space. It also improves mobility of the spine, which may help to relieve disc herniation pain and speed recovery. How to do it – begin this stretch on your hands and knees. Inhale and let your stomach “drop” towards the floor as you look up towards the ceiling. – follow this by exhaling and slowly rounding your spine while pressing into the floor with your hands and slightly curving your neck to look at your feet. – aim for 10 repetitions of this stretch and do 2-3 sets. How it helps – this exercise will help strengthen and stabilize your lower back and deep spine muscles. This will help you to maintain a good posture and avoid future episodes of herniated discs. How to do it: – begin on your hands and knees with your hands positioned under your shoulders and knees positioned under your hips. – raise your left arm and reach it forwards until it is aligned with your torso; at the same time, kick your right leg backwards until is it aligned with your torso. – hold this position for 2-3 seconds before slowly returning to the starting position. – repeat with your right arm and left leg. – alternate sides for 10 repetitions and do 2-3 sets. ** ensure that your head, neck, and back maintain a neutral alignment to minimize stress on your neck. 6.plank: how it helps – just like the bird dog, this “core” exercise will help bring your pelvis into right position by strengthening the deep spinal muscles and glutes (butt muscles). How to do it – begin lying on your stomach with your forearms against the mat. – engage your core and lift your body so that you are resting on your forearms and toes. – start with 10 second holds and work up to 30 second holds, do 2-3 sets. ** ensure to keep your back straight throughout the entire exercise – spine in neutral position. Thoracic expansion if you’re using a chair, sit facing forward and allow your upper body to fall over the back of the chair. Extend your arms above your head for a deeper stretch. Hold either position for 10 seconds and release. Repeat 3 times. 7.sitting spinal stretch sciatica pain is triggered when vertebrae in the spine compress. This stretch helps create space in the spine to relieve pressure on the sciatic nerve. 1.sit on the ground with your legs extended straight out with your feet flexed upward. 2.bend your right knee and place your foot flat on the floor on the outside of your opposite knee. 3.place your left elbow on the outside of your right knee to help you gently turn your body toward the right. 4.hold for 30 seconds and repeat three times, then switch sides. 8. Standing hamstring stretch this stretch can help ease pain and tightness in the hamstring caused by sciatica. 1.place your right foot on an elevated surface at or below your hip level. This could be a chair, ottoman, or step on a staircase. Flex your foot so your toes and leg are straight. If your knee tends to hyperextend, keep a slight bend in it. 2.bend your body forward slightly toward your foot. The further you go, the deeper the stretch. Do not push so far that you feel pain. 3.release the hip of your raised leg downward as opposed to lifting it up. If you need help easing your hip down, loop a yoga strap or long exercise band over your right thigh and under your left foot. 4.hold for at least 30 seconds, and then repeat on the other sideif you have low back pain and sciatica you can undergo intermittent pelvic traction where in your half of your body weight will be added in the electronic traction so that that would help you to reduce the pain, along with interferential therapy stimulations which would help you to get relieved from the radiating pain. 9.anterior pelvic tilt 1.lie on the back with the knees bent and feet flat on the floor, hip-width apart. 2.squeeze the buttocks and tilt the pelvis upward. 3.the back should feel as though it is flattening to the ground. 4.return to normal pelvis position. 5.repeat 10–12 times. Apply ice for the pain to get subsided immediately. If you cannot go immediately for the physiotherapy treatment. Ice can be kept in the low back where you have back pain. It is suggestible to wear lumbo sacral belt which would help you to build the abdominal muscle tone which itself would make you feel better. You can also wear mcr chappals which would help you to have less weight falling in the painful back. U have to take vitamin d rich foods. Likemilk, cheese, yogurt, brocoli, spinach. U need calcium consumption for increase the bone density. Lackof bone and bones crush inside the body vitamin d intake via supplements or exposure to low levels of sunlight. Vitamin d is used to absorb calcium in the bone and regulate calcium in the blood.this might be due to low calcium or vitamin d which has more impact on the bone density and also it makes one to feel that there is lack of bone strength or in a way the bones are brittle and almost breaking and they feel it is crushed in a way there are many bones breaking at the same time. You have to take vitamin d rich foods. Likemilk, cheese, yogurt, brocoli, spinach. U need calcium consumption for increase the bone density.