
Headache For 3 Days Straight
Sometime I have leg pain sometimes headache sometimes back pain and sleep problem also. Sexual problem is also there. I ...


Ask Free Question
Back pain back pain exercises; kindly do these exercises. Back pain is described as acute or chronic based on how long you’ve had it. Acute pain lasts days to weeks, subacute pain lasts six weeks to three months, and chronic pain lasts longer than three months. Things that make it better or worse back pain may get worse with movement or if you sit or stand for a long time. It may get better if you switch positions or walk around. Other symptoms you may experience with back pain include: •the painful spot looking swollen and feeling tender to the touch •a muscle spasm in the painful area •numbness or weakness in one or both of your legs (if the pain is due to a nerve issue) if you find you have back pain and can’t hold your urine or bowel movements, something is pressing on your spinal nerves, and you should be evaluated immediately. This condition, called cauda equina syndrome, can cause severe long-term damage to your spinal nerves if not treated right away. 6 imbalances that cause pain—and how to fix them "pain is a medical condition and a medical issue, says brett jones, owner of applied strength in pittsburgh who is certified for the functional movement screen, a system of tests and cor rective exercise strategies. "it's a warning sign. The pain is there to tell you something's wrong. And that warning sign could be more serious than "you're going too hard. Jones and the other coaches consulted for this piece all had a horror story to tell-when pain in a client meant a more serious condition such as a nerve issue, thyroid issue, or even cancer. The point: if you experience regular pain while exercising-or when you're not-go to the doctor. If you've been cleared by a doc and you're still feeling discomfort, try these simple tests to see what's truly causing the pain-it could be related to an imbalance in a completely different part of your body. The good news: with these drills, stretches, and corrective exercises, you may be able to fix them-no doctors necessary. 1. Standing extension how it helps – this standing extension helps reverse what you do on a daily basis (hunching)… since most bulging discs and herniated discs are caused by poor posture and repeated flexion of the spine (esp bending fwd in bad posture), this stretch helps push the disc back to neutral position. How to do it – begin this exercise by standing up with good posture. Now take both hands and place them on both sides of your lower back. Now with the help of your hands push your pelvis forward and extend your spine back. Follow the extension with your neck so that you end up facing the ceiling. – start with 10 repetitions and do 2-3 sets. – this one is particularly great to do when you need a break from sitting at your desk. ** this should not cause any pain. If you feel pain during it is not a good one for you. In that case, stop and try some of the other exercises below instead. 2. Half cobra pose (prone lumbar extension) how it helps – the half cobra stretch helps to push the disc material back towards the center of the inter-vertebral disc to allow for improved healing. The goal of repeated lower back extension is the “centralization of symptoms”, which basically means pain that travels down the affected leg to the foot should come back up closer to the low back – which will in turn alleviate the pain. How to do it – begin this exercise by lying on your stomach (prone position) and slowly prop yourself up on your elbows while keeping your hips in contact with the floor. – hold the prop-up position for 10-15 seconds before returning to the prone position (lying face down). – gradually increase to holding the end position for 30 seconds. Aim for 10 repetitions of this stretch. ** initially, you may not be able to tolerate this position very well, so make sure you start slowly and carefully. If there’s any pain, try a different exercise instead. 3. Full cobra pose (advanced extension) how it helps – this stretch is based on the same principle as the half cobra pose above. This advanced extension helps to push disc material back towards the center of the intervertebral disc, with the goal of alleviating pain symptoms. How to do it – once you’ve mastered the half cobra pose, you can increase the difficulty by moving to the advanced version of this stretch. Begin this exercise by lying on your stomach in the prone position (lying facing down) and slowly press up on your hands while keeping your pelvis in contact with the floor and lower back relaxed. – hold the prop-up position for 10 seconds. Aim for 10 repetitions of this stretch. – eventually try to hold this pose for longer if it feels good (20-30 seconds). ** if you feel pain during this exercise, it is not a good one for you. In that case, stop and try some of the other exercises instead. 4. Cat-cow how it helps – this is one of the most popular herniated disc exercises. By combining two yoga poses, the cat-cow stretch can help to relieve pressure on the herniated disc by opening the intervertebral disc space. It also improves mobility of the spine, which may help to relieve disc herniation pain and speed recovery. How to do it – begin this stretch on your hands and knees. Inhale and let your stomach “drop” towards the floor as you look up towards the ceiling. – follow this by exhaling and slowly rounding your spine while pressing into the floor with your hands and slightly curving your neck to look at your feet. – aim for 10 repetitions of this stretch and do 2-3 sets. How it helps – this exercise will help strengthen and stabilize your lower back and deep spine muscles. This will help you to maintain a good posture and avoid future episodes of herniated discs. How to do it: – begin on your hands and knees with your hands positioned under your shoulders and knees positioned under your hips. – raise your left arm and reach it forwards until it is aligned with your torso; at the same time, kick your right leg backwards until is it aligned with your torso. – hold this position for 2-3 seconds before slowly returning to the starting position. – repeat with your right arm and left leg. – alternate sides for 10 repetitions and do 2-3 sets. ** ensure that your head, neck, and back maintain a neutral alignment to minimize stress on your neck. 5.plank: how it helps – just like the bird dog, this “core” exercise will help bring your pelvis into right position by strengthening the deep spinal muscles and glutes (butt muscles). How to do it – begin lying on your stomach with your forearms against the mat. – engage your core and lift your body so that you are resting on your forearms and toes. – start with 10 second holds and work up to 30 second holds, do 2-3 sets. ** ensure to keep your back straight throughout the entire exercise – spine in neutral position. Thoracic expansion if you’re using a chair, sit facing forward and allow your upper body to fall over the back of the chair. Extend your arms above your head for a deeper stretch. Hold either position for 10 seconds. 1. Plank the world record for the longest plank is 8 hours. Luckily, you don’t need to hold it that long for the exercise to have an effect! in fact. You can hold it for 10-15 seconds. • the plank is similar to a push-up position, but instead of resting on your hands, you rest on your elbows and bring them directly underneath your chest. • after kneeling, lean forward and place your elbows on the ground directly below your shoulders. • lift your knees off of the floor and push your feet back. Ensure your back is straight and keep your neck aligned with the rest of your spine. • hold the position and tighten your core muscles for the desired time. 2. Side plank just like the original plank, but only balancing on one side. • lie on the floor on your side, facing sideways with your feet together. • lift up your body until you are supporting yourself with your elbow, directly below your shoulder. • raise your hips until your body is in a straight line and tighten your core muscles; your body should create a slant from your shoulders to your feet. • hold this position without dropping your hips. • repeat on the opposite side. 3. Pelvic tilt with exercise ball sit on a ball that allows your legs to be at a 90-degree angle with your feet flat on the floor. • keep your shoulders back and spine straight. • tilt your hips forward and flex your abdominals tight. • tilt your hips backward as you stick your tailbone out. • move back and forth slowly, keeping your shoulders back. • repeat 10 times for 3 sets. 4. Superman lie on your stomach, face down, with your arms out in front of you. • lift arms, legs, and chest off the floor simultaneously while keeping your hips grounded. • hold for a minimum of two seconds. • lower back down slowly. • repeat 10 times for 3 sets. 6. Crunches lie flat on your back, placing your feet flat on the floor with your legs bent. • fold your arms across your chest and lift your torso up until your head, neck, and torso are off the ground. • hold for a moment before lowering back down. • repeat. 6. Quadruped arm opposite leg raises • kneel on the floor, lean forward, and place your hands palm-down on the floor. • make sure your back is straight, your knees are below your hips, and that your palms are directly below your shoulders. • raise one arm as you raise the opposite leg until both are aligned straight out from your body, parallel to your spine. • slowly lower both your arm and leg until you are back in the starting position. • switch arm and leg, and repeat. 7. Dead bug lie flat on the floor on your back. • lift your arms straight up from your body, reaching through the air. • raise one leg until it is at a 90-degree angle from your body. • slowly lower until it is in the starting position. • switch legs and repeat. 8. Hip bridge lie on your back with your knees bent and raised, your feet flat on the floor, and your arms at your sides. • keep your feet hip-distance apart and try to keep your leg in vertical alignment with your knee. • flex your glutes and push through your heels to raise your hips upward. Try to make a diagonal line from your shoulders to your knees. • hold for a short moment before lowering back down. • repeat 10 times for 3 sets.


Hello doctor am having too much neck pain shoulder pain and ankle pain I have typhoid but was taking ciproflacin tablets ...
Ask Free Question
Shoulder pain: do’s and don’ts for shoulder pain do’s do the prescribed exercise regularly to maintain strength, flexibility and range of motion. Do keep the affected arm supported. Use an ice pack for pain relief. Apply the ice pack 3-4 times a day for 10 minutes. Don’ts don't sleep on the affected side. Don't lift heavyweight with the affected arm. Don't jerk your shoulder to avoid stress. Don't use the arm to push yourself up in bed or from a chair. Don't participate in contact sports or do any repetitive heavy lifting. We suggest you to wear shoulder support brace which is available in two different sizes which makes the patient to feel comfortable as it maintains the shoulder in anatomical position and the short lever is maintained. The reason to maintain the short lever in the shoulder joint is it helps the shoulder to prevent the movements which itself is the key to have better progression of healing in the shoulder region. This is suggested for the following conditions. This shoulder support brace what we are suggesting for you is available at our clinic. If you want you can buy from us, if you are far away from chennai we can send you by courier. The reason why we are conveying you to buy from us is we can demonstrate over the videocall (using whatsapp) and also we can monitor you throughout when to wear it and how long to wear it. And also if you find any difficulty wearing the brace you can also revert back to us for few more suggestions and we can propose you good solution how to go about it. Strenghtening exercises 1.pendulum stretch do this exercise first. Relax your shoulders. Stand and lean over slightly, allowing the affected arm to hang down. Swing the arm in a small circle — about a foot in diameter. Perform 10 revolutions in each direction, once a day. As your symptoms improve, increase the diameter of your swing, but never force it. When you're ready for more, increase the stretch by holding a light weight (three to five pounds) in the swinging arm. 2. Towel stretch hold one end of a three-foot-long towel behind your back and grab the opposite end with your other hand. Hold the towel in a horizontal position. Use your good arm to pull the affected arm upward to stretch it. You can also do an advanced version of this exercise with the towel draped over your good shoulder. Hold the bottom of the towel with the affected arm and pull it toward the lower back with the unaffected arm. Do this 10 to 20 times a day. 3. Finger walk face a wall three-quarters of an arm's length away. Reach out and touch the wall at waist level with the fingertips of the affected arm. With your elbow slightly bent, slowly walk your fingers up the wall, spider-like, until you've raised your arm as far as you comfortably can. Your fingers should be doing the work, not your shoulder muscles. Slowly lower the arm (with the help of the good arm, if necessary) and repeat. Perform this exercise 10 to 20 times a day. 4. Cross-body reachsit or stand. Use your good arm to lift your affected arm at the elbow, and bring it up and across your body, exerting gentle pressure to stretch the shoulder. Hold the stretch for 15 to 20 seconds. Do this 10 to 20 times per day. 5. Armpit stretch using your good arm, lift the affected arm onto a shelf about breast-high. Gently bend your knees, opening up the armpit. Deepen your knee bend slightly, gently stretching the armpit, and then straighten. With each knee bend, stretch a little further, but don't force it. Do this 10 to 20 times each day. Starting to strengthen as your range of motion improves, add rotator cuff–strengthening exercises. Be sure to warm up your shoulder and do your stretching exercises before you perform strengthening exercises. 6. Outward rotationhold a rubber exercise band between your hands with your elbows at a 90-degree angle close to your sides. Rotate the lower part of the affected arm outward two or three inches and hold for five seconds. Repeat 10 to 15 times, once a day. 7. Inward rotation stand next to a closed door, and hook one end of a rubber exercise band around the doorknob. Hold the other end with the hand of the affected arm, holding your elbow at a 90-degree angle. Pull the band toward your body two or three inches and hold for five seconds. Repeat 10 to 15 times, once a day. Shoulder exercises and stretches regular exercises and stretches can keep your shoulder strong and flexible. A few things to remember before swinging in to exercises: •stop any exercise if you have more shoulder pain. It may be too soon for you to try. •watch your form. Exercising incorrectly can also cause or worsen shoulder problems. •warm up, even before deep stretching. Light shoulder rolls, gentle movements, or even a warm shower are all ways to warm up your muscles before exercise and stretching. Pendulum stretch for range of motion•stand and bend at the waist. •let your arm on the injured side hang straight down. •keep your neck relaxed. •move your arm in a circle up to 20 times. •do once or more times in a day. Overhead shoulder stretch•sit or stand to do this shoulder stretch. •intertwine your fingers in front of you. •bend your elbows and raise your arms above your head. You can also place your hands on your head or behind it. •gently squeeze your shoulder blades together to move your elbows back. •continue for up to 20 repetitions. Repeat 5 to 10 times a day.Exercise foot flex use your hand to pull your toes back toward your shin. Hold this position for about 30 seconds .do each side two to three times. Toe towel grab place a small towel under your foot. Curl your toes to grip the towel. Raise the front of your foot off the floor. Hold this position for a few seconds. Release the towel as you lift up your toes and spread them as far apart as possible. Heel and calf stretch to do this stretch: 1.stand facing a wall. 2.place your hands on the wall and move one foot back as far as you can comfortably. Toes on both feet should be facing forward, heels flat, with a slight bend in your knees. 3.lean into the stretch and hold for 30 seconds. You should feel the stretch in your back leg. 4.change legs and repeat. 5.do this stretch twice for both legs. Golf ball roll roll a golf baell under your right foot. Continue for up to 1 minute. Do each foot two to three times. Neck pain cervical spondylosis– chronic condition with radiating pain this is cervical pain (neck pain) and that's the reason the pain radiates until the shoulder blades. If you keep ice that would help and alongside you can do hot water fermentation. You shall use cervical collar which would help you to reduce the radiating pain i.e. Due to the nerve compression. You have to go for traction and also you can do ift. Please consult the nearby therapist for quick relief. Use collar will definitely be helpful for him to maintain the good posture. And also cervical pillow can be used which might make you to have better posture of the shoulder neck and arm. 1.neck tilt: from the sitting position, tilt your head down so your chin touches your chest. Hold this position for 5 second s. Return to the starting position and repeat. Do this five times. 2.side-to-side neck tilt. From the same starting position, tilt you neck toward one shoulder, leading with your ear. Hold for 5 seconds and then return to the starting position. Do this five times on each side. 3.neck turn. Look straight ahead, then turn your head to one side, keeping your chin at the same level. Do this five times on each side. 4.neck stretch. Holding the rest of your body straight, push your chin forward, stretching your throat. Hold for 5 seconds. From the same starting position, push your chin backward and hold for 5 seconds. Do the forward and backward stretch five times each. If any of these exercises cause severe pain or weakness in your hands or arms, stop right away and talk with your doctor. We suggest you to wear cervical collar which will help you to improve the cervical angle and also it definitely helps you to improve the neck posture due to which your neck pain is triggered more. The importance of wearing cervical collar is to give good stability to the neck and also it definitely prevents you to have excess neck movements which makes the condition worse. If you wear cervical collar you cannot turn your neck as you like which itself will help you to have better functioning of the cervical spine. This cervical soft collar what we are suggesting for you is available at our clinic. If you want you can buy from us, if you are far away from chennai we can send you by courier. The reason why we are conveying you to buy from us is we can demonstrate over the videocall (using whatsapp) and also we can monitor you throughout when to wear it and how long to wear it. And also if you find any difficulty wearing the brace you can also revert back to us for few more suggestions and we can propose you good solution how to go about it.
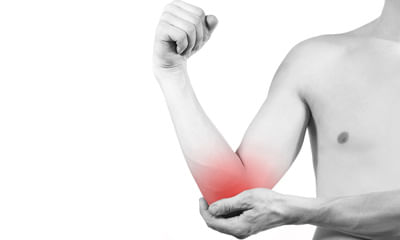
I am a 21 years old female. I have been experiencing pain in left arm and leg for 2 days. The pain came and went but now ...
Ask Free Question
Neck pain and headaches? Could be your shoulders. If you're experiencing these symptoms and have been cleared by a doctor, check out the height of your shoulders, says aaron brooks, a biomechanics expert and owner of perfect postures in auburndale, ma. "look in the mirror and see if one shoulder is higher or lower than the other, he says. If one of your shoulders is higher than the other, you'll be strengthening one more than the other, and it may wind up pulled forward more than the other-resulting an inward rotation of that hand. "when you do a row or a press, that side's going to get pinched. There's less room in the shoulder. You can wind up with bursitis or tendonitis. Or headaches and neck pain. Fix it: if the mirror test shows they're uneven, try this single-arm doorway stretch, brooks says. To do it, stand inside the threshold of a door, and place your right forearm inside the door on the right side of the jamb, palm against the jamb at about shoulder height. In this position, twist your chest slightly through the door to stretch your chest-alternately, you can take a step forward with your right foot, keeping your left foot in the threshold. This stretch will open your chest muscles and create room in your shoulder for movement. Pair that stretch with this mid-back strengthening exercise: grab a resistance band and stretch it in front of your chest so that your arms are straight out to the sides from your shoulders, palms facing up. At the full extension of your arms, the band should be stretched out. Return to clap your hands in front, and repeat the movement. Pair these two moves-in this order-three times per week. Shoulders even? Your headaches could be from a forward-leaning head. If you don't see an imbalance in the height of your shoulders, turn to the side, says robert taylor, owner of smarter team training in baltimore. If your head is jutting far forward of your shoulders, it could ultimately decrease the amount of blood flow to your head and neck. "the head leans forward, the spine leans forward, and it puts unnecessary stress on the lower spine too, he says. With the decreased blood flow to your thinking cap, you could get headaches. Fix it: increase blood flow up top and return your head to its natural, up-tall position by strength training your neck, taylor says. Try this one-arm shrug to even things out: sit on an upright bench, like one you'd use for a shoulder press. Holding a dumbbell in your right hand, place your left hand under your left butt cheek and grab the side of the seat. Let your right hand hang down straight by your side and pull your shoulder blades back and together. Now raise your right shoulder up towards your ear-raise it straight up instead of rolling yourshoulder. Hold for a beat at the top, and then return to the start position. Complete a set of 10, and repeat on the other side.

Hi sir, I have disk bulge at c4-c5, c5-c6 I have straitened neck due to para spinal muscle spasms, narrowing disk space. ...

Ask Free Question
A person can ease the symptoms with a few simple exercises. 1. Neck stretchkeep your body straight. Push your chin forward in a way that stretches the throat. Softly tense the neck muscles. Hold this for 5 seconds.Return your head to its center position. Push your head back with the chin held high, and hold for 5 seconds. Carry out 5 repetitions. 2. Neck tilttilt your head forward so that the chin touches the chest. Softly tense the neck muscles. Hold this for 5 seconds. Return the head to a neutral position. Carry out 5 repetitions. 3. Neck tilt (side-to-side) lean your head down towards either shoulder, leading with the ear. Softly tense the neck muscles. Hold this for 5 seconds. Return your head to the center and repeat on the other shoulder. Carry out 5 repetitions. 4. Neck turn turn your head to one side as far as it remains comfortable, being sure to keep your chin at a level height. Tense your neck muscles for 5 seconds. Return the head to a central position. Repeat on the opposite side. Repeat this exercise 5 times on each side. For this homeopathic treatment is very effective for more details you can consult me.
I am 20 year old boy I have backache, headache, fatigue since 3 months. I have water brash problem since 4 months and my ...
Ask Free Question
Kindly do these exercises. Back pain is described as acute or chronic based on how long you’ve had it. Acute pain lasts days to weeks, subacute pain lasts six weeks to three months, and chronic pain lasts longer than three months. Things that make it better or worse back pain may get worse with movement or if you sit or stand for a long time. It may get better if you switch positions or walk around. Accompanying symptoms other symptoms you may experience with back pain include: •the painful spot looking swollen and feeling tender to the touch •a muscle spasm in the painful area •numbness or weakness in one or both of your legs (if the pain is due to a nerve issue) if you find you have back pain and can’t hold your urine or bowel movements, something is pressing on your spinal nerves, and you should be evaluated immediately. This condition, called cauda equina syndrome, can cause severe long-term damage to your spinal nerves if not treated right away. 6 imbalances that cause pain—and how to fix them "pain is a medical condition and a medical issue, says brett jones, owner of applied strength in pittsburgh who is certified for the functional movement screen, a system of tests and cor rective exercise strategies. "it's a warning sign. The pain is there to tell you something's wrong. And that warning sign could be more serious than "you're going too hard. Jones and the other coaches consulted for this piece all had a horror story to tell-when pain in a client meant a more serious condition such as a nerve issue, thyroid issue, or even cancer. The point: if you experience regular pain while exercising-or when you're not-go to the doctor. If you've been cleared by a doc and you're still feeling discomfort, try these simple tests to see what's truly causing the pain-it could be related to an imbalance in a completely different part of your body. The good news: with these drills, stretches, and corrective exercises, you may be able to fix them-no doctors necessary. 1. Standing extension how it helps – this standing extension helps reverse what you do on a daily basis (hunching)… since most bulging discs and herniated discs are caused by poor posture and repeated flexion of the spine (esp bending fwd in bad posture), this stretch helps push the disc back to neutral position. How to do it – begin this exercise by standing up with good posture. Now take both hands and place them on both sides of your lower back. Now with the help of your hands push your pelvis forward and extend your spine back. Follow the extension with your neck so that you end up facing the ceiling. – start with 10 repetitions and do 2-3 sets. – this one is particularly great to do when you need a break from sitting at your desk. ** this should not cause any pain. If you feel pain during it is not a good one for you. In that case, stop and try some of the other exercises below instead. 2. Half cobra pose (prone lumbar extension) how it helps – the half cobra stretch helps to push the disc material back towards the center of the inter-vertebral disc to allow for improved healing. The goal of repeated lower back extension is the “centralization of symptoms”, which basically means pain that travels down the affected leg to the foot should come back up closer to the low back – which will in turn alleviate the pain. How to do it – begin this exercise by lying on your stomach (prone position) and slowly prop yourself up on your elbows while keeping your hips in contact with the floor. – hold the prop-up position for 10-15 seconds before returning to the prone position (lying face down). – gradually increase to holding the end position for 30 seconds. Aim for 10 repetitions of this stretch. ** initially, you may not be able to tolerate this position very well, so make sure you start slowly and carefully. If there’s any pain, try a different exercise instead. 3. Full cobra pose (advanced extension) how it helps – this stretch is based on the same principle as the half cobra pose above. This advanced extension helps to push disc material back towards the center of the intervertebral disc, with the goal of alleviating pain symptoms. How to do it – once you’ve mastered the half cobra pose, you can increase the difficulty by moving to the advanced version of this stretch. Begin this exercise by lying on your stomach in the prone position (lying facing down) and slowly press up on your hands while keeping your pelvis in contact with the floor and lower back relaxed. – hold the prop-up position for 10 seconds. Aim for 10 repetitions of this stretch. – eventually try to hold this pose for longer if it feels good (20-30 seconds). ** if you feel pain during this exercise, it is not a good one for you. In that case, stop and try some of the other exercises instead. 4. Cat-cow how it helps – this is one of the most popular herniated disc exercises. By combining two yoga poses, the cat-cow stretch can help to relieve pressure on the herniated disc by opening the intervertebral disc space. It also improves mobility of the spine, which may help to relieve disc herniation pain and speed recovery. How to do it – begin this stretch on your hands and knees. Inhale and let your stomach “drop” towards the floor as you look up towards the ceiling. – follow this by exhaling and slowly rounding your spine while pressing into the floor with your hands and slightly curving your neck to look at your feet. – aim for 10 repetitions of this stretch and do 2-3 sets. How it helps – this exercise will help strengthen and stabilize your lower back and deep spine muscles. This will help you to maintain a good posture and avoid future episodes of herniated discs. How to do it: – begin on your hands and knees with your hands positioned under your shoulders and knees positioned under your hips. – raise your left arm and reach it forwards until it is aligned with your torso; at the same time, kick your right leg backwards until is it aligned with your torso. – hold this position for 2-3 seconds before slowly returning to the starting position. – repeat with your right arm and left leg. – alternate sides for 10 repetitions and do 2-3 sets. ** ensure that your head, neck, and back maintain a neutral alignment to minimize stress on your neck. 5.plank: how it helps – just like the bird dog, this “core” exercise will help bring your pelvis into right position by strengthening the deep spinal muscles and glutes (butt muscles). How to do it – begin lying on your stomach with your forearms against the mat. – engage your core and lift your body so that you are resting on your forearms and toes. – start with 10 second holds and work up to 30 second holds, do 2-3 sets. ** ensure to keep your back straight throughout the entire exercise – spine in neutral position. Thoracic expansion if you’re using a chair, sit facing forward and allow your upper body to fall over the back of the chair. Extend your arms above your head for a deeper stretch. Hold either position for 10 seconds. 1. Plank the world record for the longest plank is 8 hours. Luckily, you don’t need to hold it that long for the exercise to have an effect! in fact. You can hold it for 10-15 seconds. • the plank is similar to a push-up position, but instead of resting on your hands, you rest on your elbows and bring them directly underneath your chest. • after kneeling, lean forward and place your elbows on the ground directly below your shoulders. • lift your knees off of the floor and push your feet back. Ensure your back is straight and keep your neck aligned with the rest of your spine. • hold the position and tighten your core muscles for the desired time. 2. Side plank just like the original plank, but only balancing on one side. • lie on the floor on your side, facing sideways with your feet together. • lift up your body until you are supporting yourself with your elbow, directly below your shoulder. • raise your hips until your body is in a straight line and tighten your core muscles; your body should create a slant from your shoulders to your feet. • hold this position without dropping your hips. • repeat on the opposite side. 3. Pelvic tilt with exercise ball sit on a ball that allows your legs to be at a 90-degree angle with your feet flat on the floor. • keep your shoulders back and spine straight. • tilt your hips forward and flex your abdominals tight. • tilt your hips backward as you stick your tailbone out. • move back and forth slowly, keeping your shoulders back. • repeat 10 times for 3 sets. 4. Superman lie on your stomach, face down, with your arms out in front of you. • lift arms, legs, and chest off the floor simultaneously while keeping your hips grounded. • hold for a minimum of two seconds. • lower back down slowly. • repeat 10 times for 3 sets. 6. Crunches lie flat on your back, placing your feet flat on the floor with your legs bent. • fold your arms across your chest and lift your torso up until your head, neck, and torso are off the ground. • hold for a moment before lowering back down. • repeat. 6. Quadruped arm opposite leg raises • kneel on the floor, lean forward, and place your hands palm-down on the floor. • make sure your back is straight, your knees are below your hips, and that your palms are directly below your shoulders. • raise one arm as you raise the opposite leg until both are aligned straight out from your body, parallel to your spine. • slowly lower both your arm and leg until you are back in the starting position. • switch arm and leg, and repeat. 7. Dead bug lie flat on the floor on your back. • lift your arms straight up from your body, reaching through the air. • raise one leg until it is at a 90-degree angle from your body. • slowly lower until it is in the starting position. • switch legs and repeat. 8. Hip bridge lie on your back with your knees bent and raised, your feet flat on the floor, and your arms at your sides. • keep your feet hip-distance apart and try to keep your leg in vertical alignment with your knee. • flex your glutes and push through your heels to raise your hips upward. Try to make a diagonal line from your shoulders to your knees. • hold for a short moment before lowering back down. • repeat 10 times for 3 sets. Upper back pain pushups this one may seem basic, but there’s no denying that pushups are one of the best ways to strengthen the pectoral muscles. These can be done on the knees or toes. If you’re not ready for full pushups, start with your hands resting on a solid surface higher than your feet — like a very sturdy coffee table or the edge of a couch, cushions removed, that’s pressed up against a wall — and start on the toes. Having your hands higher than your feet and your body at an angle can be a good way to start a pushup regimen. As you get stronger, you can begin to lower the angle of your body. This will help you transition to full pushups more easily than going from knees to toes. A full plank engages the muscles differently, even at an angle. When doing pushups, aim for 2 sets of 10 reps per day. 1.start in plank position with your hands under your shoulders and your core engaged. 2.as you lower, inhale. 3.as you engage your muscles to push yourself up, exhale. Keep your elbows hugging in close to your body. Keep your focus on slowly breathing as you do these, and on engaging the pectorals while keeping the core tight. Don’t just crank these out to get them done — this can compromise your form and do more harm than good. If the movement is really tough, break the sets into three or five to start, or find a higher point to begin after a week of exercise. If necessary, you can even stand and do pushups pushing against a wall. Chest fly for this exercise, you’ll need a bench or exercise ball as well as some dumbbells. If you don’t have weights, you can always use the old standby: a soup can in each hand. Just keep in mind that dumbbells are easier to hold and you can get more out of using them, as even 5-pound weights are heavier than your heaviest canned goods. 1.lie with your upper and middle back on a bench or ball, with your legs at a 90-degree angle. Hold a weight in each hand and extend your arms to the sky, elbows slightly bent. 2.as you inhale, lower your arms out wide, until your elbows are at shoulder height. 3.as you exhale, raise your hands until they meet above your chest again. 4.do 2 sets of 10. If that feels pretty easy, up it to 2 sets of 15 or increase the weight you’re using. Dumbbell row strengthening your back muscles is an important component of treating pectusexcavatum. The dumbbell row targets your lat muscles. The way it’s described below also strengthens your core, another important component of treating the condition. You’ll need some dumbbells to complete this move — err on the lighter side if you’ve never done a row before. 1.hold one dumbbell in each hand with your arms extended. Hinge at the hips until your upper body reaches a 45-degree angle. 2.keeping your neck in line with your spine and your gaze straight down, pull your elbows straight back and squeeze between your shoulder blades. 3.extend your arms back to the starting position. Complete 2 sets of 10. Dumbbell rear delt fly another move to strengthen your back, a dumbbell rear delt fly also focuses on the lats, as well as the rhomboids and the traps. Choose a light pair of dumbbells to complete this move and ensure that you’re pinching your shoulder blades together at the top to get the most out of it. 1.hold one dumbbell in each hand with your arms extended. Hinge at the hips until your upper body reaches a 45-degree angle and bring the dumbbells together. 2.keeping your spine and neck neutral, inhale and push the dumbbells out and up to the side until your arms are parallel to the floor. 3.exhale and return to the start in a slow and controlled motion. Complete 2 sets of 10. Exercise is a key component to treating pectusexcavatum. By strengthening your chest, back, and core muscles and stretching your chest cavity, you can combat the condition’s effects. Aim to complete these exercises several times a week to maximize results. For middle back pain side plank with rotation this exercise is an advanced version of the basic plank. It strengthens the arms, shoulders, and obliques by combining a side plank with arm movements. Lie on your right side with your right forearm below your shoulder. Extend your legs, left foot on top of right. Tighten your core. Lift your hips to form a straight line with your body. Raise your left arm straight up. Rotate your torso toward the floor and bring your left arm under your body. Rotate your torso and straighten your left arm to return to the starting position. Start with 1 set of 8–12 reps. Repeat on the other side. Bird dog with elbow to knee this variation on the basic bird dog incorporates fluid movement to engage your abs and back while improving core mobility. Start on all fours, hands below your shoulders and knees below your hips. Tighten your core. Lift and straighten your right leg to hip level. Simultaneously lift and extend your left arm to shoulder level, palm down. Bring your right knee and left elbow toward each other. Return to the starting position. Start with 1 set of 8–12 reps. Repeat on the other side bicycle crunch this classic exercise strengthens your abs by placing them under constant tension. Start on your back. Bend your knees and plant your feet on the floor at hip width. Line up your head and spine. Place yours behind your head, elbows pointing out to the sides. Tighten your core and move your shoulders back and down. Bend your right knee toward your chest and extend your left leg, lifting it a few inches off the floor. Lift your left shoulder and upper back, bringing your left elbow toward your right knee. Tap your left shoulder on the floor and simultaneously switch your legs. Continue alternating elbows and knees, starting with 1 set of12 reps.

My symptoms are neck pain, shoulder pain, face pain, burping and right hand and right leg pain 24x7 headache. I am exper ...
Ask Free Question
Neck pain cervical spondylosis– chronic condition with radiating pain this is cervical pain (neck pain) and that's the reason the pain radiates until the shoulder blades. If you keep ice that would help and along side you can do hot water fermentation. You shall use cervical collar which would help you to reduce the radiating pain ie. Due to the nerve compression. You have to go for traction and also you can do ift. Please consult the near bytherapist for quick relief. Use collar will definitely be helpful for him to maintain the good posture. And also cervical pillow can be used which might make you to have better posture of the shoulder neck and arm. 1.neck tilt: from the sitting position, tilt your head down so your chin touches your chest. Hold this position for 5 second s. Return to the starting position and repeat. Do this five times. 2.side-to-side neck tilt. From the same starting position, tilt you neck toward one shoulder, leading with your ear. Hold for 5 seconds and then return to the starting position. Do this five times on each side. 3.neck turn. Look straight ahead, then turn your head to one side, keeping your chin at the same level. Do this five times on each side. 4.neck stretch. Holding the rest of your body straight, push your chin forward, stretching your throat. Hold for 5 seconds. From the same starting position, push your chin backward and hold for 5 seconds. Do the forward and backward stretch five times each. If any of these exercises cause severe pain or weakness in your hands or arms, stop right away and talk with your doctor. We suggest you to wear cervical collar which will help you to improve the cervical angle and also it definitely helps you to improve the neck posture due to which your neck pain is triggered more. The importance of wearing cervical collar is to give good stability to the neck and also it definitely prevents you to have excess neck movements which makes the condition worse. If you wear cervical collar you cannot turn your neck as you like which itself will help you to have better functioning of the cervical spine. This cervical soft collar what we are suggesting for you is available at our clinic. If you want you can buy from us, if you are far away from chennai we can send you by courier. The reason why we are conveying you to buy from us is we can demonstrate over the videocall (using whatsapp) and also we can monitor you throughout when to wear it and how long to wear it. And also if you find any difficulty wearing the brace you can also revert back to us for few more suggestions and we can propose you good solution how to go about it.
Hello sir, I am preparing competitive exam but I have health issues due to 2015 accident. Problems headache, neck pain, ...
Ask Free Question
Kindly do exercises that are listed below 2. Standing extension how it helps – this standing extension helps reverse what you do on a daily basis (hunching)… since most bulging discs and herniated discs are caused by poor posture and repeated flexion of the spine (esp bending fwd in bad posture), this stretch helps push the disc back to neutral position. How to do it – begin this exercise by standing up with good posture. Now take both hands and place them on both sides of your lower back. Now with the help of your hands push your pelvis forward and extend your spine back. Follow the extension with your neck so that you end up facing the ceiling. – start with 10 repetitions and do 2-3 sets. – this one is particularly great to do when you need a break from sitting at your desk. ** this should not cause any pain. If you feel pain during it is not a good one for you. In that case, stop and try some of the other exercises below instead. 3. Half cobra pose (prone lumbar extension) how it helps – the half cobra stretch helps to push the disc material back towards the center of the inter-vertebral disc to allow for improved healing. The goal of repeated lower back extension is the “centralization of symptoms”, which basically means pain that travels down the affected leg to the foot should come back up closer to the low back – which will in turn alleviate the pain. How to do it – begin this exercise by lying on your stomach (prone position) and slowly prop yourself up on your elbows while keeping your hips in contact with the floor. – hold the prop-up position for 10-15 seconds before returning to the prone position (lying face down). – gradually increase to holding the end position for 30 seconds. Aim for 10 repetitions of this stretch. ** initially, you may not be able to tolerate this position very well, so make sure you start slowly and carefully. If there’s any pain, try a different exercise instead. 4. Full cobra pose (advanced extension) how it helps – this stretch is based on the same principle as the half cobra pose above. This advanced extension helps to push disc material back towards the center of the intervertebral disc, with the goal of alleviating pain symptoms. How to do it – once you’ve mastered the half cobra pose, you can increase the difficulty by moving to the advanced version of this stretch. Begin this exercise by lying on your stomach in the prone position (lying facing down) and slowly press up on your hands while keeping your pelvis in contact with the floor and lower back relaxed. – hold the prop-up position for 10 seconds. Aim for 10 repetitions of this stretch. – eventually try to hold this pose for longer if it feels good (20-30 seconds). ** if you feel pain during this exercise, it is not a good one for you. In that case, stop and try some of the other exercises instead. 5. Cat-cow how it helps – this is one of the most popular herniated disc exercises. By combining two yoga poses, the cat-cow stretch can help to relieve pressure on the herniated disc by opening the intervertebral disc space. It also improves mobility of the spine, which may help to relieve disc herniation pain and speed recovery. How to do it – begin this stretch on your hands and knees. Inhale and let your stomach “drop” towards the floor as you look up towards the ceiling. – follow this by exhaling and slowly rounding your spine while pressing into the floor with your hands and slightly curving your neck to look at your feet. – aim for 10 repetitions of this stretch and do 2-3 sets. How it helps – this exercise will help strengthen and stabilize your lower back and deep spine muscles. This will help you to maintain a good posture and avoid future episodes of herniated discs. How to do it: – begin on your hands and knees with your hands positioned under your shoulders and knees positioned under your hips. – raise your left arm and reach it forwards until it is aligned with your torso; at the same time, kick your right leg backwards until is it aligned with your torso. – hold this position for 2-3 seconds before slowly returning to the starting position. – repeat with your right arm and left leg. – alternate sides for 10 repetitions and do 2-3 sets. ** ensure that your head, neck, and back maintain a neutral alignment to minimize stress on your neck. Plank: how it helps – just like the bird dog, this “core” exercise will help bring your pelvis into right position by strengthening the deep spinal muscles and glutes (butt muscles). How to do it – begin lying on your stomach with your forearms against the mat. – engage your core and lift your body so that you are resting on your forearms and toes. – start with 10 second holds and work up to 30 second holds, do 2-3 sets. ** ensure to keep your back straight throughout the entire exercise – spine in neutral position. Thoracic expansion if you’re using a chair, sit facing forward and allow your upper body to fall over the back of the chair. Extend your arms above your head for a deeper stretch. Hold either position for 10 seconds and release. Repeat 3 times. Can tight neck muscles cause vertigo. Your inner ear might not be the culprit. Vertigo is the technical name for dizziness, especially the type where it feels like the room, or the patient, is spinning. Theneck structures most likely to cause vertigo are a muscle called the sternocleidomastoid (scm for short) and the uppermost joints of the spine shin pain 1.Keep your legs elevated. 2.Use ice packs to reduce swelling. Shop for cold compresses. 3.Take an over-the-counter anti-inflammatory, such as ibuprofen (advil) or naproxen sodium (aleve). Shop for ibuprofen and naproxen sodium. 4.Wear elastic compression bandages. 5.Use a foam roller to massage your shins. Finger stretch 1.Place your hand palm-down on a table or other flat surface. 2.Gently straighten your fingers as flat as you can against the surface without forcing your joints. 3.Hold for 30 to 60 seconds and then release. 4.Repeat at least four times with each hand. Scapular dyskinesis technique #1: overhead wall rollout this is a great exercise for retraining scapulohumeral rhythm and activating the serratus anterior as well as integrating shoulder flexion with core stability. 1.Stand leaning against a wall with an ab-wheel in your hands 2.Protract your scapulae 3.Slowly roll the ab-wheel up the wall and ensure you’re shrugging your shoulders to elevate your scapulae as your arms rise up while keeping tension in your core to avoid lumbar extension 4.Roll back down slowly and with control and return to the initial position. 5.Breathe naturally throughout the movement scapular dyskinesis technique #2: supine serratus activator this activation technique will help reset your scapulae in the correct position, while reactivating the inhibited posterior muscles of your shoulder. 1.Lay on your back with legs bent, feet flat and arms by your side 2.Bend your elbows so your fingers are pointing up towards the sky with palms facing together 3.Drive your elbows into the ground to activate the lats and posterior deltoids without trying to pinch your scapulae together 4.Picture your chest opening and the medial border of the scapulae moving up into your body and hold for 5 seconds 5.Relax briefly and repeat.

Last week I was diagnosed with urti with fever. The doctor gave me an alsolve-dm, nise tablet, zady 500, alex cough loze ...

Ask Free Question
Most likely it is because you are still recovering from the infection. Have good nutritious diet with ample fruits and vegetables and have good amount of water to hydrate yourself. Most likely you will be ok in a week.

I a 20 years old, masturbating from 12 years. My body becomes very week. All bones are very week some force on it it can ...

Ask Free Question
Hi, lybrate user, Excessive masturbation might cause weakness affecting your concentration with postural disorder causing curvature of bone and spine , restrict it to twice a week to remain healthy. Tk, homoeopathic medicine, underlying : @ Ustilago 30ch -5 drops, thrice. Avoid , junk food, alcohol and pornography. Tk, care.

I am getting too much neck pain, and due to this neck pain, I am getting headache. Please suggest me the foods for incre ...
Ask Free Question
Age? A person can ease the symptoms of cervical pain/spondylosis with a few simple neck exercises. 1. Neck stretch keep your body straight. Push your chin forward in a way that stretches the throat. Softly tense the neck muscles. Hold this for 5 seconds. Return your head to its center position. Push your head back with the chin held high, and hold for 5 seconds. Carry out 5 repetitions. 2. Neck tilt tilt your head forward so that the chin touches the chest. Softly tense the neck muscles. Hold this for 5 seconds. Return the head to a neutral position. Carry out 5 repetitions. 3. Neck tilt (side-to-side) lean your head down towards either shoulder, leading with the ear. Softly tense the neck muscles. Hold this for 5 seconds. Return your head to the center and repeat on the other shoulder. Carry out 5 repetitions. 4. Neck turn turn your head to one side as far as it remains comfortable, being sure to keep your chin at a level height. Tense your neck muscles for 5 seconds. Return the head to a central position. Repeat on the opposite side. Repeat this exercise 5 times on each side.
