
Gap Between Big Toe And Second Toe
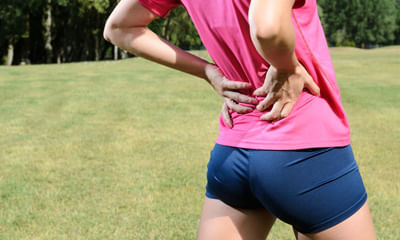
I am 26 years I have backache very badly from couple of months. Severe pain I am facing .what should I do? ...


Ask Free Question
Back pain can have causes that aren't due to underlying disease. Examples include overuse such as working out or lifting too much, prolonged sitting and lying down, sleeping in an uncomfortable position or wearing a poorly fitting backpack. Doing exercises to strengthen the lower back can help alleviate and prevent lower back pain. It can also strengthen the core, leg, and arm muscles. Exercise also increases blood flow to the lower back area, which may reduce stiffness and speed up the healing process. Below are exercises that strengthen the lower back and help manage lower back pain: 1. Bridges lie on the ground and bend the knees, placing the feet flat on the floor hip-width apart. Press the feet into the floor, keeping the arms by the sides. Raise the buttocks off the ground until the body forms a straight line from the shoulders to the knees. Squeeze the buttocks with the shoulders remaining on the floor. Lower the buttocks to the ground and rest for a few seconds. Repeat 15 times and then rest for 1 minute. Do 3 sets of 15 repetitions. 2. Knee-to-chest stretchesâ lie on the back on the floor. Bend the knees, keeping both feet flat on the floor. Use both hands to pull one knee in toward the chest. Hold the knee against the chest for 5 seconds, keeping the abdominals tight and pressing the spine into the floor. Return to the starting position. Repeat with the opposite leg. Repeat with each leg 2â3 times twice a day. 3. Lower back rotational stretchesâlie back on the floor with bent knees and feet flat on the ground. Keeping the shoulders firmly on the floor, gently roll both bent knees over to one side. Hold the position for 5â10 seconds. Return to the starting position. Gently roll the bent knees over to the opposite side, hold, and then return to the starting position. Repeat 2-3 times on each side twice a day. 4. Draw-in maneuversâ lie back on the floor with knees bent and feet flat, keeping the arms by the sides. Breathe in deeply. While breathing out, pull the bellybutton toward the spine, tightening the abdominal muscles and keeping the hips still. Hold the position for 5 seconds. Repeat 5 times. 5. Pelvic tiltsâ lie back on the floor with knees bent and feet flat, keeping the arms by the sides. Gently arch the lower back and push the stomach out. Hold for 5 seconds, then relax. Flatten the back and pull the bellybutton in toward the floor. Hold for 5 seconds, then relax. Increase the number of repetitions daily, building up to 30. 6. Lying lateral leg liftsâ lie on one side with the legs together. Keep the lower leg slightly bent. Draw the bellybutton into the spine to engage the core muscles. Raise the top leg about 18 inches, keeping it straight and extended. Hold the position for 2 seconds. Repeat 10 times. Turn onto the other side of the body and repeat, lifting the other leg. Perform 3 sets on each side. 7. Cat stretchesâ get onto the hands and knees with the knees hip-width apart. Arch the back, pulling the bellybutton up toward the spine. Slowly relax the muscles and allow the abdomen to sag toward the floor. Return to the starting position. Repeat 3â5 times twice a day. 8. Supermansâ lie face down on the ground and stretch both arms out in front of the body, keeping the legs stretched out and flat on the ground. Raise both the hands and feet, aiming to create a gap of about 6 inches between them and the floor. Try to pull in the bellybutton, lifting it off the floor to engage the core muscles. Keep the head straight and look at the floor to avoid neck injury. Stretch the hands and feet outward as far as possible. Hold the position for 2 seconds. Return to the starting position. Repeat 10 times. For this homeopathic treatment is very effective consult online with details.

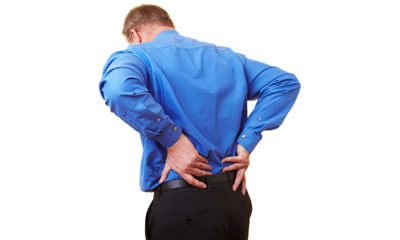
I have pain in the lower part of backbone just above the hip in the right side .from last seven days it is continuously ...

Ask Free Question
Anterior pelvic tilt 1.Lie on the back with the knees bent and feet flat on the floor, hip-width apart. 2.Squeeze the buttocks and tilt the pelvis upward. 3.The back should feel as though it is flattening to the ground. 4.Return to normal pelvis position. 5.Repeat 10–12 times 6..tb spine -spinal fusion surgery •tens (transcutaneous electrical neuromuscular stimulation) •aquatic therapy •overground training (walking program) •aerobic exercise •trunk strengthening studies examining the use of tens have shown higher frequencies are more effective in decreasing neuropathic pain. Aerobic exercise, pt, and trunk strengthening interventions have pt managment post-spinal decompression surgery •spinal stabilization exercises •maitland •back school •exercise and strengthening when compared with other physical therapy treatments and self-managment, spinal stabilization exercises were found to produce significantly more positive ratings in global outcomes. Pain and disability, however, did not show significant improvement when compared to the other two treatment options.[13] pt managmentpostall attained significant decreases in pain, psychological distress and disability.[14] postural correction exercise 1. Child’s pose this resting pose stretches and lengthens your spine, glutes, and hamstrings. The child’s pose helps to release tension in your lower back and neck. To do this: 1.Sit on your shinbones with your knees together, your big toes touching, and your heels splayed out to the side. 2.Fold forward at your hips and walk your hands out in front of you. 3.Sink your hips back down toward your feet. If your thighs won’t go all the way down, place a pillow or folded blanket under them for support. 4.Gently place your forehead on the floor or turn your head to one side. 5.Keep your arms extended or rest them along your body. 6.Breathe deeply into the back of your rib cage and waist. 7.Relax in this pose for up to 5 minutes while continuing to breathe deeply. 2. Forward fold this standing stretch releases tension in your spine, hamstrings, and glutes. It also stretches your hips and legs. While doing this stretch, you should feel the entire back side of your body opening up and lengthening. To do this: 1.Stand with your big toes touching and your heels slightly apart. 2.Bring your hands to your hips and fold forward at your hips. 3.Release your hands toward the floor or place them on a block. Don’t worry if your hands don’t touch the ground — just go as far as you can. 4.Bend your knees slightly, soften your hips joints, and allow your spine to lengthen. 5.Tuck your chin into your chest and allow your head to fall heavy to the floor. 6.Remain in this pose for up to 1 minute. 3. Cat cow practicing cat cow stretches and massages your spine. It also helps to relieve tension in your torso, shoulders, and neck while promoting blood circulation. To do this: 1.Come onto your hands and knees with your weight balanced evenly between all four points. 2.Inhale to look up, dropping your abdomen down toward the ground as you extend your spine. 3.Exhale and arch your spine toward the ceiling and tuck your chin into your chest. 4.Continue this movement for at least 1 minute. 4. Standing cat cow doing the cat cow stretch while standing helps to loosen up tightness in your back, hips, and glutes. To do this: 1.Stand with your feet about hip-width apart with a slight bend in your knees. 2.Extend your hands in front of you or place them on your thighs. 3.Lengthen your neck, bring your chin toward your chest, and round your spine. 4.Then look up, lift your chest, and move your spine in the opposite direction. 5.Hold each position for 5 breaths at a time. 6.Continue this movement for a few minutes. 5. Chest opener this exercise allows you to open and stretch your chest. This is especially useful if you spend most of your day sitting, which tends to make your chest move inward. Strengthening your chest also helps you stand up straighter. To do this: 1.Stand with your feet about hip-width apart. 2.Bring your arms behind you and interlace your fingers with your palms pressing together. Grasp a towel if your hands don’t reach each other. 3.Keep your head, neck, and spine in one line as you gaze straight ahead. 4.Inhale as you lift your chest toward the ceiling and bring your hands toward the floor. 5.Breathe deeply as you hold this pose for 5 breaths. 6.Release and relax for a few breaths. 7.Repeat at least 10 times. Ready to see how this all fits into an exercise plan? Check out our guide for better posture in 30 days. 6. High plank the high plank pose helps to relieve pain and stiffness throughout your body while strengthening your shoulders, glutes, and hamstrings. It also helps you develop balance and strength in your core and back, both important for good posture. To do this: 1.Come onto all fours and straighten your legs, lift your heels, and raise your hips. 2.Straighten your back and engage your abdominal, arm, and leg muscles. 3.Lengthen the back of your neck, soften your throat, and look down at the floor. 4.Make sure to keep your chest open and your shoulders back. 5.Hold this position for up to 1 minute at a time. 7. Side plank you can use a side plank to maintain the neutral alignment of your spine and legs. This energizing pose works the muscles in your sides and glutes. Strengthening and aligning these muscles helps to support your back and improve posture. To do this: 1.From a high plank position, bring your left hand slightly in to center. 2.Shift your weight onto your left hand, stack your ankles, and lift your hips. 3.Place your right hand on your hip or extend it up toward the ceiling. 4.You can drop your left knee down to the floor for extra support. 5.Engage your abdominals, side body, and glutes as you maintain this pose. 6.Align your body in a straight line from the crown of your head to your heels. 7.Look straight ahead of you or up toward your hand. 8.Hold this pose for up to 30 seconds. 9.Repeat on the opposite side. 8. Downward-facing dog this is a forward bend that can be used as a resting pose to balance out your body. The downward-facing dog pose helps to relieve back pain, while also strengthening and aligning your back muscles. Practicing it regularly helps to improve posture. To do this: 1.Lying with your stomach on the floor, press into your hands as you tuck your toes under your feet and lift your heels. 2.Lift your knees and hips to bring your sitting bones up toward the ceiling. 3.Bend your knees slightly and lengthen your spine. 4.Keep your ears in line with your upper arms or tuck your chin all the way into your chest. 5.Press firmly into your hands and keep your heels slightly lifted. 6.Remain in this pose for up to 1 minute. 9. Pigeon pose this is a hip opener that also loosens up your spine, hamstrings, and glutes. The pigeon pose can also help to stretch your sciatic nerve and quadriceps. Opening and stretching these places in your body makes it easier to correct imbalances in your posture. To do this: 1.Come down on all fours with your knees below your hips and your hands a little bit in front of your shoulders. 2.Bend your right knee and place it behind your right wrist with your right foot angled out to the left. 3.Rest the outside of your right shin on the floor. 4.Slide your left leg back, straighten your knee, and rest your thigh on the floor. 5.Make sure your left leg extends straight back (and not to the side). 6.Slowly lower your torso down to rest on your inner right thigh with your arms extended in front of you. 7.Hold this position for up to 1 minute. 8.Slowly release the position by walking your hands back toward your hips and lifting your torso. 9.Repeat on the left side. 10. Thoracic spine rotation this exercise relieves tightness and pain in your back while increasing stability and mobility. To do this: •come onto all fours and sink your hips back down to your heels and rest on your shins. •place your left hand behind your head with your elbow extended to the side. •keep your right hand under your shoulder or bring it to center and rest on your forearm. •exhale as you rotate your left elbow up toward the ceiling and stretch the front of your torso. •take one long inhale and exhale in this position. •release back down to the original position. •repeat this movement 5 to 10 times. •repeat on the opposite side. 11. Glute squeezes this exercise helps to strengthen and activate your glutes while relieving lower back pain. It also improves the functioning and alignment of your hips and pelvis, leading to better posture. To do this: 1.Lie on your back with your knees bent and your feet about hip-distance apart. 2.Keep your feet about a foot away from your hips. 3.Rest your arms alongside your body with your palms facing down. 4.Exhale as you bring your feet closer to your hips. 5.Hold this position for 10 seconds and then move them further away from your hips. 6.Continue this movement for 1 minute. 7.Do this exercise a few times per day. 12. Isometric rows this exercise helps to relieve pain and stiffness from sitting in one place for too long. Isometric pulls work your shoulder, arm, and back muscles, giving you the strength to maintain good posture. To do this: 1.Sit in a chair with a soft back. 2.Bend your arms so your fingers are facing forward and your palms are facing each other. 3.Exhale as you draw your elbows back into the chair behind you and squeeze your shoulder blades together. 4.Breathe deeply as you hold this position for 10 seconds. 5.On an inhale, slowly release to the starting position. 6.Repeat this movement for 1 minute. 7.Do this exercise several times throughout.
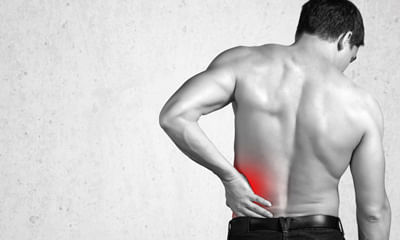
Hello sir/ma'am, when the pandemic began, I started doing home workout and weight lifting. After few months I felt back ...
Ask Free Question
Hi first of all if you have back pain the most important thing would be subside the immediately with the help of ice packs or by doing hot water fermentation. This is mandatory and this is the first and foremost thing you need to do. However exercises and physiotherapy exercises there is no big difference. The only difference is in general exercises you will concentrate more on fitness and you may not prevent moving rigorously your back. But in physiotherapy exercises for the back pain we initially concentrate only on the abdomen strengthening exercises and slowly we will teach you the spinal strengthening exercises which is mandatory. If you want we can help you to learn this from our end by doing a video call. Let us know. And also the general literature I am sharing here for you to have better understanding. However you can go for regular exercises but please avoid jogging and running as your back bone ie. The lower end of the lumbar vertebrae and the sacral vertebrae is inflamed and you need to give rest to that area by applying ice packs, doing hot water fermentation and also by wearing lumbo sacral corset. If you want that we can provide you the same as it definitely helps you to strengthen the abdominal muscles and also the abdominal muscle tone. Back pain / sciatica: back pain can affect people of any age, for different reasonsas people get older, the chance of developing lower back pain increases, due to factors such as previous occupation and degenerative disk disease. Lower back pain may be linked to the bony lumbar spine, discs between the vertebrae, ligaments around the spine and discs, spinal cord and nerves, lower back muscles, abdominal and pelvic internal organs, and the skin around the lumbar area. •acute pain starts suddenly and lasts for up to 6 weeks. •chronic or long-term pain develops over a longer period, lasts for over 3 months, and causes ongoing problems. Home advise: •resting from strenuous activity can help, but moving around will ease stiffness, reduce pain, and prevent muscles from weakening. •applying heat, ice, ultrasound, and electrical stimulation — as well as some muscle-release techniques to the back muscles and soft tissues — may help alleviate pain. •as the pain improves, the physical therapist may introduce some flexibility and strength exercises for the back and abdominal muscles. Techniques for improving posture may also help. •the patient will be encouraged to practice the techniques regularly, even after the pain has gone, to prevent back pain recurrence. Regular exercise helps build strength and control body weight. Guided, low-impact aerobic activities can boost heart health without straining or jerking the back. Before starting any exercise program, talk to a health care professional. There are two main types of exercise that people can do to reduce the risk of back pain: •core-strengthening exercises work the abdominal and back muscles, helping to strengthen muscles that protect the back. •flexibility training aims at improving core flexibility, including the spine, hips, and upper legs. We suggest you to wear lumbosacral corset (belt) which is available at our clinic. If you want you can buy from us, if you are far away from chennai we can send you by courier. The reason why we are conveying you to buy from us is we can demonstrate over the videocall (using whatsapp) and also we can monitor you throughout when to wear it and how long to wear it. And also if you find any difficulty wearing the brace you can also revert back to us for few more suggestions and we can propose you good solution how to go about it. Uses of lumbosacral corset (belt) a lumbosacral corset adds pressure to the intra-abdominal area. This adds stability to the spine. It is prescribed to people suffering from moderate to severe pain. Other benefits of using a lumbar spine belt are: 1.helps in a certain degree of immobilization of facet joints. 2.reduces pain to allow continuation of normal activities. 3.speeds up the healing process. 4.the pressure exerted by a lumbar spine belt helps in stretching the erector spine muscles. 5.this belt can also be used to support the lower back while exercising. Ohelps prevent rolling oprovides stability to lumbar and sacral regions of the back ocan be used when performing actions like lifting and handling heavy items ocan also be used when playing sports orestricts back movement to aid treatment of back problems do’s and don’ts sitting do: • sit as little as possible and then only for short periods. • place a supportive towel roll at the belt line of the back especially when sitting in a car. • when getting up from sitting, keep the normal curves in your back. Move to the front of the seat and stand up by straightening your legs. Avoid bending forward at the waist. • try to keep the normal curves in your back at all times. Don’t: • do not sit on a low soft couch with a deep seat. It will force you to sit with your hips lower than your knees and will round your back. You will loose the normal curve in your back. • do not place your legs straight out in front of you while sitting (e.g. Sitting in the bath tub). Standing do: • if you must stand for a long period of time, keep one leg up on a foot stool. • adapt work heights. Don’t: • avoid half bent positions. Lifting avoid lifting if you can. Do: • use the correct lifting technique. Keep your back straight when lifting. Never stoop or bend forward. Stand close to the load, have a firm footing and wide stance. Kneel on one knee, keeping the back straight. Have a secure grip on the load and lift by straightening your knees. Do a steady lift. Shift your feet to turn and do not twist your back. Don’t: • do not jerk when you lift. • do not bend over the object you are lifting. Lying do: • sleep on a good firm surface. • if your bed sags, use slats or plywood supports between the mattress and base to firm it. You also can place the mattress on the floor, a simple but temporary solution. • you may be more comfortable at night when you use a pillow for support. Don’t: • do not sleep on your stomach unless advised to do so by your doctor or physical therapist. Bending forward do: • keep the natural curves of your back when doing these and other activities: making a bed, vacuuming, sweeping or mopping the floor, weeding the garden or raking leaves. Coughing and sneezing do: • bend backwards to increase the curve of your back while you cough or sneeze. Driving a car do: • drive the car as little as possible. It is better to be a passenger than to drive yourself. • move the seat forward to the steering wheel. Your seat must be close enough to the wheel to keep the natural curves of your back. If your hips are lower than your knees in this position, raise yourself by sitting on a pillow. Exercises for low back pain safety guidelines • an increase in your low back pain can be expected with these exercises. This is acceptable as long as your leg symptoms are not increasing. • if while doing these exercises, your pain worsens or you have new pain or symptoms, stop the exercises and discuss your symptoms with your doctor or physical therapist. • stop exercising and let your doctor or physical therapist know right away if you have any change in your bowel or bladder control or any increase in weakness in your leg or foot. Exercises ‰ •press-ups: keep your back and buttocks relaxed and use your arms to press up. Concentrate on keeping your hips down and push up your upper body as high as possible. •double knee to chest: grasp both your knees with your hands and pull toward your shoulders. Hold the stretch for 1 second. Let your knees return, but keep them bent at arms length. ‰ •lumbar spine stretches: lie on your back. Bring your knees towards your chest. Rotate your knees towards the pain. •side-lying position: lie on your side and face forward. Have both arms straight in front and bend your knees. Turn your head as you move your top arm across your body as far as you can. Keep your arm in place and turn your head back to the starting position. Look back again and turn your head farther if you can. Bring your head and arm back to the starting position. Relax and repeat 10 times on each side. •hamstring stretch: lie on your back with your legs out straight. Raise your leg up and put your hands around the upper leg for support. Slowly straighten the raised knee until you feel a stretch in the back of the upper leg. Hold, then relax and repeat 10 times on each leg. •standing arch: stand with your feet apart and hands on the small of your back with fingers pointing backwards. Bend backwards at the waist, supporting the trunk with your hands. Keep your knees straight. Hold for 5 seconds. Repeat 3 to 5 times. Side glides: stand at a right angle to the wall about 2 feet o eliminate your pain improve your muscular endurance and strength attain better posture, balance, body awareness and co-ordination improve your balance and flexibility learn to lift properly. posture when standing: make sure you have a neutral pelvic position. Stand upright, head facing forward, back straight, and balance your weight evenly on both feet. Keep your legs straight and your head in line with your spine. Posture when sitting: a good seat for working should have good back support, arm rests and a swivel base. When sitting, try to keep your knees and hips level and keep your feet flat on the floor, or use a footstool. You should ideally be able to sit upright with support in the small of your back. If you are using a keyboard, make sure your elbows are at right-angles and that your forearms are horizontal. Shoes: flat shoes place less of a strain on the back. Driving: it is important to have proper support for your back. Make sure the wing mirrors are properly positioned so you do not need to twist. The pedals should be squarely in front of your feet. If you are on a long journey, have plenty of breaks. Get out of the car and walk around. Bed: you should have a mattress that keeps your spine straight, while at the same time supporting the weight of your shoulders and buttocks. Use a pillow, but not one that forces your neck into a steep angle. Posture supportspoor sitting posture is a common cause of sciatica. To assist the support of your lower back many simple and effective products have been developed over time. These include: lumbar d-roll bassett frame kinesiology lumbar tape please ask your physiotherapist for their advice in what will help you most. Exercise sciatic nerve pain 1. Reclining pigeon posepigeon pose is a common yoga pose. It works to open the hips. There are multiple versions of this stretch. The first is a starting version known as the reclining pigeon pose. If you are just starting your treatment, you should try the reclining pose first. 1.While on your back, bring your right leg up to a right angle. Clasp both hands behind the thigh, locking your fingers. 2.Lift your left leg and place your right on top of the left knee. 3.Hold the position for a moment. This helps stretch the tiny piriformis muscle, which sometimes becomes inflamed and presses against the sciatic nerve, causing pain. 4.Do the same exercise with the other leg. Once you can do the reclining version without pain, work with your physical therapist on the sitting and forward versions of pigeon pose. 2. Sitting pigeon pose 1.Sit on the floor with your legs stretched out straight in front of you. 2.Bend your right leg, putting your right ankle on top of the left knee. 3.Lean forward and allow your upper body to reach toward your thigh. 4.Hold for 15 to 30 seconds. This stretches the glutes and lower back. 5.Repeat on the other side. 3. Forward pigeon pose 1.Kneel on the floor on all fours. 2.Pick up your right leg and move it forward on the ground in front of your body. Your lower leg should be on the ground, horizontal to the body. Your right foot should be in front of your right knee while your right knee stays to the right. 3.Stretch the left leg out all the way behind you on the floor, with the top of the foot on the ground and toes pointing back. 4.Shift your body weight gradually from your arms to your legs so that your legs are supporting your weight. Sit up straight with your hands on either side of your legs. 5.Take a deep breath. While exhaling, lean your upper body forward over your front leg. Support your weight with your arms as much as possible. 6.Repeat on the other side. 7.4. Knee to opposite shoulder this simple stretch helps relieve sciatica pain by loosening your gluteal and piriformis muscles, which can become inflamed and press against the sciatic nerve. 1.Lie on your back with your legs extended and your feet flexed upward. 2.Bend your right leg and clasp your hands around the knee. 3.Gently pull your right leg ac 4.5.6.7.Ross your body toward your left shoulder. Hold it there for 30 seconds. Remember to pull your knee only as far as it will comfortably go. You should feel a relieving stretch in your muscle, not pain. 8.Push your knee so your leg returns to its starting position. 9.Repeat for a total of 3 reps, and then switch legs. 5.sitting spinal stretch sciatica pain is triggered when vertebrae in the spine compress. This stretch helps create space in the spine to relieve pressure on the sciatic nerve. 1.Sit on the ground with your legs extended straight out with your feet flexed upward. 2.Bend your right knee and place your foot flat on the floor on the outside of your opposite knee. 3.Place your left elbow on the outside of your right knee to help you gently turn your body toward the right. 4.Hold for 30 seconds and repeat three times, then switch sides. 6. Standing hamstring stretch this stretch can help ease pain and tightness in the hamstring caused by sciatica. 1.Place your right foot on an elevated surface at or below your hip level. This could be a chair, ottoman, or step on a staircase. Flex your foot so your toes and leg are straight. If your knee tends to hyperextend, keep a slight bend in it. 2.Bend your body forward slightly toward your foot. The further you go, the deeper the stretch. Do not push so far that you feel pain. 3.Release the hip of your raised leg downward as opposed to lifting it up. If you need help easing your hip down, loop a yoga strap or long exercise band over your right thigh and under your left foot. 4.Hold for at least 30 seconds, and then repeat on the other sideif you have low back pain and sciatica you can undergo intermittent pelvic traction where in your half of your body weight will be added in the electronic traction so that that would help you to reduce the pain, along with interferential therapy stimulations which would help you to get relieved from the radiating pain. Apply ice for the pain to get subsided immediately. If you cannot go immediately for the physiotherapy treatment. Ice can be kept in the low back where you have back pain. It is suggestible to wear lumbo sacral belt which would help you to build the abdominal muscle tone which itself would make you feel better. You can also wear mcr chappals which would help you to have less weight falling in the painful back. U have to take vitamin d rich foods. Likemilk,cheese, yogurt,brocoli, spinach.u need calcium consumption for increase the bone density. Lackof bone and bones crush inside the body this might be due to low calcium or vitamin d which has more impact on the bone density and also it makes one to feel that there is lack of bone strength or in a way the bones are brittle and almost breaking and they feel it is crushed in a way there are many bones breaking at the same time. You have to take vitamin d rich foods. Likemilk,cheese, yogurt, brocoli, spinach.u need calcium consumption for increase the bone density. vitamin d intake via supplements or exposure to low levels of sunlight. Vitamin d is used to absorb calcium in the bone and regulate calcium in the blood.
Hi doctor, is it abnormal to notice a slight increase in gap between the big toe and the second toe. Also the skin is li ...

Ask Free Question
Do an x-ray ray of that area ap and lat view take wax bath therapy for 20 days consultation with orthopaedic surgeon.
I am depressed since my fiance broke up in a single day after a live in relationship of 13 months showing ignorance has ...

Ask Free Question
7 Yoga Poses That Will Help You Fight Depression Some days, you dread getting up in the morning and facing the world. Hopelessness takes over, and you feel empty. If this recurs often, you are in trouble, my friend, as depression is knocking on your door. The sooner you find a solution, the better. Yoga is said to relieve depression naturally, and here’s a list of 7 yoga poses that will help you do so. Take a look. Before that, let’s get to know a few facts about depression. What Is Depression? Depression is an illness that affects your brain. It is your reaction to something sad, loss of someone, or dejection. When these feelings aggravate and become intense, it leads to a medical condition called clinical depression. You know you are depressed when you display the following symptoms consistently for two weeks. Symptoms Of Depression •You feel worthless and guilty on a daily basis. •Your concentration decreases and indecisiveness takes over. •All the hobbies and activities you enjoyed previously now don’t seem appealing at all. •You think about death and contemplate suicide. •You feel unstable and fidgety or incredibly dull and slow. •There will be a significant change in your weight – you either gain it or lose it. What Causes Depression? When you get emotionally attached to something over a period, and it doesn’t exist anymore, it leaves a gap, and depression takes over to cope with the loss. Genetics, fluctuation in the hormone levels, some medical conditions, post-surgery reaction, and high stress levels also cause depression. It is a common yet severe problem that needs to be tackled before it gets out of hand. Let’s now find out how to do that. Yoga As A Cure For Depression Yoga is one of the best ways to lighten your mood and keep depression at bay. Yoga poses increase blood circulation to the brain and enable the production of the mood-elevating hormones. The practice of yoga doesn’t have any adverse side effects, which make it a better option as compared to other medication for depression. Some yoga poses to fight depression are mentioned below. Try them for at least 12 weeks to notice significant changes. 7 Depression-Fighting Yoga Poses 1.Balasana (Child Pose) 2.Sethu Bandhasana (Bridge Pose) 3.Urdhva Mukha Svanasana (Upward-Facing Dog Pose) 4.Adho Mukha Svanasana (Downward-Facing Dog Pose) 5.Halasana (Plow Pose) 6.Uttanasana (Standing Forward Fold Pose) 7.Savasana (Corpse Pose) 1. Balasana (Child Pose) Balasana helps calm your brain and relieves stress and anxiety. It gently stretches your lower back and hips, enabling your body to relax. Peace and calm prevail over your entire being, helping you deal with your depression better. Balasana is considered as one of the most comfortable yoga poses. All you have to do is kneel and sit on your heels. Make sure your big toes touch each other. Keep your hands on your knees and spread your knees hip-width apart. Then, bend your torso forward, in between your divided thighs, with your face touching the ground. Bring your arms forward and place them on either side of your head, with the palms facing down. Be in this position for a few minutes. 2. Sethu Bandhasana (Bridge Pose) Sethu Bandhasana strengthens the back muscles and relieves a tired back. It helps you relax and works wonders for people suffering from stress, anxiety, and depression. Sethu Bandhasana opens up your heart, making you feel light and at ease. To do the pose, lie down on the floor on your back. Keep your arms on the floor on either side with the palms facing down. Lift your legs by folding them at the knees. Make sure the ankles and knees are in a straight line, and the feet are a few inches apart. Then, gently lift your entire back off the floor and stay there for a few seconds. While doing this, your thighs should be parallel to each other, and your chest should touch your chin. Make sure you do not bend your chin. 3. Urdhva Mukha Svanasana (Upward-Facing Dog Pose) Urdhva Mukha Svanasana can easily cure mild fatigue and depression. It has an overall rejuvenating effect on your body, and all the stress trapped in your back will vanish. Urdhva Mukha Svanasana strengthens and awakens your upper body. To do the asana, lie on the floor with your face down and legs following the same with the toes facing downward and a few inches apart. Place your palms near the chest on either side, facing down. Keep your palms close to your ribs. Lift your torso and straighten your arms and legs a few inches off the floor. Press the top part of your feet firmly into the ground. Keep your head straight or facing upwards and your shoulders away from your ears and let your chest rise. 4. Adho Mukha Svanasana (Downward-Facing Dog Pose) Adho Mukha Svanasana enables fresh blood to flow into your body. It stretches the neck and cervical spine, releasing the stress in them, thereby reducing anxiety and calming your being. Adho Mukha Svanasana strengthens your abdominal muscles and improves digestion. To do the pose, make a posture of a table with your body. Use your legs and hands to make the legs of the table and your back as the table top. Now, straighten your elbows and knees, pushing your hip upward and forming an inverted V-shape with your body. The hands should be shoulder-width apart, legs hips-width apart, and the toes pointing straight. Firmly press your hands to the ground and straighten your neck. Your ear should touch your inner arms. Keep your eye gaze at your navel. × 5. Halasana (Plow Pose) Halasana reduces the strain on your back and enhances your posture. It calms your brain, gives it a good stretch, and reduces stress. It keeps headaches and insomnia at bay. Halasana is one of the best calming poses for your nervous system. To do the pose, lie flat on your back, with your arms kept alongside your body. Lift your legs off the ground at an angle of 90 degrees to the ground. Then, place your hands on your hips and using them as support, lift your hips towards your chest. Slowly bring down your legs and take them over your head, touching the ground beyond your head and placing your toes firmly on the ground. Make sure your thighs are straight to avoid them touching your head. Remove your hands from the hips, straighten your arms forward, and place them on the ground with the palms facing downward. 6. Uttanasana (Standing Forward Fold Pose) Uttanasana relieves tension in your back, shoulders, and neck and improves the functioning of your nervous system. It calms you and reduces anxiety. Uttanasana also improves blood circulation. To do the asana, stand straight with your arms alongside your body and your feet at arms’ length. Now, place your arms on your hips and bend forward at the hips. Make your head and chest touch your thighs. Bring your hands down and put them beside your feet or hold your ankles from behind. Keep your thighs straight. 7. Savasana (Corpse Pose) Savasana rejuvenates you and helps your body relax. It reduces blood pressure and lets the effects of the previous poses to sink in better. Finally, after all the mind and body invigorating poses, Savasana will give you all the rest and scope to heal. To do the Savasana, lie on the floor on your back. Keep your feet a few inches apart and let them fall sideways. Let your arms lie alongside your body with your palms facing upwards. Now, gently close your eyes and let your whole body relax, slowly and gently. Take deep breaths, and stay in the moment. All the poses mentioned above will help relieve the emotional scars and trauma deeply ingrained in your physical and psychic body. Do give it a shot. Now, let’s look at some common queries regarding depression. Expert’s Answers For Readers’ Questions Is depression more prevalent in women than in men? Yes, depression is more common in women than in men. The biological and hormonal changes that women go through in their life may be factors responsible for this. What is Postpartum Depression (PDD)? Postpartum depression occurs in women after they give birth to a child. PDD occurs due to physical and hormonal changes in their body and the overwhelming feeling of taking care of a newborn. Is the rate of depression increasing? According to reports, the rate of depression is increasing. It could be due to the stress that comes with the modern way of living. How do people react when they are diagnosed with depression? The reactions vary from person to person. Usually, they are either comforted by the thought that their problem has been recognized or go through shock, sadness or feel ashamed that they have a mental illness. How common is depression? Depression is widespread and is prevalent in about 121 million people across the world. When you do yoga, you pay attention to your body. It makes you feel whole and connected. Yoga offers support and solace and the ability to live in the moment. The unique mind-body approach of yoga is more and more becoming the choice to fight depression. It is holistic and long-lasting without any side effects. So, why not?

Doctor I am very thin advice me Which types of exercise is good for gaining weight and attractive body. ...

Ask Free Question
Hi, There are certain yogasanas which will help you to gain weight. Yogasanas for gaining weight: Bhujangasana: Lie flat on your stomach. Place your hands on the side and ensure that your toes touch each other. Then, move your hands to the front, making sure they are at the shoulder level, and place your palms on the floor. Now, placing your body’s weight on your palms, slowly raise your head and trunk. Note that your arms should be bent at your elbows at this stage. You need to arch your neck backwards, in an attempt to replicate the cobra with the raised hood. Hold the asana for a few seconds, while breathing normally. Feel your stomach pressed against the floor. With practice, you should be able to hold the asana for up to two minutes. To release the pose, slowly bring your hands back to the sides, and rest your head on the ground by bringing your forehead in contact with the floor. Place your hands under your head. Then, slowly rest your head on one side and breathe. Repeat this pose thrice for best results. Contraindications: This exercise should be avoided if you suffer from hernia or have had an abdominal surgery recently. This asana should be avoided at all costs if you are pregnant or have a back injury. 2. Vajrasana: Kneel on your knees, making sure your calf muscles lie close together, and your big toes are crossed. Lower your upper body, placing your buttocks on your heels and your thighs on your calf muscles. Place your hands on your knees and ensure your upper body is erect. Breathe normally. Concentrate on how you inhale and exhale. You can close your eyes while you try to calm your mind. It might be a good idea to hold this position for about five to 10 minutes. If you feel a strain or pain in your legs, release the position. With regular practice, you could actually meditate in this position for as long as 30 minutes. Contraindications: It is best to avoid this asana if you are suffering from a knee problem or have undergone a knee surgery recently. If you are pregnant, make sure you keep your knees apart when you assume this position, or you might end up adding stress and pressure on your abdomen. 3. Pavanamuktasana: You need to lie flat on your back, ensuring your feet are together and that your arms are placed beside your body. Take a deep breath and bring both your knees towards your chest, pressing your thighs on your abdomen, while your hands clasp your lower legs, packaging your whole body. Take another deep breath. Lift your chest such that your chin fits into the gap between your knees as you exhale. Hold the position for as long as you are comfortable, adjusting the grip of your hands as you inhale and exhale while you hold. Rock up and down or roll from one side to another about five times before you release the pose. Exhale and release the pose. Repeat the pose thrice, leaving a 15-second interval between repetitions. Contraindications: This asana must be avoided if you have heart problems, hernia, high blood pressure, hyperacidity, slipped disc, back and neck problems, or testicle disorders. If you are in your second and third trimester of pregnancy or if you are menstruating, it is better to avoid doing this asana.
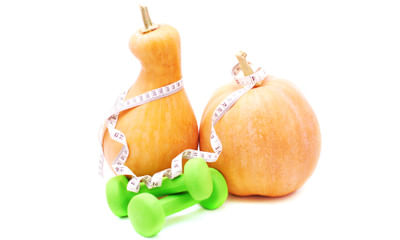
I want to lose my belly. But I am certain that what I do not understand. I want to reduce it. ...

Ask Free Question
Hye, Thanks for the query. You cannot work on a specific body part. You have to work on overall fat loss and toning. Try to eat small but frequent meals. Avoid long gaps in between meals. Drink a glass of lime water in the mornings to lush out your system & avoid bloating. Avoid junk as far as possible. Exercise at least 4 times a week. Include exercises that tone your back and abdominal muscles too. Include the following exercises in your workout routine. Exercises To Reduce Stomach Fat1) Crunches: There is no better exercise that you can think of to reduce belly fat than crunches. It will help you to easily burn stomach fat and if this exercise is coupled with a proper diet intake, then you can see effective results in quick time. Lie flat on your back on a mat. Bent your knees with your feet touching the ground. Now place your hands just behind your head. Take a deep breath and lift your upper body off the floor. You need to exhale when you are lifting your body. When you bring your body back to its original position you need to inhale. Once you come up you need to exhale. Do this for 10 times and then repeat for two or three more sets. 2) Reverse Crunches This is another exercise that will help you to easily get rid of stomach fat. Lie with your back on a mat. Raise your knees with the feet planted on the ground. Keep both the hands on either side of your body. Push your feet in such a way that your thighs are perpendicular to the ground and your feet are off the ground. Now lift your back such that your knees bend towards your chest. Inhale when you plant your feet on the ground and exhale when you lift your back and move your knees towards the chest. Repeat this for 10 times and for two more sets. 3) Twist Crunches This exercise routine is very similar to crunch exercise and here you will have to rotate your shoulder in the direction of the other shoulder. Lie down on the mat with your hands behind your head. Bend your knees and make sure that the feet do not touch the ground. Now move your upper body towards your knees like the crunch exercise. But, here you will have to make sure that you twist your right shoulder towards your left and the left torso must be on the ground. Repeat the same way on the other side. Here, you lift your left shoulder towards the right with the right torso resting on the ground. Repeat the same procedure for 10 to 12 times. 4) Vertical Leg CrunchLie with your back on the mat or the floor. Extend both your legs towards the ceiling and make sure that you cross one knee over the other. Now repeat the same what you have done in the crunch exercise. Breathe in when you lift and cross the knees and breathe out when you move your upper body towards your knees. Repeat this vertical crunch exercise for 10 to 15 times for three consecutive sets. 5) Side Crunches The side crunches will also help you to shed excess belly fat and will also help in providing a proper workout for your love handles. It is very much similar to the twist crunch exercise. The only difference here is that you will have to lift your right leg up when you are tilting your left shoulder towards the right shoulder and vice versa. Repeat for 10 to 12 times each side for 2 consecutive sets. 6) Bicycle Exercise This is yet another exercise that will help you to shed excess fat round your belly area easily. Lie flat on the floor or the mat and keep both the hands on either side of your head. Now lift both your legs from the ground and bend them at your knees. Now pull your right knee close to your chest with your left leg out. When you are bringing the right knee up you can try to meet your left elbow with your right knee to have a perfect stomach crunch. Now take your right leg out and bring your left knee close to your chest. Now, lift your upper body and make sure that your right elbow touches your left knee for a perfect crunch. Repeat this for 10 to 12 times for both the sides and for two consecutive sets. 7) Rolling Plank Exercise The rolling plank exercise is another popular exercise that will work great on your lower back, hip and abdomen areas. Take your position on the floor or a mat in such a way that your knees and elbows are resting on the ground. You need to look forward so that your neck is aligned with your spine. Now lift the knees up so that you support your legs now on your toes. Now contract your knees and keep it in this plank pose for about 30 seconds. Make sure that you breathe normally during this routine. Now move to and fro for the next half a minute to constitute a rolling plank exercise. Rolling Plank SidewaysLie on the floor in a sideways position. Support your weight on the right elbow and your right leg. Make sure that the right elbow is perpendicular to your right shoulder. Place the left leg above your right leg. Keep your knees straight and lift yourself in such a way that your hips are off the ground. Hold this position for about 30 seconds. Once you practice this position, you can hold to this position for 1 to 2 minutes. Do the same on the other side as well. 8) Lunge Twist If you are a beginner trying to work your belly to remove its excess fat, then you should first try out the lunge twist exercise. Move your left foot forward and bend your left knee. You will feel the hamstring stretch on your right leg. Now lift your hands parallel to the ground and make sure that they are in front of you. Take a big step forward with your left leg and sit down as if you are sitting on a chair. Your right leg should be positioned backwards and you must use your toes to support your right leg. Make sure that your upper body and the spine are in the upright position to perform perfect lunges. Now perform the same lunge exercise on the other leg. Repeat this for 15 times. 9) Side To Side Bending Bending side to side not just helps in reducing excess fat deposits in your stomach area, but it also helps in giving your love handles a perfect shape. Stand in an erect position with your feet together. Lift both your hands and stretch it above your head and make sure that they are clasped together. Now bend your body to your left side as much as possible until you feel a strain on your right side. Hold in this position for 15 seconds. Now come back to the same standing position. Now repeat the same on the right side. Now hold this position for about 15 seconds. Once you get comfortable holding on for 15 seconds, you can increase it to 30 seconds or more on both sides. 10) Stomach Vacuum If you are a beginner looking to do some exercises to reduce belly fat, then you should start with low impact exercises like stomach vacuum exercises. This is an exercise that concentrates mainly on breathing. Hit the ground on all fours by supporting your body on your knees and hands. Now take a deep breath and make sure that your abdomen is loose. Now exhale your breath and make sure that you hold your abdomen muscles tight during exhalation. You need to hold the abdomen contraction for about 15 to 30 seconds. Repeat this process for 15 times for two to three sets daily. 11) Captain’s Chair You will need a chair to do this exercise. It is a simple exercise that will help in reducing excess belly fat. Sit on the chair with an upright spine and straight shoulders. Place both your hands on either side with the palms of the hands facing downwards. Take a deep breath. Now as you exhale, make sure that you bring both your legs upwards such that your knees are very close to the chest. Hold in this position for 5 to 10 seconds. Do not arch your back or bend forwards when your knees are close to your chest. Now bring your legs back to the ground and repeat the same process for 15 times. Lastly be committed. Remember it's a lifestyle change and not a one time thing. It's a balanced intake that will last you longer. All the so called diets and singular ab exercises or ab machines ALONE will not give you targeted results. The fats will remain as it is. It's all about overall work out and balanced diet.
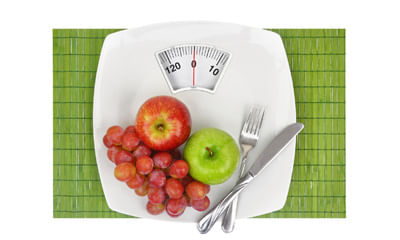
I have big belly. Can anyone suggest me how to reduce my belly fast? What diet I can take? What to eat and what not to e ...
Ask Free Question
Hye, Thanks for the query. You cannot work on a specific body part. You have to work on overall fat loss and toning. Try to eat small but frequent meals. Avoid long gaps in between meals. Drink a glass of lime water in the mornings to lush out your system & avoid bloating. Avoid junk as far as possible. Exercise at least 4 times a week. Include exercises that tone your back and abdominal muscles too. Include the following exercises in your workout routine. Exercises To Reduce Stomach Fat1) Crunches: There is no better exercise that you can think of to reduce belly fat than crunches. It will help you to easily burn stomach fat and if this exercise is coupled with a proper diet intake, then you can see effective results in quick time. Lie flat on your back on a mat. Bent your knees with your feet touching the ground. Now place your hands just behind your head. Take a deep breath and lift your upper body off the floor. You need to exhale when you are lifting your body. When you bring your body back to its original position you need to inhale. Once you come up you need to exhale. Do this for 10 times and then repeat for two or three more sets. 2) Reverse Crunches This is another exercise that will help you to easily get rid of stomach fat. Lie with your back on a mat. Raise your knees with the feet planted on the ground. Keep both the hands on either side of your body. Push your feet in such a way that your thighs are perpendicular to the ground and your feet are off the ground. Now lift your back such that your knees bend towards your chest. Inhale when you plant your feet on the ground and exhale when you lift your back and move your knees towards the chest. Repeat this for 10 times and for two more sets. 3) Twist Crunches This exercise routine is very similar to crunch exercise and here you will have to rotate your shoulder in the direction of the other shoulder. Lie down on the mat with your hands behind your head. Bend your knees and make sure that the feet do not touch the ground. Now move your upper body towards your knees like the crunch exercise. But, here you will have to make sure that you twist your right shoulder towards your left and the left torso must be on the ground. Repeat the same way on the other side. Here, you lift your left shoulder towards the right with the right torso resting on the ground. Repeat the same procedure for 10 to 12 times. 4) Vertical Leg CrunchLie with your back on the mat or the floor. Extend both your legs towards the ceiling and make sure that you cross one knee over the other. Now repeat the same what you have done in the crunch exercise. Breathe in when you lift and cross the knees and breathe out when you move your upper body towards your knees. Repeat this vertical crunch exercise for 10 to 15 times for three consecutive sets. 5) Side Crunches The side crunches will also help you to shed excess belly fat and will also help in providing a proper workout for your love handles. It is very much similar to the twist crunch exercise. The only difference here is that you will have to lift your right leg up when you are tilting your left shoulder towards the right shoulder and vice versa. Repeat for 10 to 12 times each side for 2 consecutive sets. 6) Bicycle Exercise This is yet another exercise that will help you to shed excess fat round your belly area easily. Lie flat on the floor or the mat and keep both the hands on either side of your head. Now lift both your legs from the ground and bend them at your knees. Now pull your right knee close to your chest with your left leg out. When you are bringing the right knee up you can try to meet your left elbow with your right knee to have a perfect stomach crunch. Now take your right leg out and bring your left knee close to your chest. Now, lift your upper body and make sure that your right elbow touches your left knee for a perfect crunch. Repeat this for 10 to 12 times for both the sides and for two consecutive sets. 7) Rolling Plank Exercise The rolling plank exercise is another popular exercise that will work great on your lower back, hip and abdomen areas. Take your position on the floor or a mat in such a way that your knees and elbows are resting on the ground. You need to look forward so that your neck is aligned with your spine. Now lift the knees up so that you support your legs now on your toes. Now contract your knees and keep it in this plank pose for about 30 seconds. Make sure that you breathe normally during this routine. Now move to and fro for the next half a minute to constitute a rolling plank exercise. Rolling Plank SidewaysLie on the floor in a sideways position. Support your weight on the right elbow and your right leg. Make sure that the right elbow is perpendicular to your right shoulder. Place the left leg above your right leg. Keep your knees straight and lift yourself in such a way that your hips are off the ground. Hold this position for about 30 seconds. Once you practice this position, you can hold to this position for 1 to 2 minutes. Do the same on the other side as well. 8) Lunge Twist If you are a beginner trying to work your belly to remove its excess fat, then you should first try out the lunge twist exercise. Move your left foot forward and bend your left knee. You will feel the hamstring stretch on your right leg. Now lift your hands parallel to the ground and make sure that they are in front of you. Take a big step forward with your left leg and sit down as if you are sitting on a chair. Your right leg should be positioned backwards and you must use your toes to support your right leg. Make sure that your upper body and the spine are in the upright position to perform perfect lunges. Now perform the same lunge exercise on the other leg. Repeat this for 15 times. 9) Side To Side Bending Bending side to side not just helps in reducing excess fat deposits in your stomach area, but it also helps in giving your love handles a perfect shape. Stand in an erect position with your feet together. Lift both your hands and stretch it above your head and make sure that they are clasped together. Now bend your body to your left side as much as possible until you feel a strain on your right side. Hold in this position for 15 seconds. Now come back to the same standing position. Now repeat the same on the right side. Now hold this position for about 15 seconds. Once you get comfortable holding on for 15 seconds, you can increase it to 30 seconds or more on both sides. 10) Stomach Vacuum If you are a beginner looking to do some exercises to reduce belly fat, then you should start with low impact exercises like stomach vacuum exercises. This is an exercise that concentrates mainly on breathing. Hit the ground on all fours by supporting your body on your knees and hands. Now take a deep breath and make sure that your abdomen is loose. Now exhale your breath and make sure that you hold your abdomen muscles tight during exhalation. You need to hold the abdomen contraction for about 15 to 30 seconds. Repeat this process for 15 times for two to three sets daily. 11) Captain’s Chair You will need a chair to do this exercise. It is a simple exercise that will help in reducing excess belly fat. Sit on the chair with an upright spine and straight shoulders. Place both your hands on either side with the palms of the hands facing downwards. Take a deep breath. Now as you exhale, make sure that you bring both your legs upwards such that your knees are very close to the chest. Hold in this position for 5 to 10 seconds. Do not arch your back or bend forwards when your knees are close to your chest. Now bring your legs back to the ground and repeat the same process for 15 times. Lastly be committed. Remember it's a lifestyle change and not a one time thing. It's a balanced intake that will last you longer. All the so called diets and singular ab exercises or ab machines ALONE will not give you targeted results. The fats will remain as it is. It's all about overall work out and balanced diet. Your ideal weight is 70 kgs as per height.
My friend is about 5feet10 inch and he is perfect with his body but only has got some belly fat please tell how could he ...
Ask Free Question
Hye, Thanks for the query. You cannot work on a specific body part. You have to work on overall fat loss and toning. Try to eat small but frequent meals. Avoid long gaps in between meals. Drink a glass of lime water in the mornings to lush out your system & avoid bloating. Avoid junk as far as possible. Exercise at least 4 times a week. Include exercises that tone your back and abdominal muscles too. Lastly be committed. Remember it's a lifestyle change and not a one time thing. It's a balanced intake that will last you longer. All the so called diets and singular ab exercises or ab machines ALONE will not give you targeted results. Add them to your exercise routine. Do not do them exclusively, or the fats will remain as it is. Exercises To Reduce Stomach Fat1) Crunches: There is no better exercise that you can think of to reduce belly fat than crunches. It will help you to easily burn stomach fat and if this exercise is coupled with a proper diet intake, then you can see effective results in quick time. Lie flat on your back on a mat. Bent your knees with your feet touching the ground. Now place your hands just behind your head. Take a deep breath and lift your upper body off the floor. You need to exhale when you are lifting your body. When you bring your body back to its original position you need to inhale. Once you come up you need to exhale. Do this for 10 times and then repeat for two or three more sets. 2) Reverse Crunches This is another exercise that will help you to easily get rid of stomach fat. Lie with your back on a mat. Raise your knees with the feet planted on the ground. Keep both the hands on either side of your body. Push your feet in such a way that your thighs are perpendicular to the ground and your feet are off the ground. Now lift your back such that your knees bend towards your chest. Inhale when you plant your feet on the ground and exhale when you lift your back and move your knees towards the chest. Repeat this for 10 times and for two more sets. 3) Twist Crunches This exercise routine is very similar to crunch exercise and here you will have to rotate your shoulder in the direction of the other shoulder. Lie down on the mat with your hands behind your head. Bend your knees and make sure that the feet do not touch the ground. Now move your upper body towards your knees like the crunch exercise. But, here you will have to make sure that you twist your right shoulder towards your left and the left torso must be on the ground. Repeat the same way on the other side. Here, you lift your left shoulder towards the right with the right torso resting on the ground. Repeat the same procedure for 10 to 12 times. 4) Vertical Leg CrunchLie with your back on the mat or the floor. Extend both your legs towards the ceiling and make sure that you cross one knee over the other. Now repeat the same what you have done in the crunch exercise. Breathe in when you lift and cross the knees and breathe out when you move your upper body towards your knees. Repeat this vertical crunch exercise for 10 to 15 times for three consecutive sets. 5) Side Crunches The side crunches will also help you to shed excess belly fat and will also help in providing a proper workout for your love handles. It is very much similar to the twist crunch exercise. The only difference here is that you will have to lift your right leg up when you are tilting your left shoulder towards the right shoulder and vice versa. Repeat for 10 to 12 times each side for 2 consecutive sets. 6) Bicycle Exercise This is yet another exercise that will help you to shed excess fat round your belly area easily. Lie flat on the floor or the mat and keep both the hands on either side of your head. Now lift both your legs from the ground and bend them at your knees. Now pull your right knee close to your chest with your left leg out. When you are bringing the right knee up you can try to meet your left elbow with your right knee to have a perfect stomach crunch. Now take your right leg out and bring your left knee close to your chest. Now, lift your upper body and make sure that your right elbow touches your left knee for a perfect crunch. Repeat this for 10 to 12 times for both the sides and for two consecutive sets. 7) Rolling Plank Exercise The rolling plank exercise is another popular exercise that will work great on your lower back, hip and abdomen areas. Take your position on the floor or a mat in such a way that your knees and elbows are resting on the ground. You need to look forward so that your neck is aligned with your spine. Now lift the knees up so that you support your legs now on your toes. Now contract your knees and keep it in this plank pose for about 30 seconds. Make sure that you breathe normally during this routine. Now move to and fro for the next half a minute to constitute a rolling plank exercise. Rolling Plank SidewaysLie on the floor in a sideways position. Support your weight on the right elbow and your right leg. Make sure that the right elbow is perpendicular to your right shoulder. Place the left leg above your right leg. Keep your knees straight and lift yourself in such a way that your hips are off the ground. Hold this position for about 30 seconds. Once you practice this position, you can hold to this position for 1 to 2 minutes. Do the same on the other side as well. 8) Lunge Twist If you are a beginner trying to work your belly to remove its excess fat, then you should first try out the lunge twist exercise. Move your left foot forward and bend your left knee. You will feel the hamstring stretch on your right leg. Now lift your hands parallel to the ground and make sure that they are in front of you. Take a big step forward with your left leg and sit down as if you are sitting on a chair. Your right leg should be positioned backwards and you must use your toes to support your right leg. Make sure that your upper body and the spine are in the upright position to perform perfect lunges. Now perform the same lunge exercise on the other leg. Repeat this for 15 times. 9) Side To Side Bending Bending side to side not just helps in reducing excess fat deposits in your stomach area, but it also helps in giving your love handles a perfect shape. Stand in an erect position with your feet together. Lift both your hands and stretch it above your head and make sure that they are clasped together. Now bend your body to your left side as much as possible until you feel a strain on your right side. Hold in this position for 15 seconds. Now come back to the same standing position. Now repeat the same on the right side. Now hold this position for about 15 seconds. Once you get comfortable holding on for 15 seconds, you can increase it to 30 seconds or more on both sides. 10) Stomach Vacuum If you are a beginner looking to do some exercises to reduce belly fat, then you should start with low impact exercises like stomach vacuum exercises. This is an exercise that concentrates mainly on breathing. Hit the ground on all fours by supporting your body on your knees and hands. Now take a deep breath and make sure that your abdomen is loose. Now exhale your breath and make sure that you hold your abdomen muscles tight during exhalation. You need to hold the abdomen contraction for about 15 to 30 seconds. Repeat this process for 15 times for two to three sets daily. 11) Captain’s Chair You will need a chair to do this exercise. It is a simple exercise that will help in reducing excess belly fat. Sit on the chair with an upright spine and straight shoulders. Place both your hands on either side with the palms of the hands facing downwards. Take a deep breath. Now as you exhale, make sure that you bring both your legs upwards such that your knees are very close to the chest. Hold in this position for 5 to 10 seconds. Do not arch your back or bend forwards when your knees are close to your chest. Now bring your legs back to the ground and repeat the same process for 15 times. It's all about overall work out and balanced diet.
I am 25 years old M, I have gained weight near my belly and I want to reduce belly fat. Can you pls advise a diet plan. ...
Ask Free Question
Hye, Thanks for the query. You cannot work on a specific body part. You have to work on overall fat loss and toning. Try to eat small but frequent meals. Avoid long gaps in between meals. Drink a glass of lime water in the mornings to lush out your system & avoid bloating. Avoid junk as far as possible. Exercise at least 4 times a week. Include exercises that tone your back and abdominal muscles too. Lastly be committed. Remember it's a lifestyle change and not a one time thing. It's a balanced intake that will last you longer. All the so called diets and singular ab exercises or ab machines ALONE will not give you targeted results. Include the following exercises in your routine. Or the fats will remain as it is. Exercises To Reduce Stomach Fat1) Crunches: There is no better exercise that you can think of to reduce belly fat than crunches. It will help you to easily burn stomach fat and if this exercise is coupled with a proper diet intake, then you can see effective results in quick time. Lie flat on your back on a mat. Bent your knees with your feet touching the ground. Now place your hands just behind your head. Take a deep breath and lift your upper body off the floor. You need to exhale when you are lifting your body. When you bring your body back to its original position you need to inhale. Once you come up you need to exhale. Do this for 10 times and then repeat for two or three more sets. 2) Reverse Crunches This is another exercise that will help you to easily get rid of stomach fat. Lie with your back on a mat. Raise your knees with the feet planted on the ground. Keep both the hands on either side of your body. Push your feet in such a way that your thighs are perpendicular to the ground and your feet are off the ground. Now lift your back such that your knees bend towards your chest. Inhale when you plant your feet on the ground and exhale when you lift your back and move your knees towards the chest. Repeat this for 10 times and for two more sets. 3) Twist Crunches This exercise routine is very similar to crunch exercise and here you will have to rotate your shoulder in the direction of the other shoulder. Lie down on the mat with your hands behind your head. Bend your knees and make sure that the feet do not touch the ground. Now move your upper body towards your knees like the crunch exercise. But, here you will have to make sure that you twist your right shoulder towards your left and the left torso must be on the ground. Repeat the same way on the other side. Here, you lift your left shoulder towards the right with the right torso resting on the ground. Repeat the same procedure for 10 to 12 times. 4) Vertical Leg CrunchLie with your back on the mat or the floor. Extend both your legs towards the ceiling and make sure that you cross one knee over the other. Now repeat the same what you have done in the crunch exercise. Breathe in when you lift and cross the knees and breathe out when you move your upper body towards your knees. Repeat this vertical crunch exercise for 10 to 15 times for three consecutive sets. 5) Side Crunches The side crunches will also help you to shed excess belly fat and will also help in providing a proper workout for your love handles. It is very much similar to the twist crunch exercise. The only difference here is that you will have to lift your right leg up when you are tilting your left shoulder towards the right shoulder and vice versa. Repeat for 10 to 12 times each side for 2 consecutive sets. 6) Bicycle Exercise This is yet another exercise that will help you to shed excess fat round your belly area easily. Lie flat on the floor or the mat and keep both the hands on either side of your head. Now lift both your legs from the ground and bend them at your knees. Now pull your right knee close to your chest with your left leg out. When you are bringing the right knee up you can try to meet your left elbow with your right knee to have a perfect stomach crunch. Now take your right leg out and bring your left knee close to your chest. Now, lift your upper body and make sure that your right elbow touches your left knee for a perfect crunch. Repeat this for 10 to 12 times for both the sides and for two consecutive sets. 7) Rolling Plank Exercise The rolling plank exercise is another popular exercise that will work great on your lower back, hip and abdomen areas. Take your position on the floor or a mat in such a way that your knees and elbows are resting on the ground. You need to look forward so that your neck is aligned with your spine. Now lift the knees up so that you support your legs now on your toes. Now contract your knees and keep it in this plank pose for about 30 seconds. Make sure that you breathe normally during this routine. Now move to and fro for the next half a minute to constitute a rolling plank exercise. Rolling Plank SidewaysLie on the floor in a sideways position. Support your weight on the right elbow and your right leg. Make sure that the right elbow is perpendicular to your right shoulder. Place the left leg above your right leg. Keep your knees straight and lift yourself in such a way that your hips are off the ground. Hold this position for about 30 seconds. Once you practice this position, you can hold to this position for 1 to 2 minutes. Do the same on the other side as well. 8) Lunge Twist If you are a beginner trying to work your belly to remove its excess fat, then you should first try out the lunge twist exercise. Move your left foot forward and bend your left knee. You will feel the hamstring stretch on your right leg. Now lift your hands parallel to the ground and make sure that they are in front of you. Take a big step forward with your left leg and sit down as if you are sitting on a chair. Your right leg should be positioned backwards and you must use your toes to support your right leg. Make sure that your upper body and the spine are in the upright position to perform perfect lunges. Now perform the same lunge exercise on the other leg. Repeat this for 15 times. 9) Side To Side Bending Bending side to side not just helps in reducing excess fat deposits in your stomach area, but it also helps in giving your love handles a perfect shape. Stand in an erect position with your feet together. Lift both your hands and stretch it above your head and make sure that they are clasped together. Now bend your body to your left side as much as possible until you feel a strain on your right side. Hold in this position for 15 seconds. Now come back to the same standing position. Now repeat the same on the right side. Now hold this position for about 15 seconds. Once you get comfortable holding on for 15 seconds, you can increase it to 30 seconds or more on both sides. 10) Stomach Vacuum If you are a beginner looking to do some exercises to reduce belly fat, then you should start with low impact exercises like stomach vacuum exercises. This is an exercise that concentrates mainly on breathing. Hit the ground on all fours by supporting your body on your knees and hands. Now take a deep breath and make sure that your abdomen is loose. Now exhale your breath and make sure that you hold your abdomen muscles tight during exhalation. You need to hold the abdomen contraction for about 15 to 30 seconds. Repeat this process for 15 times for two to three sets daily. 11) Captain’s Chair You will need a chair to do this exercise. It is a simple exercise that will help in reducing excess belly fat. Sit on the chair with an upright spine and straight shoulders. Place both your hands on either side with the palms of the hands facing downwards. Take a deep breath. Now as you exhale, make sure that you bring both your legs upwards such that your knees are very close to the chest. Hold in this position for 5 to 10 seconds. Do not arch your back or bend forwards when your knees are close to your chest. Now bring your legs back to the ground and repeat the same process for 15 times. It's all about overall work out and balanced diet.
