
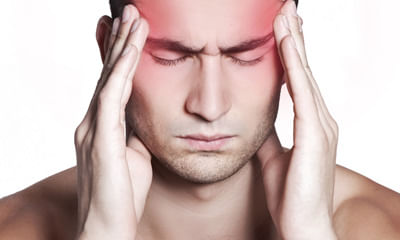
Blood Patch For Spinal Headache
I am 20 year old boy I have backache, headache, fatigue since 3 months. I have water brash problem since 4 months and my ...


Ask Free Question
Kindly do these exercises. Back pain is described as acute or chronic based on how long you’ve had it. Acute pain lasts days to weeks, subacute pain lasts six weeks to three months, and chronic pain lasts longer than three months. Things that make it better or worse back pain may get worse with movement or if you sit or stand for a long time. It may get better if you switch positions or walk around. Accompanying symptoms other symptoms you may experience with back pain include: •the painful spot looking swollen and feeling tender to the touch •a muscle spasm in the painful area •numbness or weakness in one or both of your legs (if the pain is due to a nerve issue) if you find you have back pain and can’t hold your urine or bowel movements, something is pressing on your spinal nerves, and you should be evaluated immediately. This condition, called cauda equina syndrome, can cause severe long-term damage to your spinal nerves if not treated right away. 6 imbalances that cause pain—and how to fix them "pain is a medical condition and a medical issue, says brett jones, owner of applied strength in pittsburgh who is certified for the functional movement screen, a system of tests and cor rective exercise strategies. "it's a warning sign. The pain is there to tell you something's wrong. And that warning sign could be more serious than "you're going too hard. Jones and the other coaches consulted for this piece all had a horror story to tell-when pain in a client meant a more serious condition such as a nerve issue, thyroid issue, or even cancer. The point: if you experience regular pain while exercising-or when you're not-go to the doctor. If you've been cleared by a doc and you're still feeling discomfort, try these simple tests to see what's truly causing the pain-it could be related to an imbalance in a completely different part of your body. The good news: with these drills, stretches, and corrective exercises, you may be able to fix them-no doctors necessary. 1. Standing extension how it helps – this standing extension helps reverse what you do on a daily basis (hunching)… since most bulging discs and herniated discs are caused by poor posture and repeated flexion of the spine (esp bending fwd in bad posture), this stretch helps push the disc back to neutral position. How to do it – begin this exercise by standing up with good posture. Now take both hands and place them on both sides of your lower back. Now with the help of your hands push your pelvis forward and extend your spine back. Follow the extension with your neck so that you end up facing the ceiling. – start with 10 repetitions and do 2-3 sets. – this one is particularly great to do when you need a break from sitting at your desk. ** this should not cause any pain. If you feel pain during it is not a good one for you. In that case, stop and try some of the other exercises below instead. 2. Half cobra pose (prone lumbar extension) how it helps – the half cobra stretch helps to push the disc material back towards the center of the inter-vertebral disc to allow for improved healing. The goal of repeated lower back extension is the “centralization of symptoms”, which basically means pain that travels down the affected leg to the foot should come back up closer to the low back – which will in turn alleviate the pain. How to do it – begin this exercise by lying on your stomach (prone position) and slowly prop yourself up on your elbows while keeping your hips in contact with the floor. – hold the prop-up position for 10-15 seconds before returning to the prone position (lying face down). – gradually increase to holding the end position for 30 seconds. Aim for 10 repetitions of this stretch. ** initially, you may not be able to tolerate this position very well, so make sure you start slowly and carefully. If there’s any pain, try a different exercise instead. 3. Full cobra pose (advanced extension) how it helps – this stretch is based on the same principle as the half cobra pose above. This advanced extension helps to push disc material back towards the center of the intervertebral disc, with the goal of alleviating pain symptoms. How to do it – once you’ve mastered the half cobra pose, you can increase the difficulty by moving to the advanced version of this stretch. Begin this exercise by lying on your stomach in the prone position (lying facing down) and slowly press up on your hands while keeping your pelvis in contact with the floor and lower back relaxed. – hold the prop-up position for 10 seconds. Aim for 10 repetitions of this stretch. – eventually try to hold this pose for longer if it feels good (20-30 seconds). ** if you feel pain during this exercise, it is not a good one for you. In that case, stop and try some of the other exercises instead. 4. Cat-cow how it helps – this is one of the most popular herniated disc exercises. By combining two yoga poses, the cat-cow stretch can help to relieve pressure on the herniated disc by opening the intervertebral disc space. It also improves mobility of the spine, which may help to relieve disc herniation pain and speed recovery. How to do it – begin this stretch on your hands and knees. Inhale and let your stomach “drop” towards the floor as you look up towards the ceiling. – follow this by exhaling and slowly rounding your spine while pressing into the floor with your hands and slightly curving your neck to look at your feet. – aim for 10 repetitions of this stretch and do 2-3 sets. How it helps – this exercise will help strengthen and stabilize your lower back and deep spine muscles. This will help you to maintain a good posture and avoid future episodes of herniated discs. How to do it: – begin on your hands and knees with your hands positioned under your shoulders and knees positioned under your hips. – raise your left arm and reach it forwards until it is aligned with your torso; at the same time, kick your right leg backwards until is it aligned with your torso. – hold this position for 2-3 seconds before slowly returning to the starting position. – repeat with your right arm and left leg. – alternate sides for 10 repetitions and do 2-3 sets. ** ensure that your head, neck, and back maintain a neutral alignment to minimize stress on your neck. 5.plank: how it helps – just like the bird dog, this “core” exercise will help bring your pelvis into right position by strengthening the deep spinal muscles and glutes (butt muscles). How to do it – begin lying on your stomach with your forearms against the mat. – engage your core and lift your body so that you are resting on your forearms and toes. – start with 10 second holds and work up to 30 second holds, do 2-3 sets. ** ensure to keep your back straight throughout the entire exercise – spine in neutral position. Thoracic expansion if you’re using a chair, sit facing forward and allow your upper body to fall over the back of the chair. Extend your arms above your head for a deeper stretch. Hold either position for 10 seconds. 1. Plank the world record for the longest plank is 8 hours. Luckily, you don’t need to hold it that long for the exercise to have an effect! in fact. You can hold it for 10-15 seconds. • the plank is similar to a push-up position, but instead of resting on your hands, you rest on your elbows and bring them directly underneath your chest. • after kneeling, lean forward and place your elbows on the ground directly below your shoulders. • lift your knees off of the floor and push your feet back. Ensure your back is straight and keep your neck aligned with the rest of your spine. • hold the position and tighten your core muscles for the desired time. 2. Side plank just like the original plank, but only balancing on one side. • lie on the floor on your side, facing sideways with your feet together. • lift up your body until you are supporting yourself with your elbow, directly below your shoulder. • raise your hips until your body is in a straight line and tighten your core muscles; your body should create a slant from your shoulders to your feet. • hold this position without dropping your hips. • repeat on the opposite side. 3. Pelvic tilt with exercise ball sit on a ball that allows your legs to be at a 90-degree angle with your feet flat on the floor. • keep your shoulders back and spine straight. • tilt your hips forward and flex your abdominals tight. • tilt your hips backward as you stick your tailbone out. • move back and forth slowly, keeping your shoulders back. • repeat 10 times for 3 sets. 4. Superman lie on your stomach, face down, with your arms out in front of you. • lift arms, legs, and chest off the floor simultaneously while keeping your hips grounded. • hold for a minimum of two seconds. • lower back down slowly. • repeat 10 times for 3 sets. 6. Crunches lie flat on your back, placing your feet flat on the floor with your legs bent. • fold your arms across your chest and lift your torso up until your head, neck, and torso are off the ground. • hold for a moment before lowering back down. • repeat. 6. Quadruped arm opposite leg raises • kneel on the floor, lean forward, and place your hands palm-down on the floor. • make sure your back is straight, your knees are below your hips, and that your palms are directly below your shoulders. • raise one arm as you raise the opposite leg until both are aligned straight out from your body, parallel to your spine. • slowly lower both your arm and leg until you are back in the starting position. • switch arm and leg, and repeat. 7. Dead bug lie flat on the floor on your back. • lift your arms straight up from your body, reaching through the air. • raise one leg until it is at a 90-degree angle from your body. • slowly lower until it is in the starting position. • switch legs and repeat. 8. Hip bridge lie on your back with your knees bent and raised, your feet flat on the floor, and your arms at your sides. • keep your feet hip-distance apart and try to keep your leg in vertical alignment with your knee. • flex your glutes and push through your heels to raise your hips upward. Try to make a diagonal line from your shoulders to your knees. • hold for a short moment before lowering back down. • repeat 10 times for 3 sets. Upper back pain pushups this one may seem basic, but there’s no denying that pushups are one of the best ways to strengthen the pectoral muscles. These can be done on the knees or toes. If you’re not ready for full pushups, start with your hands resting on a solid surface higher than your feet — like a very sturdy coffee table or the edge of a couch, cushions removed, that’s pressed up against a wall — and start on the toes. Having your hands higher than your feet and your body at an angle can be a good way to start a pushup regimen. As you get stronger, you can begin to lower the angle of your body. This will help you transition to full pushups more easily than going from knees to toes. A full plank engages the muscles differently, even at an angle. When doing pushups, aim for 2 sets of 10 reps per day. 1.start in plank position with your hands under your shoulders and your core engaged. 2.as you lower, inhale. 3.as you engage your muscles to push yourself up, exhale. Keep your elbows hugging in close to your body. Keep your focus on slowly breathing as you do these, and on engaging the pectorals while keeping the core tight. Don’t just crank these out to get them done — this can compromise your form and do more harm than good. If the movement is really tough, break the sets into three or five to start, or find a higher point to begin after a week of exercise. If necessary, you can even stand and do pushups pushing against a wall. Chest fly for this exercise, you’ll need a bench or exercise ball as well as some dumbbells. If you don’t have weights, you can always use the old standby: a soup can in each hand. Just keep in mind that dumbbells are easier to hold and you can get more out of using them, as even 5-pound weights are heavier than your heaviest canned goods. 1.lie with your upper and middle back on a bench or ball, with your legs at a 90-degree angle. Hold a weight in each hand and extend your arms to the sky, elbows slightly bent. 2.as you inhale, lower your arms out wide, until your elbows are at shoulder height. 3.as you exhale, raise your hands until they meet above your chest again. 4.do 2 sets of 10. If that feels pretty easy, up it to 2 sets of 15 or increase the weight you’re using. Dumbbell row strengthening your back muscles is an important component of treating pectusexcavatum. The dumbbell row targets your lat muscles. The way it’s described below also strengthens your core, another important component of treating the condition. You’ll need some dumbbells to complete this move — err on the lighter side if you’ve never done a row before. 1.hold one dumbbell in each hand with your arms extended. Hinge at the hips until your upper body reaches a 45-degree angle. 2.keeping your neck in line with your spine and your gaze straight down, pull your elbows straight back and squeeze between your shoulder blades. 3.extend your arms back to the starting position. Complete 2 sets of 10. Dumbbell rear delt fly another move to strengthen your back, a dumbbell rear delt fly also focuses on the lats, as well as the rhomboids and the traps. Choose a light pair of dumbbells to complete this move and ensure that you’re pinching your shoulder blades together at the top to get the most out of it. 1.hold one dumbbell in each hand with your arms extended. Hinge at the hips until your upper body reaches a 45-degree angle and bring the dumbbells together. 2.keeping your spine and neck neutral, inhale and push the dumbbells out and up to the side until your arms are parallel to the floor. 3.exhale and return to the start in a slow and controlled motion. Complete 2 sets of 10. Exercise is a key component to treating pectusexcavatum. By strengthening your chest, back, and core muscles and stretching your chest cavity, you can combat the condition’s effects. Aim to complete these exercises several times a week to maximize results. For middle back pain side plank with rotation this exercise is an advanced version of the basic plank. It strengthens the arms, shoulders, and obliques by combining a side plank with arm movements. Lie on your right side with your right forearm below your shoulder. Extend your legs, left foot on top of right. Tighten your core. Lift your hips to form a straight line with your body. Raise your left arm straight up. Rotate your torso toward the floor and bring your left arm under your body. Rotate your torso and straighten your left arm to return to the starting position. Start with 1 set of 8–12 reps. Repeat on the other side. Bird dog with elbow to knee this variation on the basic bird dog incorporates fluid movement to engage your abs and back while improving core mobility. Start on all fours, hands below your shoulders and knees below your hips. Tighten your core. Lift and straighten your right leg to hip level. Simultaneously lift and extend your left arm to shoulder level, palm down. Bring your right knee and left elbow toward each other. Return to the starting position. Start with 1 set of 8–12 reps. Repeat on the other side bicycle crunch this classic exercise strengthens your abs by placing them under constant tension. Start on your back. Bend your knees and plant your feet on the floor at hip width. Line up your head and spine. Place yours behind your head, elbows pointing out to the sides. Tighten your core and move your shoulders back and down. Bend your right knee toward your chest and extend your left leg, lifting it a few inches off the floor. Lift your left shoulder and upper back, bringing your left elbow toward your right knee. Tap your left shoulder on the floor and simultaneously switch your legs. Continue alternating elbows and knees, starting with 1 set of12 reps.

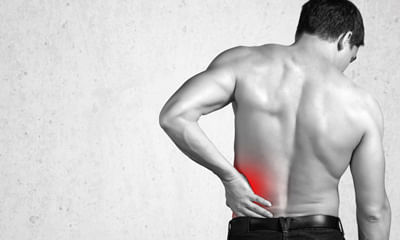
I have severe low back that radiates through legs. Can't even stand or sit for 5 min. Since I have 8 month baby it's rea ...

Ask Free Question
It can be because of sciatica. Do these exercises to relieve sciatica pain url/health/back-pain/sciatic-stretches#sitting-pigeon-pose 1. Reclining pigeon pose— pigeon pose is a common yoga pose. It works to open the hips. There are multiple versions of this stretch. The first is a starting version known as the reclining pigeon pose. If you are just starting your treatment, you should try the reclining pose first. While on your back, bring your right leg up to a right angle. Clasp both hands behind the thigh, locking your fingers. Lift your left leg and place your right ankle on top of the left knee. Hold the position for a moment. This helps stretch the tiny piriformis muscle, which sometimes becomes inflamed and presses against the sciatic nerve, causing pain. Do the same exercise with the other leg. Once you can do the reclining version without pain, work with your physical therapist on the sitting and forward versions of pigeon pose. 2. Sitting pigeon pose— sit on the floor with your legs stretched out straight in front of you. Bend your right leg, putting your right ankle on top of the left knee. Lean forward and allow your upper body to reach toward your thigh. Hold for 15 to 30 seconds. This stretches the glutes and lower back. Repeat on the other side.3. Forward pigeon pose— kneel on the floor on all fours. Pick up your right leg and move it forward on the ground in front of your body. Your lower leg should be on the ground, horizontal to the body. Your right foot should be in front of your right knee while your right knee stays to the right. Stretch the left leg out all the way behind you on the floor, with the top of the foot on the ground and toes pointing back. Shift your body weight gradually from your arms to your legs so that your legs are supporting your weight. Sit up straight with your hands on either side of your legs. Take a deep breath. While exhaling, lean your upper body forward over your front leg. Support your weight with your arms as much as possible. Repeat on the other side. 4. Knee to opposite shoulder— this simple stretch helps relieve sciatica pain by loosening your gluteal and piriformis muscles, which can become inflamed and press against the sciatic nerve. Lie on your back with your legs extended and your feet flexed upward. Bend your right leg and clasp your hands around the knee. Gently pull your right leg across your body toward your left shoulder. Hold it there for 30 seconds. Remember to pull your knee only as far as it will comfortably go. You should feel a relieving stretch in your muscle, not pain. Push your knee so your leg returns to its starting position. Repeat for a total of 3 reps, and then switch legs. 5. Sitting spinal stretch— sciatica pain is triggered when vertebrae in the spine compress. This stretch helps create space in the spine to relieve pressure on the sciatic nerve. Sit on the ground with your legs extended straight out with your feet flexed upward. Bend your right knee and place your foot flat on the floor on the outside of your opposite knee. Place your left elbow on the outside of your right knee to help you gently turn your body toward the right. Hold for 30 seconds and repeat three times, then switch sides. 6. Standing hamstring stretch— this stretch can help ease pain and tightness in the hamstring caused by sciatica. Place your right foot on an elevated surface at or below your hip level. This could be a chair, ottoman, or step on a staircase. Flex your foot so your toes and leg are straight. If your knee tends to hyperextend, keep a slight bend in it. Bend your body forward slightly toward your foot. The further you go, the deeper the stretch. Do not push so far that you feel pain. Release the hip of your raised leg downward as opposed to lifting it up. If you need help easing your hip down, loop a yoga strap or long exercise band over your right thigh and under your left foot. Hold for at least 30 seconds, and then repeat on the other side. For this homeopathic treatment is very effective for more details you can consult me.
I am 28 years female and I am suffering from back pain should I plan for pregnancy? Please help me. ...
Ask Free Question
Because your kidneys are located toward your back and underneath your ribcage, it may be hard to tell if the pain you’re experiencing in that area is coming from your back or your kidney. The symptoms you’re having can help you figure out which is the source of the pain. The location, type, and severity of the pain are some of the things that will be different depending on whether the pain is from a problem in your kidneys or your back. How to identify kidney painkidney pain is most often caused by a kidney infection or a stone in the tubes coming out of your kidney. If the pain is coming from your kidney, it will have these features: where the pain is located kidney pain is felt in your flank, which is the area on either side of your spine between the bottom of your ribcage and your hips. It usually occurs in one side of your body, but it can occur in both sides. Type of pain kidney pain is usually sharp if you have a kidney stone and a dull ache if you have an infection. Most often it will be constant. It won’t get worse with movement or go away by itself without treatment. If you’re passing a kidney stone, the pain may fluctuate as the stone moves. Radiation of the pain sometimes the pain spreads (radiates) to your inner thigh or lower abdomen. Severity of the pain kidney pain is classified according to how bad it is — severe or mild. A kidney stone usually causes severe pain, and the pain from an infection is usually mild. Things that make it better or worse typically, nothing makes the pain better until the problem is corrected, such as by passing the stone. Unlike back pain, it usually won’t change with movement. Accompanying symptoms if you have a kidney infection or a kidney stone, you may also experience: •fever and chills •nausea and vomiting •cloudy or dark urine •an urgent need to urinate •pain when you urinate •a recent infection in your bladder •blood in your urine (this can happen with an infection or kidney stones) •small kidney stones that look like gravel in your urine how to identify back pain back pain is more common than kidney pain and is usually caused by a problem in the muscles, bones, or nerves in your back. Has the following features: where the pain is located back pain can occur anywhere on your back, but it’s most commonly located in your lower back or one of your buttocks. Type of pain muscle pain feels like a dull ache. If a nerve has been injured or irritated, the pain is a sharp burning sensation that may travel down your buttock to your lower leg or even your foot. Muscle pain may affect one or both sides, but nerve pain usually only affects one side. Radiation of the pain nerve pain may spread to your lower leg. Pain from a muscle usually stays in the back. Severity of the pain back pain is described as acute or chronic based on how long you’ve had it. Acute pain lasts days to weeks, subacute pain lasts six weeks to three months, and chronic pain lasts longer than three months. Things that make it better or worse back pain may get worse with movement or if you sit or stand for a long time. It may get better if you switch positions or walk around. Accompanying symptoms other symptoms you may experience with back pain include: •the painful spot looking swollen and feeling tender to the touch •a muscle spasm in the painful area •numbness or weakness in one or both of your legs (if the pain is due to a nerve issue) if you find you have back pain and can’t hold your urine or bowel movements, something is pressing on your spinal nerves, and you should be evaluated immediately. This condition, called cauda equina syndrome, can cause severe long-term damage to your spinal nerves if not treated right away. 6 imbalances that cause pain—and how to fix them "pain is a medical condition and a medical issue, says brett jones, owner of applied strength in pittsburgh who is certified for the functional movement screen, a system of tests and cor rective exercise strategies. "it's a warning sign. The pain is there to tell you something's wrong. And that warning sign could be more serious than "you're going too hard. Jones and the other coaches consulted for this piece all had a horror story to tell-when pain in a client meant a more serious condition such as a nerve issue, thyroid issue, or even cancer. The point: if you experience regular pain while exercising-or when you're not-go to the doctor. If you've been cleared by a doc and you're still feeling discomfort, try these simple tests to see what's truly causing the pain-it could be related to an imbalance in a completely different part of your body. The good news: with these drills, stretches, and corrective exercises, you may be able to fix them-no doctors necessary. Neck pain and headaches? Could be your shoulders. If you're experiencing these symptoms and have been cleared by a doctor, check out the height of your shoulders, says aaron brooks, a biomechanics expert and owner of perfect postures in auburndale, ma. "look in the mirror and see if one shoulder is higher or lower than the other, he says. If one of your shoulders is higher than the other, you'll be strengthening one more than the other, and it may wind up pulled forward more than the other-resulting an inward rotation of that hand. "when you do a row or a press, that side's going to get pinched. There's less room in the shoulder. You can wind up with bursitis or tendonitis. Or headaches and neck pain. Fix it: if the mirror test shows they're uneven, try this single-arm doorway stretch, brooks says. To do it, stand inside the threshold of a door, and place your right forearm inside the door on the right side of the jamb, palm against the jamb at about shoulder height. In this position, twist your chest slightly through the door to stretch your chest-alternately, you can take a step forward with your right foot, keeping your left foot in the threshold. This stretch will open your chest muscles and create room in your shoulder for movement. Pair that stretch with this mid-back strengthening exercise: grab a resistance band and stretch it in front of your chest so that your arms are straight out to the sides from your shoulders, palms facing up. At the full extension of your arms, the band should be stretched out. Return to clap your hands in front, and repeat the movement. Pair these two moves-in this order-three times per week. Shoulders even? Your headaches could be from a forward-leaning head. If you don't see an imbalance in the height of your shoulders, turn to the side, says robert taylor, owner of smarter team training in baltimore. If your head is jutting far forward of your shoulders, it could ultimately decrease the amount of blood flow to your head and neck. "the head leans forward, the spine leans forward, and it puts unnecessary stress on the lower spine too, he says. With the decreased blood flow to your thinking cap, you could get headaches. Fix it: increase blood flow up top and return your head to its natural, up-tall position by strength training your neck, taylor says. Try this one-arm shrug to even things out: sit on an upright bench, like one you'd use for a shoulder press. Holding a dumbbell in your right hand, place your left hand under your left butt cheek and grab the side of the seat. Let your right hand hang down straight by your side and pull your shoulder blades back and together. Now raise your right shoulder up towards your ear-raise it straight up instead of rolling your shoulder. Hold for a beat at the top, and then return to the start position. Complete a set of 10, and repeat on the other side. Knee pain when you run? Could be your hips. "the knee has two bad neighbors-the hip and the ankle, jones says. The pain you feel in your knee could very well be tightness or immobility in those bad neighbors. "they sweep all their leaves into the knee's yard. Everyone blames the knee, but it's the neighbors. To see if your hips have a proper level of mobility, lay on your back in a doorway so that the middle of your kneecap is right on the threshold. Relax your arms at your sides, palms up. Bring your feet together, toes pointed at the ceiling. Pull your toes towards your shins to create a 90-degree angle at the ankle. Keep one leg straight and still as you slowly raise the other leg until either your knee bends on your raising leg, or your bottom foot bends or turns out to the side. "see if the knobby part of your ankle can make it past the door frame, jones says. If it does, your hips are plenty mobile-check the ankle test below to see if that's causing some knee issues. If either ankle can't make it, foam roll your hips and glutes, and then work on this stretch using a belt or strap for instant improvement. Fix it: lying in the same position as during the test, wrap a strap or belt around one foot and raise it until you just start to feel a stretch-not to the level where it's all the stretch you can take, but just the beginning of the stretch, jones says. Once here, bring your other leg up to meet it. Return the non-strapped leg to the floor. At this point, you may find that the strapped leg can come up a little higher. When it does, bring the non-strapped leg up to meet it again. Continue until you no longer feel progress in the strapped leg, and switch. Hips moving ok? Check your ankles. If your hips are mobile (and even if they're not), ankle mobility can also lead to knee pain, says mike perry, owner of skill of strength in north chelmsford, mass. Who is certified in the functional movement screen. To see how mobile your ankles are (or aren't), assume a one-knee position facing a wall. Your knees should both form 90-degree angles, and the toe of your planted foot should be about four inches from the wall. In this position, perry says, try to glide your knee over the pinky toe to touch the wall without lifting your heel. If you can reach the wall, your ankle is gliding correctly. If your foot comes up before your knee touches the wall, your calves are "incredibly tight, perry says. Fix it: to help remedy this issue, foam roll your calves and try this variation on that ankle test from brett jones. Assume the same half-kneeling position, and place the point of a broomstick on the pinky toe of your planted foot. Hold the stick so it's touching the outside of your knee. With the stick in this position, keeping your knee from flaring out to the side, glide the knee forward slowly, stopping when your heel leaves the ground. If you perform this as a drill, jones says, you can see as much as half an inch of improvement in the first session. If you feel pain during the drill, stop and consult a physician. Lower-back tightness? Might be your hips. As with knee pain, back discomfort often isn't a back problem at all, brooks says. If one side of your pelvis is higher than the other, it can result in back pain, hip pain, groin pain, or even knee pain. "if you try to do a lunge, the knee on the high side will cave in and the hip will angle inward, brooks says. The repercussions of this change over time can be knee pain, a patella tear, a medial meniscus injury, or hip bursitis. But back to your back-the unevenness of your hips can pull on your lower back, causing that tightness while sitting all day. Fix it: if you notice your hips are uneven, try this hip abduction exercise. Lie on your back with knees bent and feet flat on the floor, hip-width apart (the classic sit-up position). Wrap a small resistance band around your knees so that it's already a little tight while your knees are together. Now press out against the strap to separate your knees until they form a v-shape, holding at the outermost edge of the press for a few moments. This move helps to fix the hip imbalance because "in the lying position, the muscles that are causing the pelvis to be out of alignment are shut off, brooks says. Repeat for 2 sets of 20 reps, 3 times per week. Tail bone pain the lower end of the vertebral column is inflamed and that bone is called coccyx bone and the condition is called coccydynia. The conservative management would be to keep ice in that inflamed area during one time in a day and also to sit in a hot water bowl where the penetration of the heat would help to reduce the inflammation. And to reduce the weight falling on the inflammed surface we suggest patients to use air cushion pillow (also called as doughnut pillow) where in the buttock's weight will not fall exactly on the painful tail bone and that would automatically reduce the pain. For this the best treatment would be to undergo ultrasonic therapy in one of the nearby physiotherapy clinics.

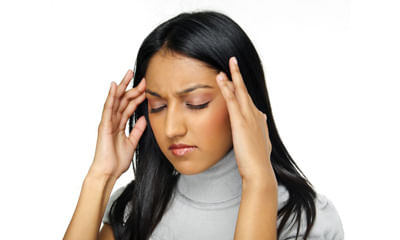
I am suffering from right sided and back pressurized stabbing head pain. I am female of 21 years .i also feeling vomit s ...

Ask Free Question
Check your BP Since you are on a beta blocker medication to reduce the heart rate ,even forgetting to take the medicine.and delay in.the dosage can cause above symptoms Since you are 21 years only you require a cardiology work up as to.the cause of increased heart rate
Hello Doctor, Meri beti jab 3 month ki thi to usko meningitis hua tha, approx 20 days treatment k bad doctor ne discharg ...

Ask Free Question
Meningitis is an inflammation of the membranes (meninges) surrounding your brain and spinal cord. The swelling from meningitis typically triggers symptoms such as headache, fever and a stiff neck. Your child may undergo the following diagnostic tests: blood cultures, imaging, spinal tap and csf analysis may also help to identify which bacterium caused the meningitis.

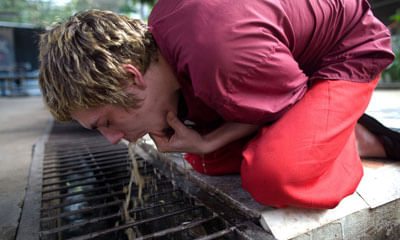
Sir please help me, mera baby 28 jan 2019 ko cesarian se hua, mujhe full anesthesia dia tha, meine labor pain bhi lia or ...

Ask Free Question
Well lybrate-user, here I the cyst imaging I would like to know and your pain must be related to spinal anesthesia often therapy called epidural blood patch helps let me know your further plan in private consult hope you have finished tamiflu course and please wear mask n (% with baby until 21 days after completion of therapy.
Hello, Yesterday (6/11) I came to my room, and was feeling tired and sleepy. So I slept on my left shoulder side as usua ...

Ask Free Question
You should take some blood test like CBC MP. You can consult me at Lybrate for homoeopathic treatment.
Dimagi bukhar (Fever) ka test kaise hota h. I mean kaise pata chalta h marij ko dimagi bukhar (fever) h. Please suggest. ...

Ask Free Question
Dimagi bukhar me patient ko neck stiffness ho sakta hai. Confusion, drowsiness, unconsciousness, vomiting, headache. Blood test ,spinal fluid test ,CT scan se pata chal sakta hai ki patient ko dimagi bukhar hai ya nahi.
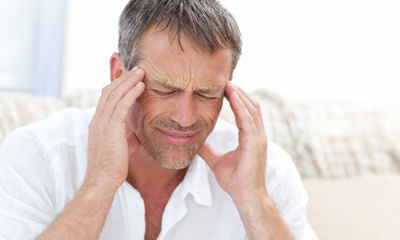
I have started work-out (since last three weeks) at gym and does weight training for one hour after proper warm up. Ever ...

Ask Free Question
Exertion headaches are exercise-induced headaches that are correlated with training at a very high intensity. They most commonly occur after a set of a compound leg movement (i.e. Leg press, squat, deadlift) performed to failure or close to failure. Right after the set, sometimes on the final rep, an intense headache occurs typically in the back of the head or in the temples. What scientifically occurs is a forced dilation (expansion) of the blood vessels in your brain beyond their normal thresholds. This puts pressure on the meninges, (small nerves that cover the brain) which causes the painful headache. Once the heart rate and blood pressure drop, the headache becomes less intense; however, the meninges remain extra sensitive, and are susceptible to future headaches if blood pressure or heart rate spike. WHAT CAUSES AN EXERTION HEADACHE? Exertion headaches occur when a combination of the following circumstances are true: DEHYDRATION: Dehydration thickens your blood VALSALVA MANEUVER (Holding Breath): This causes a dramatic spike in blood pressure POOR NECK POSITION: Anything other than a neutral spine causes constrictions on the carotid arteries, the main arteries that deliver blood to the brain. INCREASED HEART RATE: As a set progresses, your heart rate will steadily climb so that by the end of your set it can be close to (or above) your maximal heart rate. HEAVY WEIGHT: The more weight on your body, the more blood pressure will rise while lifting it. Because legs are the strongest muscle group in the body, more weight is needed to reach a level of fatigue or failure. The correlation between heavy weight and an increase in blood pressure makes compound leg movements more risky than other movements. The combination of elevated blood pressure, heart rate, thickened blood and constricted arteries can result in a devastating surge of blood attempting to enter the brain, forcibly expanding the arteriole walls and putting pressure on the meninges. HOW LONG WILL THE HEADACHE LAST? Exertion headaches have three phases: INTENSE HEADACHE: The first phase is the intense, painful headache that occurs during or immediately after an intense workout. The pain is typically in the temples or back of head. The feeling can best be described as a grenade exploding in the head. The headache hits rapidly, and throbs painfully. This headache will not go away until there is a decrease in heart rate, blood pressure, and all activity has ceased. DULL HEADACHE: The second phase is a dull, fatiguing headache that can last for up to 2 weeks. It typically lingers wherever the initial phase of the headache was felt because that is the area that the meninges flared up. FULL RECOVERY: Full recovery depends on the severity of the initial headache and the quality of rest given to the body to recover. If the body is given the opportunity to heal, dull headaches are typically gone in 1 week. True full recovery, meaning the ability to perform at the same level as before the headache, will take approximately 2 months. HOW CAN EXERTION HEADACHES BE PREVENTED? To prevent an exertion headache: HYDRATE: Drink enough water that you’re urine is clear or faintly yellow (never dark golden) the day before your lift and the day of, and continue to drink water during your workout. This will ensure that your blood can flow freely and smoothly through your blood vessels. BREATHE: The valsalva maneuver is a valuable tool for creating stability in the thoracic cavity (torso area) that can help prevent lower back injuries during maximal lifts. It should not, however, be used during sets of multiple repetitions. When performing multiple repetitions, exhale during the positive phase and inhale during the negative phase. You can find more detailed information on breathing techniques here. NEUTRAL SPINE: Unless performing a neck exercise, there is no need for the neck to be bent. Maintaining a neutral spinal alignment allows for proper circulation through the arteries and veins responsible for moving blood in and out of the brain. While “looking up” may mentally help keep the back straight during a squat or a deadlift, it is not essential. Keep the head and neck in a neutral position. CONDITIONING: Developing a healthy heart and lungs that can handle high intensity training can be accomplished with regimented cardiovascular training. General conditioning along with interval training can help reduce the risk of exertion headaches by developing an efficient and healthy cardiovascular system that can handle the stress. Training with a high level of intensity is part of improving the body’s performance potential, increasing size and strength; however, it can also create an opportunity for an exertion headache. To avoid exertion headaches during high intensity training sessions, build a solid cardiovascular base, be hydrated, breathe correctly, and maintain a neutral spine. Also, consider performing the larger compound leg movements at the beginning of the workout. Leg movements are inherently heavy, taxing exercises. Performing them early in the workout is safer because fatigue, exercise-induced dehydration, and a peaking heart rate won’t be part of the equation yet. HOW DO I RECOVER FROM AN EXERTION HEADACHE? There are some simple guidelines that will help with full recovery and full pre-headache performance: STOP: Once an exertion headache occurs, STOP. Do not attempt to push through the rest of the training session, it will only worsen the headache and the duration of symptoms. MEDICAL VISIT: It is important to rule out any other underlying potential causes. Aneurysm’s, thunderclap headaches, and slipped discs may be potential causes for similar symptoms and must be ruled out. If it is an exertion headache, physicians may recommend rest, plenty of fluids and ibuprofen taken every 4 – 6 hours daily to help with the swelling of the meninges. Or, they may recommend something else which is why it is important to consult the physician. REST 1 WEEK: The initial rest phase should be a complete week of total rest from all physical activity, including practices, strength training, cardio, as well as recreational and competitive activities. If steps 1 – 3 are done without any interruptions, then the headache should subside and the head should feel normal after 1 week. However, the body is still not ready at this point for pre-headache performance. At this point, download the A.P.E.X. App and begin the INCEPTION workout progression designed by me specifically for recovery from exertion headaches. Over the last decade I have fine tuned this program to incorporate the correct volume, introducing compound and lower body movements at the appropriate time, allowing for the highest percentage of full recovery within a 2 month window. Here are some guidelines for building back up to pre-headache performance: PHASE 1 (2 WEEKS): Take two weeks off from any lower body exercises, performing only upper body exercises at 50 – 75% of your pre-headache weight. By the end of the two weeks, weight should be approaching pre-workout level. Introduce light cardio, no more than 70% of your Maximum Target Heart Rate (220-Age), for no more than 20 minutes. PHASE 2 (2 WEEKS): Introduce single-joint, isolateral leg exercises to the upper body strength program. This includes leg extensions, leg curls, hip adduction and abduction. This allows for strength maintenance without loading the frame. Attempting to do compound leg movements such as squats, leg press, or deadlifts prematurely can cause a flair-up of the meninges and another full-blown exertion headache. Begin increasing intensity of cardiovascular training slowly during this phase. PHASE 3 (4 WEEKS): Begin introducing compound leg movements at 50% OF PRE-HEADACHE WEIGHT. Slowly add back volume and weight each workout. Begin pushing the cardiovascular system. If at any point during this recovery plan an exertion headache occurs, then go back to step one which was STOP. Repeat with physician visit, rest, and slow recovery. It is important to note that while 2 months of recovery does seem like a long time, these headaches can linger for over 6 months if the body is not allowed to heal. 2 months of strategic recovery is better than 6 months of bull-headed attempts to push through it. CROSSFIT Since the original post of this article in 2011, and my original post back in 2007, CrossFit has exploded in popularity and has become a huge part of the fitness culture. WOD’s, CrossFit Games, and CrossFit Gyms have saturated the fitness world internationally. The reason I mention this because we have noticed a gradual climb in emails, hits, and posts related to exertion headaches coming from CrossFitters. None of our A.P.E.X. Coaches are CrossFit Certified, A.P.E.X. Is not affiliated with CrossFit in any formal way at this point; however, we are all here to train at a high level and I have a tremendous respect for any athlete willing to push themselves hard enough to cause an exertion headache. Here are some things to consider as a CrossFitter as it relates to exertion headaches: OLYMPIC MOVEMENTS: CrossFit incorporates big, compound, technical movements such as snatches, power cleans, jerks, deadlifts and squats VALSALVA MANEUVER: Holding your breath can help protect your spine during Olympic movements by creating thoracic pressure, helping your abdominal wall create a stable core SUPER-SETS: CrossFit workouts, in general, combine big movements with cardio movements, or big movements with other big movements NO REST: CrossFit workouts tend to omit rest between exercises, thus heart rate and blood pressure steadily climb, also leaving no time for water consumption during the workout COMPETITION: Competition can help by tapping into adrenaline, resiliency, and a never-quit attitude that can mask pain Big movements that put weight on your frame cause a spike in blood pressure. Holding your breath to improve posture during big movements also causes additional spike in blood pressure. Doing multiple exercises back-to-back without rest causes an additional spike in blood pressure, but mainly an increase in heart rate. An increase in both heart rate and blood pressure, in a competitive setting, while not being able to calm down or drink water, can lead to an exertion headache. It will not be early in the workout when you are calm, energetic, and focused, but towards the end when blood pressure and heart rate are peaking out, and your trying to overcompensate to finish the workout by holding your breath as your core fatigues. CrossFit philosophy dictates that variables 1, 3, 4 and 5 are part of what makes CrossFit workouts intense, and that will not change. Many people have successfully completed WOD’s without causing an exertion headache; therefore, CrossFit workouts do not inherently cause exertion headaches. The key to preventing an exertion headache during bouts of intense exercise is coming into the workout rested, hydrated, and mentally focused. During the workout, you must maintain a good breathing cadence, making sure to exhale during the positive phase, and inhale during the negative phase of the movement. Late in the workouts when your blood pressure and heart rate are climbing, you must remain calm and focused, regulate your breathing, and concentrating on good body mechanics. If you do these things, you will be able to perform CrossFit style training free from exertion headaches. If you do experience an exertion headache during a CrossFit workout, here is the recommended recovery timeline to get back to performing WOD’s at 100% pre-headache performance levels. STOP: Once an exertion headache occurs, STOP. Do not attempt to push through the rest of the training session, it will only worsen the headache and the duration of symptoms. MEDICAL VISIT: It is important to rule out any other underlying potential causes. Aneurysm’s, thunderclap headaches, and slipped discs may be potential causes for similar symptoms and must be ruled out. If it is an exertion headache, physicians may recommend rest, plenty of fluids and ibuprofen taken every 4 – 6 hours daily to help with the swelling of the meninges. Or, they may recommend something else which is why it is important to consult the physician. REST 1 WEEK: The initial rest phase should be a complete week of total rest from all physical activity, including practices, strength training, cardio, as well as recreational and competitive activities. If steps 1 – 3 are done without any interruptions, then the headache should subside and the head should feel normal after 1 week. However, the body is still not ready at this point for pre-headache performance. Here are some guidelines for building back up to pre-headache performance: PHASE 1 (2 WEEKS): Focus on cardiovascular conditioning, introduce light cardio, no more than 70% of your Maximum Target Heart Rate (220-Age), for no more than 20 minutes. Jogging, running, swimming, and hiking are the types of cardio to do during phase 1. PHASE 2 (2 WEEKS): Begin pushing your cardiovascular system to closer to 90% of your Maximum Target Heart Rate, introducing rowing and other body-weight exercises (burpees, air squats, vertical jumps, lunges, jumping jacks, etc.). There are “No Equipment” CrossFit workouts that you can test yourself on, seeing how well you can handle intensity before adding in weights. PHASE 3 (4 WEEKS): Week 1, do WOD’s at 50% of pre-headache WEIGHT and TOTAL VOLUME. Week 2, do WOD’s at 50% of pre-headache weight, but normal VOLUME. Week 3, up the weight to 75% of pre-headache weight. Week 4, attempt with caution, pre-headache weights. During PHASE 1 and PHASE 2, focus on hydration, breathing, and sleep, and listen to your body. If you feel like a flair-up may happen, STOP. The key is getting through PHASE 1 and 2 without a headache while performing at a high level. Before moving into PHASE 3, you should be dominating body weight WOD’s without any fear of a headache. For PHASE 3, use the following example for clarification. EXAMPLE: WOD – 10 rounds, 10 snatches @ 100 kilos / 30 seconds of speed rope PHASE 3, WEEK 1: 5 rounds, 10 snatches @ 50 kilos / 30 seconds of speed rope (50% WEIGHT & VOLUME) PHASE 3, WEEK 2: 10 rounds, 10 snatches @ 50 kilos / 30 seconds of speed rope (50% WEIGHT) PHASE 3, WEEK 3: 10 rounds, 10 snatches @ 75 kilos / 30 seconds of speed rope (75% WEIGHT) PHASE 3, WEEK 4: 10 rounds, 10 snatches @ 100 kilos / 30 seconds of speed rope (100% WEIGHT) The key is to slowly re-introduce weight while under stress. PHASES 1 and 2 should have prepared your blood vessels for the increase of heart rate, but the spike in blood pressure comes with additional weight on your frame. Remember, if at any point you experience an exertion headache, you are back to STOP, a MEDICAL VISIT, and 1 FULL WEEK OF REST, so don’t try to skip ahead, it will only delay your full recovery. FINAL thought Those of us that have experienced exertion headaches are like pit bulls. We have a high pain tolerance, we push ourselves beyond normal limits, and we are stubborn as hell if we are told to take some time off for any injury, especially one that doesn’t involve a torn muscle or a broken bone. We all believe we are the exception, and that we can heal like Wolverine. Remember, an EXERTION HEADACHE is an INJURY TO THE BRAIN. If not taken seriously, it won’t go away and can become worse. Just like any other injury, certain steps must be taken to transition the body back to a high performance level again. So from one pit bull to another, please take the next 2 months to slowly recover and get back to pre-headache performance levels. FOR MEDICATION CONSULT ONLINE IN PRIVATE.
My mother is a patient of breast cancer which was detected in 2015 in 4th stage chemotherapy and necessary surgical trea ...

Ask Free Question
Got your pain you and your mom went through and concern. Though it's unfortunate but very common with chemo and Radiation therapy. Thanks for trusting and expecting assertively healthy and progressively fit with Holistic ayurved approach. Ayurved offers amazing outcome with such issues I.e. Primarily your aim is to be pain free nothing life. Till you consult ayurved college hospital in your city or clinic follow Kshirbala thailam Application on palm feet naval area and on head and Basti as well. As her Gastric mucosa got irritated, skin and per rectal route is most best suited way to avail soothing effect.
