
Facial at home


Ever felt that your skin has lost its radiant glow? or that it's feeling a little too dry (or oily)? do you feel like in the midst of friends, work and relationships, there's absolutely no time to head to the spa for a facial? well not to worry, you can now give yourself a fabulous facial at home. So read on, and give these facial tips at home a try.
Cleanse:
To prep yourself for a facial, you need to start by washing your hands. Remember, you'll be using your hands to massage and treat your face. So they must be clean. Wash them with warm water and a simple bar soap. Your hands carry germs that can lead to breakouts on your skin.
Tie up your hair:
Tie you hair back (use a hairband to hold back stray strands or bangs). You need your face to be clear of any obstructions for a through facial.
Remove your makeup:
Now we move onto cleansing your face thoroughly. You can either use natural ingredients like milk or you can go for a gentle makeup cleanser (choose the cleanser that suits your skin type best.) use cotton balls to gently wipe off the makeup from your eyes, cheeks, lips, face and neck. Move the cotton ball in gentle circular motions. Around the eyes, be careful and use gentle strokes (don't tug at the skin!)
Exfoliate:
This is an important step. Exfoliation helps remove dead skin, reduces large pores and prevents fine lines and wrinkles. Spread the exfoliator on your palms and massage your skin in circular motions. You don't need to press the exfoliating beads into your skin, just a gentle amount of pressure is fine. Avoid scrubbing the exfoliator around your eyes. If you don't have an exfoliator, take a cup of milk and add a teaspoon of granulated sugar, this works just as well!
Steam:
Take a clean washcloth and run under hot water. Place it over your face and let it rest for five minutes. Alternatively, you can fill a pot of water till it is boiling. Then stand with your face above the steaming water. Drape a cloth over your head to prevent the steam from escaping. You can add drops of rosemary oil to add to the cleansing process. Steam your face for 10-15 minutes, not more. If you have sensitive skin, try and avoid this step as it can exacerbate the problem.
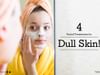
Mask:
The fourth step of this process is to apply the facial mask. It is vital to choose a facial mask that suits your skin type. For oily skin, you can try a mud or clay mask to absorb the extra oil from your skin. For dry skin, go for a hydrating or creamy face mask. Combination skin needs both these elements. Cover your face in a light mask, avoiding the areas around the eye. You can soothe your eyes with cucumber slices. After 15 minutes, wash off the mask with plenty of water and pat it try.
Moisturise:
To maintain the texture of your glossy skin, use a moisturiser after wiping off the face mask. For oily skin, you can choose a water-based or light moisturiser, while for dry skin you can use a denser cream. For sensitive skin, avoid a product with heavy fragrances or acidic ingredients. These can cause breakouts or rashes.


RELATED ISSUES
RELATED SPECIALITIES
Ask a free question
Get FREE multiple opinions from Doctors


+1.svg)
