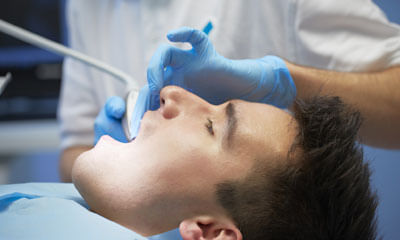
How To Treat Severe Bad Breath
Please I have this pain in my left leg and a lower back pain…x rays says there is nothing wrong with my back but they su ...


Ask Free Question
Avoid strain to back, avoid lifting any weights, avoid bending forward, hot fomentation to back (make sure no burns. Do back strengthening and core activation exercises with a physiotherapist. Consult an orthopaedic surgeon if needed.


I have candida growth on my tongue. Because of this I faced bad breath problem. I drink a lot of water and maintain oral ...

Ask Free Question
Candida overgrowth in the mouth is a common condition known as oral thrush, which can cause white or yellowish patches on the tongue and other areas of the mouth. The condition is usually harmless but can be uncomfortable and cause bad breath. Maintaining good oral hygiene, including brushing your teeth twice a day, using mouthwash, and cleaning your tongue regularly, can help manage oral thrush. In addition to good oral hygiene practices, antifungal medications are typically used to treat oral thrush. Topical treatments such as nystatin oral suspension or clotrimazole lozenges are often prescribed for mild cases, while systemic medications such as fluconazole may be needed for more severe cases or for those with compromised immune systems. However, it is important to note that self-treatment for oral thrush with medication is not recommended without first consulting with a healthcare provider. If you have any further questions or concerns, I am available to schedule a consultation and discuss your symptoms in more detail.
I am 20 year old boy I have backache, headache, fatigue since 3 months. I have water brash problem since 4 months and my ...

Ask Free Question
Kindly do these exercises. Back pain is described as acute or chronic based on how long you’ve had it. Acute pain lasts days to weeks, subacute pain lasts six weeks to three months, and chronic pain lasts longer than three months. Things that make it better or worse back pain may get worse with movement or if you sit or stand for a long time. It may get better if you switch positions or walk around. Accompanying symptoms other symptoms you may experience with back pain include: •the painful spot looking swollen and feeling tender to the touch •a muscle spasm in the painful area •numbness or weakness in one or both of your legs (if the pain is due to a nerve issue) if you find you have back pain and can’t hold your urine or bowel movements, something is pressing on your spinal nerves, and you should be evaluated immediately. This condition, called cauda equina syndrome, can cause severe long-term damage to your spinal nerves if not treated right away. 6 imbalances that cause pain—and how to fix them "pain is a medical condition and a medical issue, says brett jones, owner of applied strength in pittsburgh who is certified for the functional movement screen, a system of tests and cor rective exercise strategies. "it's a warning sign. The pain is there to tell you something's wrong. And that warning sign could be more serious than "you're going too hard. Jones and the other coaches consulted for this piece all had a horror story to tell-when pain in a client meant a more serious condition such as a nerve issue, thyroid issue, or even cancer. The point: if you experience regular pain while exercising-or when you're not-go to the doctor. If you've been cleared by a doc and you're still feeling discomfort, try these simple tests to see what's truly causing the pain-it could be related to an imbalance in a completely different part of your body. The good news: with these drills, stretches, and corrective exercises, you may be able to fix them-no doctors necessary. 1. Standing extension how it helps – this standing extension helps reverse what you do on a daily basis (hunching)… since most bulging discs and herniated discs are caused by poor posture and repeated flexion of the spine (esp bending fwd in bad posture), this stretch helps push the disc back to neutral position. How to do it – begin this exercise by standing up with good posture. Now take both hands and place them on both sides of your lower back. Now with the help of your hands push your pelvis forward and extend your spine back. Follow the extension with your neck so that you end up facing the ceiling. – start with 10 repetitions and do 2-3 sets. – this one is particularly great to do when you need a break from sitting at your desk. ** this should not cause any pain. If you feel pain during it is not a good one for you. In that case, stop and try some of the other exercises below instead. 2. Half cobra pose (prone lumbar extension) how it helps – the half cobra stretch helps to push the disc material back towards the center of the inter-vertebral disc to allow for improved healing. The goal of repeated lower back extension is the “centralization of symptoms”, which basically means pain that travels down the affected leg to the foot should come back up closer to the low back – which will in turn alleviate the pain. How to do it – begin this exercise by lying on your stomach (prone position) and slowly prop yourself up on your elbows while keeping your hips in contact with the floor. – hold the prop-up position for 10-15 seconds before returning to the prone position (lying face down). – gradually increase to holding the end position for 30 seconds. Aim for 10 repetitions of this stretch. ** initially, you may not be able to tolerate this position very well, so make sure you start slowly and carefully. If there’s any pain, try a different exercise instead. 3. Full cobra pose (advanced extension) how it helps – this stretch is based on the same principle as the half cobra pose above. This advanced extension helps to push disc material back towards the center of the intervertebral disc, with the goal of alleviating pain symptoms. How to do it – once you’ve mastered the half cobra pose, you can increase the difficulty by moving to the advanced version of this stretch. Begin this exercise by lying on your stomach in the prone position (lying facing down) and slowly press up on your hands while keeping your pelvis in contact with the floor and lower back relaxed. – hold the prop-up position for 10 seconds. Aim for 10 repetitions of this stretch. – eventually try to hold this pose for longer if it feels good (20-30 seconds). ** if you feel pain during this exercise, it is not a good one for you. In that case, stop and try some of the other exercises instead. 4. Cat-cow how it helps – this is one of the most popular herniated disc exercises. By combining two yoga poses, the cat-cow stretch can help to relieve pressure on the herniated disc by opening the intervertebral disc space. It also improves mobility of the spine, which may help to relieve disc herniation pain and speed recovery. How to do it – begin this stretch on your hands and knees. Inhale and let your stomach “drop” towards the floor as you look up towards the ceiling. – follow this by exhaling and slowly rounding your spine while pressing into the floor with your hands and slightly curving your neck to look at your feet. – aim for 10 repetitions of this stretch and do 2-3 sets. How it helps – this exercise will help strengthen and stabilize your lower back and deep spine muscles. This will help you to maintain a good posture and avoid future episodes of herniated discs. How to do it: – begin on your hands and knees with your hands positioned under your shoulders and knees positioned under your hips. – raise your left arm and reach it forwards until it is aligned with your torso; at the same time, kick your right leg backwards until is it aligned with your torso. – hold this position for 2-3 seconds before slowly returning to the starting position. – repeat with your right arm and left leg. – alternate sides for 10 repetitions and do 2-3 sets. ** ensure that your head, neck, and back maintain a neutral alignment to minimize stress on your neck. 5.plank: how it helps – just like the bird dog, this “core” exercise will help bring your pelvis into right position by strengthening the deep spinal muscles and glutes (butt muscles). How to do it – begin lying on your stomach with your forearms against the mat. – engage your core and lift your body so that you are resting on your forearms and toes. – start with 10 second holds and work up to 30 second holds, do 2-3 sets. ** ensure to keep your back straight throughout the entire exercise – spine in neutral position. Thoracic expansion if you’re using a chair, sit facing forward and allow your upper body to fall over the back of the chair. Extend your arms above your head for a deeper stretch. Hold either position for 10 seconds. 1. Plank the world record for the longest plank is 8 hours. Luckily, you don’t need to hold it that long for the exercise to have an effect! in fact. You can hold it for 10-15 seconds. • the plank is similar to a push-up position, but instead of resting on your hands, you rest on your elbows and bring them directly underneath your chest. • after kneeling, lean forward and place your elbows on the ground directly below your shoulders. • lift your knees off of the floor and push your feet back. Ensure your back is straight and keep your neck aligned with the rest of your spine. • hold the position and tighten your core muscles for the desired time. 2. Side plank just like the original plank, but only balancing on one side. • lie on the floor on your side, facing sideways with your feet together. • lift up your body until you are supporting yourself with your elbow, directly below your shoulder. • raise your hips until your body is in a straight line and tighten your core muscles; your body should create a slant from your shoulders to your feet. • hold this position without dropping your hips. • repeat on the opposite side. 3. Pelvic tilt with exercise ball sit on a ball that allows your legs to be at a 90-degree angle with your feet flat on the floor. • keep your shoulders back and spine straight. • tilt your hips forward and flex your abdominals tight. • tilt your hips backward as you stick your tailbone out. • move back and forth slowly, keeping your shoulders back. • repeat 10 times for 3 sets. 4. Superman lie on your stomach, face down, with your arms out in front of you. • lift arms, legs, and chest off the floor simultaneously while keeping your hips grounded. • hold for a minimum of two seconds. • lower back down slowly. • repeat 10 times for 3 sets. 6. Crunches lie flat on your back, placing your feet flat on the floor with your legs bent. • fold your arms across your chest and lift your torso up until your head, neck, and torso are off the ground. • hold for a moment before lowering back down. • repeat. 6. Quadruped arm opposite leg raises • kneel on the floor, lean forward, and place your hands palm-down on the floor. • make sure your back is straight, your knees are below your hips, and that your palms are directly below your shoulders. • raise one arm as you raise the opposite leg until both are aligned straight out from your body, parallel to your spine. • slowly lower both your arm and leg until you are back in the starting position. • switch arm and leg, and repeat. 7. Dead bug lie flat on the floor on your back. • lift your arms straight up from your body, reaching through the air. • raise one leg until it is at a 90-degree angle from your body. • slowly lower until it is in the starting position. • switch legs and repeat. 8. Hip bridge lie on your back with your knees bent and raised, your feet flat on the floor, and your arms at your sides. • keep your feet hip-distance apart and try to keep your leg in vertical alignment with your knee. • flex your glutes and push through your heels to raise your hips upward. Try to make a diagonal line from your shoulders to your knees. • hold for a short moment before lowering back down. • repeat 10 times for 3 sets. Upper back pain pushups this one may seem basic, but there’s no denying that pushups are one of the best ways to strengthen the pectoral muscles. These can be done on the knees or toes. If you’re not ready for full pushups, start with your hands resting on a solid surface higher than your feet — like a very sturdy coffee table or the edge of a couch, cushions removed, that’s pressed up against a wall — and start on the toes. Having your hands higher than your feet and your body at an angle can be a good way to start a pushup regimen. As you get stronger, you can begin to lower the angle of your body. This will help you transition to full pushups more easily than going from knees to toes. A full plank engages the muscles differently, even at an angle. When doing pushups, aim for 2 sets of 10 reps per day. 1.start in plank position with your hands under your shoulders and your core engaged. 2.as you lower, inhale. 3.as you engage your muscles to push yourself up, exhale. Keep your elbows hugging in close to your body. Keep your focus on slowly breathing as you do these, and on engaging the pectorals while keeping the core tight. Don’t just crank these out to get them done — this can compromise your form and do more harm than good. If the movement is really tough, break the sets into three or five to start, or find a higher point to begin after a week of exercise. If necessary, you can even stand and do pushups pushing against a wall. Chest fly for this exercise, you’ll need a bench or exercise ball as well as some dumbbells. If you don’t have weights, you can always use the old standby: a soup can in each hand. Just keep in mind that dumbbells are easier to hold and you can get more out of using them, as even 5-pound weights are heavier than your heaviest canned goods. 1.lie with your upper and middle back on a bench or ball, with your legs at a 90-degree angle. Hold a weight in each hand and extend your arms to the sky, elbows slightly bent. 2.as you inhale, lower your arms out wide, until your elbows are at shoulder height. 3.as you exhale, raise your hands until they meet above your chest again. 4.do 2 sets of 10. If that feels pretty easy, up it to 2 sets of 15 or increase the weight you’re using. Dumbbell row strengthening your back muscles is an important component of treating pectusexcavatum. The dumbbell row targets your lat muscles. The way it’s described below also strengthens your core, another important component of treating the condition. You’ll need some dumbbells to complete this move — err on the lighter side if you’ve never done a row before. 1.hold one dumbbell in each hand with your arms extended. Hinge at the hips until your upper body reaches a 45-degree angle. 2.keeping your neck in line with your spine and your gaze straight down, pull your elbows straight back and squeeze between your shoulder blades. 3.extend your arms back to the starting position. Complete 2 sets of 10. Dumbbell rear delt fly another move to strengthen your back, a dumbbell rear delt fly also focuses on the lats, as well as the rhomboids and the traps. Choose a light pair of dumbbells to complete this move and ensure that you’re pinching your shoulder blades together at the top to get the most out of it. 1.hold one dumbbell in each hand with your arms extended. Hinge at the hips until your upper body reaches a 45-degree angle and bring the dumbbells together. 2.keeping your spine and neck neutral, inhale and push the dumbbells out and up to the side until your arms are parallel to the floor. 3.exhale and return to the start in a slow and controlled motion. Complete 2 sets of 10. Exercise is a key component to treating pectusexcavatum. By strengthening your chest, back, and core muscles and stretching your chest cavity, you can combat the condition’s effects. Aim to complete these exercises several times a week to maximize results. For middle back pain side plank with rotation this exercise is an advanced version of the basic plank. It strengthens the arms, shoulders, and obliques by combining a side plank with arm movements. Lie on your right side with your right forearm below your shoulder. Extend your legs, left foot on top of right. Tighten your core. Lift your hips to form a straight line with your body. Raise your left arm straight up. Rotate your torso toward the floor and bring your left arm under your body. Rotate your torso and straighten your left arm to return to the starting position. Start with 1 set of 8–12 reps. Repeat on the other side. Bird dog with elbow to knee this variation on the basic bird dog incorporates fluid movement to engage your abs and back while improving core mobility. Start on all fours, hands below your shoulders and knees below your hips. Tighten your core. Lift and straighten your right leg to hip level. Simultaneously lift and extend your left arm to shoulder level, palm down. Bring your right knee and left elbow toward each other. Return to the starting position. Start with 1 set of 8–12 reps. Repeat on the other side bicycle crunch this classic exercise strengthens your abs by placing them under constant tension. Start on your back. Bend your knees and plant your feet on the floor at hip width. Line up your head and spine. Place yours behind your head, elbows pointing out to the sides. Tighten your core and move your shoulders back and down. Bend your right knee toward your chest and extend your left leg, lifting it a few inches off the floor. Lift your left shoulder and upper back, bringing your left elbow toward your right knee. Tap your left shoulder on the floor and simultaneously switch your legs. Continue alternating elbows and knees, starting with 1 set of12 reps.

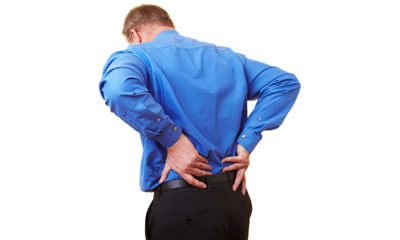
I am suffering from back pain from 1.5 year pain is only in lower back not in legs in mri my l4 l5 is 8.5 if I play cric ...

Ask Free Question
Back pain can have causes that aren't due to underlying disease. Examples include overuse such as working out or lifting too much, prolonged sitting and lying down, sleeping in an uncomfortable position or wearing a poorly fitting backpack. Doing exercises to strengthen the lower back can help alleviate and prevent lower back pain. It can also strengthen the core, leg, and arm muscles. Exercise also increases blood flow to the lower back area, which may reduce stiffness and speed up the healing process. Below are exercises that strengthen the lower back and help manage lower back pain: url/articles/323204. Php#seated-lower-back-rotational-stretches 1. Bridges—lie on the ground and bend the knees, placing the feet flat on the floor hip-width apart. Press the feet into the floor, keeping the arms by the sides. Raise the buttocks off the ground until the body forms a straight line from the shoulders to the knees. Squeeze the buttocks with the shoulders remaining on the floor. Lower the buttocks to the ground and rest for a few seconds.Repeat 15 times and then rest for 1 minute.Do 3 sets of 15 repetitions.2. Knee-to-chest stretches— lie on the back on the floor. Bend the knees, keeping both feet flat on the floor. Use both hands to pull one knee in toward the chest. Hold the knee against the chest for 5 seconds, keeping the abdominals tight and pressing the spine into the floor. Return to the starting position.Repeat with the opposite leg.Repeat with each leg 2–3 times twice a day. 3. Lower back rotational stretches—lie back on the floor with bent knees and feet flat on the ground. Keeping the shoulders firmly on the floor, gently roll both bent knees over to one side. Hold the position for 5–10 seconds. Return to the starting position. Gently roll the bent knees over to the opposite side, hold, and then return to the starting position. Repeat 2–3 times on each side twice a day. 4. Draw-in maneuvers— lie back on the floor with knees bent and feet flat, keeping the arms by the sides. Breathe in deeply. While breathing out, pull the bellybutton toward the spine, tightening the abdominal muscles and keeping the hips still. Hold the position for 5 seconds. Repeat 5 times. 5. Pelvic tilts— lie back on the floor with knees bent and feet flat, keeping the arms by the sides. Gently arch the lower back and push the stomach out. Hold for 5 seconds, then relax. Flatten the back and pull the bellybutton in toward the floor. Hold for 5 seconds, then relax. Increase the number of repetitions daily, building up to 30. 6. Lying lateral leg lifts— lie on one side with the legs together. Keep the lower leg slightly bent. Draw the bellybutton into the spine to engage the core muscles. Raise the top leg about 18 inches, keeping it straight and extended. Hold the position for 2 seconds. Repeat 10 times. Turn onto the other side of the body and repeat, lifting the other leg. Perform 3 sets on each side. 7. Cat stretches— get onto the hands and knees with the knees hip-width apart. Arch the back, pulling the bellybutton up toward the spine. Slowly relax the muscles and allow the abdomen to sag toward the floor. Return to the starting position. Repeat 3–5 times twice a day. 8. Supermans— lie face down on the ground and stretch both arms out in front of the body, keeping the legs stretched out and flat on the ground. Raise both the hands and feet, aiming to create a gap of about 6 inches between them and the floor. Try to pull in the bellybutton, lifting it off the floor to engage the core muscles. Keep the head straight and look at the floor to avoid neck injury. Stretch the hands and feet outward as far as possible. Hold the position for 2 seconds. Return to the starting position. Repeat 10 times. For this homeopathic treatment is very effective consult online with details.
If stiffness and curvature of cervical spine can be reduced to normal situation where the hed can rotate normal i.e the ...
Ask Free Question
Cervical spondylosis– chronic condition with radiating pain this is cervical pain (neck pain) and that's the reason the pain radiates until the shoulder blades. If you keep ice that would help and along side you can do hot water fermentation. You shall use cervical collar which would help you to reduce the radiating pain ie. Due to the nerve compression. You have to go for traction and also you can do ift. Please consult the near bytherapist for quick relief. Use collar will definitely be helpful for him to maintain the good posture. And also cervical pillow can be used which might make you to have better posture of the shoulder neck and arm. Neck tilt: from the sitting position, tilt your head down so your chin touches your chest. Hold this position for 5 second s. Return to the starting position and repeat. Do this five times. Side-to-side neck tilt. From the same starting position, tilt you neck toward one shoulder, leading with your ear. Hold for 5 seconds and then return to the starting position. Do this five times on each side. Neck turn. Look straight ahead, then turn your head to one side, keeping your chin at the same level. Do this five times on each side. Neck stretch. Holding the rest of your body straight, push your chin forward, stretching your throat. Hold for 5 seconds. From the same starting position, push your chin backward and hold for 5 seconds. Do the forward and backward stretch five times each. If any of these exercises cause severe pain or weakness in your hands or arms, stop right away and talk with your doctor. We suggest you to wear cervical collar which will help you to improve the cervical angle and also it definitely helps you to improve the neck posture due to which your neck pain is triggered more. The importance of wearing cervical collar is to give good stability to the neck and also it definitely prevents you to have excess neck movements which makes the condition worse. If you wear cervical collar you cannot turn your neck as you like which itself will help you to have better functioning of the cervical spine. This cervical soft collar what we are suggesting for you is available at our clinic. If you want you can buy from us, if you are far away from chennai we can send you by courier. The reason why we are conveying you to buy from us is we can demonstrate over the videocall (using whatsapp) and also we can monitor you throughout when to wear it and how long to wear it. And also if you find any difficulty wearing the brace you can also revert back to us for few more suggestions and we can propose you good solution how to go about it. Pushups this one may seem basic, but there’s no denying that pushups are one of the best ways to strengthen the pectoral muscles. These can be done on the knees or toes. If you’re not ready for full pushups, start with your hands resting on a solid surface higher than your feet — like a very sturdy coffee table or the edge of a couch, cushions removed, that’s pressed up against a wall — and start on the toes. Having your hands higher than your feet and your body at an angle can be a good way to start a pushup regimen. As you get stronger, you can begin to lower the angle of your body. This will help you transition to full pushups more easily than going from knees to toes. A full plank engages the muscles differently, even at an angle. When doing pushups, aim for 2 sets of 10 reps per day. 1.start in plank position with your hands under your shoulders and your core engaged. 2.as you lower, inhale. 3.as you engage your muscles to push yourself up, exhale. Keep your elbows hugging in close to your body. Keep your focus on slowly breathing as you do these, and on engaging the pectorals while keeping the core tight. Don’t just crank these out to get them done — this can compromise your form and do more harm than good. If the movement is really tough, break the sets into three or five to start, or find a higher point to begin after a week of exercise. If necessary, you can even stand and do pushups pushing against a wall. Chest fly for this exercise, you’ll need a bench or exercise ball as well as some dumbbells. If you don’t have weights, you can always use the old standby: a soup can in each hand. Just keep in mind that dumbbells are easier to hold and you can get more out of using them, as even 5-pound weights are heavier than your heaviest canned goods. 1.lie with your upper and middle back on a bench or ball, with your legs at a 90-degree angle. Hold a weight in each hand and extend your arms to the sky, elbows slightly bent. 2.as you inhale, lower your arms out wide, until your elbows are at shoulder height. 3.as you exhale, raise your hands until they meet above your chest again. 4.do 2 sets of 10. If that feels pretty easy, up it to 2 sets of 15 or increase the weight you’re using. Dumbbell row strengthening your back muscles is an important component of treating pectusexcavatum. The dumbbell row targets your lat muscles. The way it’s described below also strengthens your core, another important component of treating the condition. You’ll need some dumbbells to complete this move — err on the lighter side if you’ve never done a row before. 1.hold one dumbbell in each hand with your arms extended. Hinge at the hips until your upper body reaches a 45-degree angle. 2.keeping your neck in line with your spine and your gaze straight down, pull your elbows straight back and squeeze between your shoulder blades. 3.extend your arms back to the starting position. Complete 2 sets of 10. Dumbbell rear delt fly another move to strengthen your back, a dumbbell rear delt fly also focuses on the lats, as well as the rhomboids and the traps. Choose a light pair of dumbbells to complete this move and ensure that you’re pinching your shoulder blades together at the top to get the most out of it. 1.hold one dumbbell in each hand with your arms extended. Hinge at the hips until your upper body reaches a 45-degree angle and bring the dumbbells together. 2.keeping your spine and neck neutral, inhale and push the dumbbells out and up to the side until your arms are parallel to the floor. 3.exhale and return to the start in a slow and controlled motion. Complete 2 sets of 10. Exercise is a key component to treating pectusexcavatum. By strengthening your chest, back, and core muscles and stretching your chest cavity, you can combat the condition’s effects. Aim to complete these exercises several times a week to maximize results. Anterior pelvic tilt 1.lie on the back with the knees bent and feet flat on the floor, hip-width apart. 2.squeeze the buttocks and tilt the pelvis upward. 3.the back should feel as though it is flattening to the ground. 4.return to normal pelvis position. 5.repeat 10–12 times. This is a general knee pain and for this you can follow these measures: one keep a pillow right under the knee while sleeping, next is you can keep ice in the painful area for about 5--10 minutes, it looks like you are is important to check that. Anaemia always leads to the symptoms of being tired and also having body pain though there may not be any pathological reasons for knee pain. With knee exercises you will definitely feel better and muscles must be strengthened.•don't play through pain. As soon as you notice exercise-related knee pain, ice the area and rest. Until your knee is pain-free, avoid activities that put stress on your patellar tendon. •strengthen your muscles. Strong thigh muscles are better able to handle the stresses that can cause patellar tendinitis. Eccentric exercises, which involve lowering your leg very slowly after extending your knee, are particularly helpful. •improve your technique. To be sure you're using your body correctly, consider taking lessons or getting professional instructions when starting a new sport or using exercise equipment. •therapy •a variety of physical therapy techniques can help reduce the symptoms associated with patellar tendinitis, including back pain it looks like you are anaemic. If you have back pain after you sit for long hours then it is due to your haemoglobin levels as it is important to check that. Anaemia always leads to the symptoms of being tired and also having back / leg pain though there may not be any pathological reasons for back pain. It looks like you are anaemic. And also you have to check with your vitamin and calcium, if the bones are weak then automatically the pain gets triggered more as there is less severity of the pain back pain is described as acute or chronic based on how long you’ve had it. Acute pain lasts days to weeks, subacute pain lasts six weeks to three months, and chronic pain lasts longer than three months. Things that make it better or worse back pain may get worse with movement or if you sit or stand for a long time. It may get better if you switch positions or walk around. Accompanying symptoms other symptoms you may experience with back pain include: •the painful spot looking swollen and feeling tender to the touch •a muscle spasm in the painful area •numbness or weakness in one or both of your legs (if the pain is due to a nerve issue) if you find you have back pain and can’t hold your urine or bowel movements, something is pressing on your spinal nerves, and you should be evaluated immediately. This condition, called caudaequina syndrome, can cause severe long-term damage to your spinal nerves if not treated right away. 6 imbalances that cause pain—and how to fix them "pain is a medical condition and a medical issue, says brett jones, owner of applied strength in pittsburgh who is certified for the functional movement screen, a system of tests and cor rective exercise strategies. "it's a warning sign. The pain is there to tell you something's wrong. And that warning sign could be more serious than "you're going too hard. Jones and the other coaches consulted for this piece all had a horror story to tell-when pain in a client meant a more serious condition such as a nerve issue, thyroid issue, or even cancer. The point: if you experience regular pain while exercising-or when you're not-go to the doctor. If you've been cleared by a doc and you're still feeling discomfort, try these simple tests to see what's truly causing the pain-it could be related to an imbalance in a completely different part of your body. The good news: with these drills, stretches, and corrective exercises, you may be able to fix them-no doctors necessary. 2. Standing extension how it helps – this standing extension helps reverse what you do on a daily basis (hunching)… since most bulging discs and herniated discs are caused by poor posture and repeated flexion of the spine (esp bending fwd in bad posture), this stretch helps push the disc back to neutral position. How to do it – begin this exercise by standing up with good posture. Now take both hands and place them on both sides of your lower back. Now with the help of your hands push your pelvis forward and extend your spine back. Follow the extension with your neck so that you end up facing the ceiling. – start with 10 repetitions and do 2-3 sets. – this one is particularly great to do when you need a break from sitting at your desk. ** this should not cause any pain. If you feel pain during it is not a good one for you. In that case, stop and try some of the other exercises below instead. 3. Half cobra pose (prone lumbar extension) how it helps – the half cobra stretch helps to push the disc material back towards the center of the inter-vertebral disc to allow for improved healing. The goal of repeated lower back extension is the “centralization of symptoms”, which basically means pain that travels down the affected leg to the foot should come back up closer to the low back – which will in turn alleviate the pain. How to do it – begin this exercise by lying on your stomach (prone position) and slowly prop yourself up on your elbows while keeping your hips in contact with the floor. – hold the prop-up position for 10-15 seconds before returning to the prone position (lying face down). – gradually increase to holding the end position for 30 seconds. Aim for 10 repetitions of this stretch. ** initially, you may not be able to tolerate this position very well, so make sure you start slowly and carefully. If there’s any pain, try a different exercise instead. 4. Full cobra pose (advanced extension) how it helps – this stretch is based on the same principle as the half cobra pose above. This advanced extension helps to push disc material back towards the center of the intervertebral disc, with the goal of alleviating pain symptoms. How to do it – once you’ve mastered the half cobra pose, you can increase the difficulty by moving to the advanced version of this stretch. Begin this exercise by lying on your stomach in the prone position (lying facing down) and slowly press up on your hands while keeping your pelvis in contact with the floor and lower back relaxed. – hold the prop-up position for 10 seconds. Aim for 10 repetitions of this stretch. – eventually try to hold this pose for longer if it feels good (20-30 seconds). ** if you feel pain during this exercise, it is not a good one for you. In that case, stop and try some of the other exercises instead. 5. Cat-cow how it helps – this is one of the most popular herniated disc exercises. By combining two yoga poses, the cat-cow stretch can help to relieve pressure on the herniated disc by opening the intervertebral disc space. It also improves mobility of the spine, which may help to relieve disc herniation pain and speed recovery. How to do it – begin this stretch on your hands and knees. Inhale and let your stomach “drop” towards the floor as you look up towards the ceiling. – follow this by exhaling and slowly rounding your spine while pressing into the floor with your hands and slightly curving your neck to look at your feet. – aim for 10 repetitions of this stretch and do 2-3 sets. How it helps – this exercise will help strengthen and stabilize your lower back and deep spine muscles. This will help you to maintain a good posture and avoid future episodes of herniated discs. How to do it: – begin on your hands and knees with your hands positioned under your shoulders and knees positioned under your hips. – raise your left arm and reach it forwards until it is aligned with your torso; at the same time, kick your right leg backwards until is it aligned with your torso. – hold this position for 2-3 seconds before slowly returning to the starting position. – repeat with your right arm and left leg. – alternate sides for 10 repetitions and do 2-3 sets. ** ensure that your head, neck, and back maintain a neutral alignment to minimize stress on your neck. Plank: how it helps – just like the bird dog, this “core” exercise will help bring your pelvis into right position by strengthening the deep spinal muscles and glutes (butt muscles). How to do it – begin lying on your stomach with your forearms against the mat. – engage your core and lift your body so that you are resting on your forearms and toes. – start with 10 second holds and work up to 30 second holds, do 2-3 sets. ** ensure to keep your back straight throughout the entire exercise – spine in neutral position. Thoracic expansion if you’re using a chair, sit facing forward and allow your upper body to fall over the back of the chair. Extend your arms above your head for a deeper stretch. Hold either position for 10 seconds and release. Repeat 3 times.

Pain radiating from lower back to neck with burning sensation near the spinal cord with pain also sideways in spinal cor ...
Ask Free Question
Cervical spondylosis– chronic condition with radiating pain this is cervical pain (neck pain) and that's the reason the pain radiates until the shoulder blades. If you keep ice that would help and along side you can do hot water fermentation. You shall use cervical collar which would help you to reduce the radiating pain ie. Due to the nerve compression. You have to go for traction and also you can do ift. Please consult the near bytherapist for quick relief. Use collar will definitely be helpful for him to maintain the good posture. And also cervical pillow can be used which might make you to have better posture of the shoulder neck and arm. Neck tilt: from the sitting position, tilt your head down so your chin touches your chest. Hold this position for 5 second s. Return to the starting position and repeat. Do this five times. Side-to-side neck tilt. From the same starting position, tilt you neck toward one shoulder, leading with your ear. Hold for 5 seconds and then return to the starting position. Do this five times on each side. Neck turn. Look straight ahead, then turn your head to one side, keeping your chin at the same level. Do this five times on each side. Neck stretch. Holding the rest of your body straight, push your chin forward, stretching your throat. Hold for 5 seconds. From the same starting position, push your chin backward and hold for 5 seconds. Do the forward and backward stretch five times each. If any of these exercises cause severe pain or weakness in your hands or arms, stop right away and talk with your doctor. We suggest you to wear cervical collar which will help you to improve the cervical angle and also it definitely helps you to improve the neck posture due to which your neck pain is triggered more. The importance of wearing cervical collar is to give good stability to the neck and also it definitely prevents you to have excess neck movements which makes the condition worse. If you wear cervical collar you cannot turn your neck as you like which itself will help you to have better functioning of the cervical spine. This cervical soft collar what we are suggesting for you is available at our clinic. If you want you can buy from us, if you are far away from chennai we can send you by courier. The reason why we are conveying you to buy from us is we can demonstrate over the videocall (using whatsapp) and also we can monitor you throughout when to wear it and how long to wear it. And also if you find any difficulty wearing the brace you can also revert back to us for few more suggestions and we can propose you good solution how to go about it. Pushups this one may seem basic, but there’s no denying that pushups are one of the best ways to strengthen the pectoral muscles. These can be done on the knees or toes. If you’re not ready for full pushups, start with your hands resting on a solid surface higher than your feet — like a very sturdy coffee table or the edge of a couch, cushions removed, that’s pressed up against a wall — and start on the toes. Having your hands higher than your feet and your body at an angle can be a good way to start a pushup regimen. As you get stronger, you can begin to lower the angle of your body. This will help you transition to full pushups more easily than going from knees to toes. A full plank engages the muscles differently, even at an angle. When doing pushups, aim for 2 sets of 10 reps per day. 1.start in plank position with your hands under your shoulders and your core engaged. 2.as you lower, inhale. 3.as you engage your muscles to push yourself up, exhale. Keep your elbows hugging in close to your body. Keep your focus on slowly breathing as you do these, and on engaging the pectorals while keeping the core tight. Don’t just crank these out to get them done — this can compromise your form and do more harm than good. If the movement is really tough, break the sets into three or five to start, or find a higher point to begin after a week of exercise. If necessary, you can even stand and do pushups pushing against a wall. Chest fly for this exercise, you’ll need a bench or exercise ball as well as some dumbbells. If you don’t have weights, you can always use the old standby: a soup can in each hand. Just keep in mind that dumbbells are easier to hold and you can get more out of using them, as even 5-pound weights are heavier than your heaviest canned goods. 1.lie with your upper and middle back on a bench or ball, with your legs at a 90-degree angle. Hold a weight in each hand and extend your arms to the sky, elbows slightly bent. 2.as you inhale, lower your arms out wide, until your elbows are at shoulder height. 3.as you exhale, raise your hands until they meet above your chest again. 4.do 2 sets of 10. If that feels pretty easy, up it to 2 sets of 15 or increase the weight you’re using. Dumbbell row strengthening your back muscles is an important component of treating pectusexcavatum. The dumbbell row targets your lat muscles. The way it’s described below also strengthens your core, another important component of treating the condition. You’ll need some dumbbells to complete this move — err on the lighter side if you’ve never done a row before. 1.hold one dumbbell in each hand with your arms extended. Hinge at the hips until your upper body reaches a 45-degree angle. 2.keeping your neck in line with your spine and your gaze straight down, pull your elbows straight back and squeeze between your shoulder blades. 3.extend your arms back to the starting position. Complete 2 sets of 10. Dumbbell rear delt fly another move to strengthen your back, a dumbbell rear delt fly also focuses on the lats, as well as the rhomboids and the traps. Choose a light pair of dumbbells to complete this move and ensure that you’re pinching your shoulder blades together at the top to get the most out of it. 1.hold one dumbbell in each hand with your arms extended. Hinge at the hips until your upper body reaches a 45-degree angle and bring the dumbbells together. 2.keeping your spine and neck neutral, inhale and push the dumbbells out and up to the side until your arms are parallel to the floor. 3.exhale and return to the start in a slow and controlled motion. Complete 2 sets of 10. Exercise is a key component to treating pectusexcavatum. By strengthening your chest, back, and core muscles and stretching your chest cavity, you can combat the condition’s effects. Aim to complete these exercises several times a week to maximize results. Anterior pelvic tilt 1.lie on the back with the knees bent and feet flat on the floor, hip-width apart. 2.squeeze the buttocks and tilt the pelvis upward. 3.the back should feel as though it is flattening to the ground. 4.return to normal pelvis position. 5.repeat 10–12 times. This is a general knee pain and for this you can follow these measures: one keep a pillow right under the knee while sleeping, next is you can keep ice in the painful area for about 5--10 minutes, it looks like you are is important to check that. Anaemia always leads to the symptoms of being tired and also having body pain though there may not be any pathological reasons for knee pain. With knee exercises you will definitely feel better and muscles must be strengthened.•don't play through pain. As soon as you notice exercise-related knee pain, ice the area and rest. Until your knee is pain-free, avoid activities that put stress on your patellar tendon. •strengthen your muscles. Strong thigh muscles are better able to handle the stresses that can cause patellar tendinitis. Eccentric exercises, which involve lowering your leg very slowly after extending your knee, are particularly helpful. •improve your technique. To be sure you're using your body correctly, consider taking lessons or getting professional instructions when starting a new sport or using exercise equipment. •therapy •a variety of physical therapy techniques can help reduce the symptoms associated with patellar tendinitis, including back pain it looks like you are anaemic. If you have back pain after you sit for long hours then it is due to your haemoglobin levels as it is important to check that. Anaemia always leads to the symptoms of being tired and also having back / leg pain though there may not be any pathological reasons for back pain. It looks like you are anaemic. And also you have to check with your vitamin and calcium, if the bones are weak then automatically the pain gets triggered more as there is less severity of the pain back pain is described as acute or chronic based on how long you’ve had it. Acute pain lasts days to weeks, subacute pain lasts six weeks to three months, and chronic pain lasts longer than three months. Things that make it better or worse back pain may get worse with movement or if you sit or stand for a long time. It may get better if you switch positions or walk around. Accompanying symptoms other symptoms you may experience with back pain include: •the painful spot looking swollen and feeling tender to the touch •a muscle spasm in the painful area •numbness or weakness in one or both of your legs (if the pain is due to a nerve issue) if you find you have back pain and can’t hold your urine or bowel movements, something is pressing on your spinal nerves, and you should be evaluated immediately. This condition, called caudaequina syndrome, can cause severe long-term damage to your spinal nerves if not treated right away. 6 imbalances that cause pain—and how to fix them "pain is a medical condition and a medical issue, says brett jones, owner of applied strength in pittsburgh who is certified for the functional movement screen, a system of tests and cor rective exercise strategies. "it's a warning sign. The pain is there to tell you something's wrong. And that warning sign could be more serious than "you're going too hard. Jones and the other coaches consulted for this piece all had a horror story to tell-when pain in a client meant a more serious condition such as a nerve issue, thyroid issue, or even cancer. The point: if you experience regular pain while exercising-or when you're not-go to the doctor. If you've been cleared by a doc and you're still feeling discomfort, try these simple tests to see what's truly causing the pain-it could be related to an imbalance in a completely different part of your body. The good news: with these drills, stretches, and corrective exercises, you may be able to fix them-no doctors necessary. 2. Standing extension how it helps – this standing extension helps reverse what you do on a daily basis (hunching)… since most bulging discs and herniated discs are caused by poor posture and repeated flexion of the spine (esp bending fwd in bad posture), this stretch helps push the disc back to neutral position. How to do it – begin this exercise by standing up with good posture. Now take both hands and place them on both sides of your lower back. Now with the help of your hands push your pelvis forward and extend your spine back. Follow the extension with your neck so that you end up facing the ceiling. – start with 10 repetitions and do 2-3 sets. – this one is particularly great to do when you need a break from sitting at your desk. ** this should not cause any pain. If you feel pain during it is not a good one for you. In that case, stop and try some of the other exercises below instead. 3. Half cobra pose (prone lumbar extension) how it helps – the half cobra stretch helps to push the disc material back towards the center of the inter-vertebral disc to allow for improved healing. The goal of repeated lower back extension is the “centralization of symptoms”, which basically means pain that travels down the affected leg to the foot should come back up closer to the low back – which will in turn alleviate the pain. How to do it – begin this exercise by lying on your stomach (prone position) and slowly prop yourself up on your elbows while keeping your hips in contact with the floor. – hold the prop-up position for 10-15 seconds before returning to the prone position (lying face down). – gradually increase to holding the end position for 30 seconds. Aim for 10 repetitions of this stretch. ** initially, you may not be able to tolerate this position very well, so make sure you start slowly and carefully. If there’s any pain, try a different exercise instead. 4. Full cobra pose (advanced extension) how it helps – this stretch is based on the same principle as the half cobra pose above. This advanced extension helps to push disc material back towards the center of the intervertebral disc, with the goal of alleviating pain symptoms. How to do it – once you’ve mastered the half cobra pose, you can increase the difficulty by moving to the advanced version of this stretch. Begin this exercise by lying on your stomach in the prone position (lying facing down) and slowly press up on your hands while keeping your pelvis in contact with the floor and lower back relaxed. – hold the prop-up position for 10 seconds. Aim for 10 repetitions of this stretch. – eventually try to hold this pose for longer if it feels good (20-30 seconds). ** if you feel pain during this exercise, it is not a good one for you. In that case, stop and try some of the other exercises instead. 5. Cat-cow how it helps – this is one of the most popular herniated disc exercises. By combining two yoga poses, the cat-cow stretch can help to relieve pressure on the herniated disc by opening the intervertebral disc space. It also improves mobility of the spine, which may help to relieve disc herniation pain and speed recovery. How to do it – begin this stretch on your hands and knees. Inhale and let your stomach “drop” towards the floor as you look up towards the ceiling. – follow this by exhaling and slowly rounding your spine while pressing into the floor with your hands and slightly curving your neck to look at your feet. – aim for 10 repetitions of this stretch and do 2-3 sets. How it helps – this exercise will help strengthen and stabilize your lower back and deep spine muscles. This will help you to maintain a good posture and avoid future episodes of herniated discs. How to do it: – begin on your hands and knees with your hands positioned under your shoulders and knees positioned under your hips. – raise your left arm and reach it forwards until it is aligned with your torso; at the same time, kick your right leg backwards until is it aligned with your torso. – hold this position for 2-3 seconds before slowly returning to the starting position. – repeat with your right arm and left leg. – alternate sides for 10 repetitions and do 2-3 sets. ** ensure that your head, neck, and back maintain a neutral alignment to minimize stress on your neck. Plank: how it helps – just like the bird dog, this “core” exercise will help bring your pelvis into right position by strengthening the deep spinal muscles and glutes (butt muscles). How to do it – begin lying on your stomach with your forearms against the mat. – engage your core and lift your body so that you are resting on your forearms and toes. – start with 10 second holds and work up to 30 second holds, do 2-3 sets. ** ensure to keep your back straight throughout the entire exercise – spine in neutral position. Thoracic expansion if you’re using a chair, sit facing forward and allow your upper body to fall over the back of the chair. Extend your arms above your head for a deeper stretch. Hold either position for 10 seconds and release. Repeat 3 times. This simple stretch helps relieve sciatica pain by loosening your gluteal and piriformis muscles, which can become inflamed and press against the sciatic nerve. 1.lie on your back with your legs extended and your feet flexed upward. 2.bend your right leg and clasp your hands around the knee. 3.gently pull your right leg ac 4.ross your body toward your left shoulder. Hold it there for 30 seconds. Remember to pull your knee only as far as it will comfortably go. You should feel a relieving stretch in your muscle, not pain. 5.push your knee so your leg returns to its starting position. 6.repeat for a total of 3 reps, and then switch legs. 7.sitting spinal stretch sciatica pain is triggered when vertebrae in the spine compress. This stretch helps create space in the spine to relieve pressure on the sciatic nerve. 1.sit on the ground with your legs extended straight out with your feet flexed upward. 2.bend your right knee and place your foot flat on the floor on the outside of your opposite knee. 3.place your left elbow on the outside of your right knee to help you gently turn your body toward the right. 4.hold for 30 seconds and repeat three times, then switch sides. 6. Standing hamstring stretch this stretch can help ease pain and tightness in the hamstring caused by sciatica. 1.place your right foot on an elevated surface at or below your hip level. This could be a chair, ottoman, or step on a staircase. Flex your foot so your toes and leg are straight. If your knee tends to hyperextend, keep a slight bend in it. 2.bend your body forward slightly toward your foot. The further you go, the deeper the stretch. Do not push so far that you feel pain. 3.release the hip of your raised leg downward as opposed to lifting it up. If you need help easing your hip down, loop a yoga strap or long exercise band over your right thigh and under your left foot. 4.hold for at least 30 seconds, and then repeat on the other sideif you have low back pain and sciatica you can undergo intermittent pelvic traction where in your half of your body weight will be added in the electronic traction so that that would help you to reduce the pain, along with interferential therapy stimulations which would help you to get relieved from the radiating pain. Apply ice for the pain to get subsided immediately. If you cannot go immediately for the physiotherapy treatment. Ice can be kept in the low back where you have back pain. It is suggestible to wear lumbo sacral belt which would help you to build the abdominal muscle tone which itself would make you feel better. You can also wear mcr chappals which would help you to have less weight falling in the painful back. U have to take vitamin d rich foods. Likemilk, cheese, yogurt, brocoli, spinach. U need calcium consumption for increase the bone density. Lackof bone and bones crush inside the body vitamin d intake via supplements or exposure to low levels of sunlight. Vitamin d is used to absorb calcium in the bone and regulate calcium in the blood.this might be due to low calcium or vitamin d which has more impact on the bone density and also it makes one to feel that there is lack of bone strength or in a way the bones are brittle and almost breaking and they feel it is crushed in a way there are many bones breaking at the same time. You have to take vitamin d rich foods. Likemilk, cheese, yogurt, brocoli, spinach. U need calcium consumption for increase the bone density.

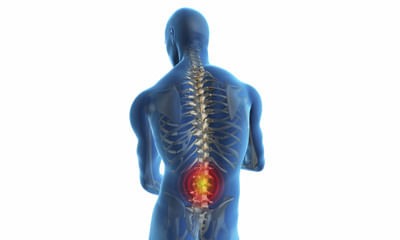
I've got a pain in my left side above my hip and below my ribs when it hits I can't breathe I can't walk I can't find a ...
Ask Free Question
Kidney pain vs. Back pain because your kidneys are located toward your back and= underneath your ribcage, it may be hard to tell if the pain you’re experiencing in that area is coming from your back or your kidney. The symptoms you’re having can help you figure out which is the source of the pain. The location, type, and severity of the pain are some of the things that will be different depending on whether the pain is from a problem in your kidneys or your back. How to identify kidney painkidney pain is most often caused by a kidney infection or a stone in the tubes coming out of your kidney. If the pain is coming from your kidney, it will have these features: where the pain is located kidney pain is felt in your flank, which is the area on either side of your spine between the bottom of your ribcage and your hips. It usually occurs in one side of your body, but it can occur in both sides. Type of pain kidney pain is usually sharp if you have a kidney stone and a dull ache if you have an infection. Most often it will be constant. It won’t get worse with movement or go away by itself without treatment. If you’re passing a kidney stone, the pain may fluctuate as the stone moves. Radiation of the pain sometimes the pain spreads (radiates) to your inner thigh or lower abdomen. Severity of the pain kidney pain is classified according to how bad it is — severe or mild. A kidney stone usually causes severe pain, and the pain from an infection is usually mild. Things that make it better or worse typically, nothing makes the pain better until the problem is corrected, such as by passing the stone. Unlike back pain, it usually won’t change with movement. Accompanying symptoms if you have a kidney infection or a kidney stone, you may also experience: •fever and chills •nausea and vomiting •cloudy or dark urine •an urgent need to urinate •pain when you urinate •a recent infection in your bladder •blood in your urine (this can happen with an infection or kidney stones) •small kidney stones that look like gravel in your urine how to identify back pain back pain is more common than kidney pain and is usually caused by a problem in the muscles, bones, or nerves in your back. Has the following features: where the pain is located back pain can occur anywhere on your back, but it’s most commonly located in your lower back or one of your buttocks. Type of pain muscle pain feels like a dull ache. If a nerve has been injured or irritated, the pain is a sharp burning sensation that may travel down your buttock to your lower leg or even your foot. Muscle pain may affect one or both sides, but nerve pain usually only affects one side. Radiation of the pain nerve pain may spread to your lower leg. Pain from a muscle usually stays in the back. Severity of the pain back pain is described as acute or chronic based on how long you’ve had it. Acute pain lasts days to weeks, subacute pain lasts six weeks to three months, and chronic pain lasts longer than three months. Things that make it better or worse back pain may get worse with movement or if you sit or stand for a long time. It may get better if you switch positions or walk around. Accompanying symptoms other symptoms you may experience with back pain include: •the painful spot looking swollen and feeling tender to the touch •a muscle spasm in the painful area •numbness or weakness in one or both of your legs (if the pain is due to a nerve issue) if you find you have back pain and can’t hold your urine or bowel movements, something is pressing on your spinal nerves, and you should be evaluated immediately. This condition, called caudaequina syndrome, can cause severe long-term damage to your spinal nerves if not treated right away. 6 imbalances that cause pain—and how to fix them "pain is a medical condition and a medical issue, says brett jones, owner of applied strength in pittsburgh who is certified for the functional movement screen, a system of tests and cor rective exercise strategies. "it's a warning sign. The pain is there to tell you something's wrong.
From 15 march after a massage session in salon I started feeling in pain in right side upper back. Same kind of pain was ...
Ask Free Question
It looks like a muscle pain kindly do the exercise regularly. Bad posture can contribute to the severity and appearance of pectusexcavatum. Strengthening your postural muscles can help. Because we often work on our front body — especially when strengthening our chest to help with pectusexcavatum — this exercise will help balance your body by strengthening your posterior chain — those muscles on the back of the body. 1.Lie on your stomach on a mat with your arms extended in front of you and your forehead resting on the ground. 2.As you inhale, lift your head, legs, and arms. 3.Hold for a count of 5 and gently release back to the ground. 4.Complete 2 sets of 10. The great thing about this exercise is that it can be done at work — in a regular chair with no weights. Or it can be made more difficult by sitting on an exercise ball and using weights. You’ll feel this in your upper back and obliques. It’ll also work your core and your pecs, especially if you use weights. 1.Sit up straight and engage your core. Extend your arms out in front of you. If you’re using a weight, hold it with both hands, either wrapping 1 hand over the other or stacking them on the weight. 2.Inhale and as you exhale, twist to the right. 3.Count slowly to 5, and then move with your breath. You’ll twist when you exhale and sit up taller or untwist when you inhale. Bow pose stretching is also a vital component to treating pectusexcavatum. Yoga chest openers will help to expand the chest while also promoting deep breathing. Try bow pose to start. 1.Lie on your stomach on a mat with your arms at your sides, palms facing up. 2.Bend your knees and bring your feet to your backside, grabbing your ankles with your hands. 3.Inhale and lift your thighs away from the floor, pressing your shoulder blades back to open your chest. Your gaze should be forward. Maintain the pose for at least 15 seconds, ensuring that you continue to breath. Complete 2 rounds. Read on to learn how to do 12 exercises that’ll help you stand a little taller. Camel pose another chest-opening yoga pose, camel gives you a deep stretch through the entire upper body. This will be difficult for beginners — if you can’t achieve the full pose, lean back with your hands on the back of your pelvis, feeling the stretch there. 1.Kneel on the floor with your shins and the tops of your feet pressed into the ground. Place your hands on the back of your pelvis. 2.Keeping your thighs perpendicular to the ground and pushing against your tail bone, lean back, aiming to drop your hands to your heels. Drop your head back. 3.Maintain the pose for at least 15 seconds. Hold the stretch for 5-10 seconds, then return to the start position. Repeat on your left side. You can do several sets and work your way up to 10 repetitions. For extra stretch, put the hand on the same side of your tilted head on top of your head, and press lightly with your fingertips. Side rotation you can do this while seated or standing. Keep your head squarely over your shoulders and your back straight. Slowly turn your head to the right until you feel a stretch in the side of your neck and shoulder. Hold the stretch for 15-30 seconds, and then slowly turn your head forward again. Repeat on your left side. Do up to 10 sets. Press your palm against your forehead. Resist with your neck muscles. Hold for 10 seconds. Relax. Repeat 5 times. Do the exercise again, pressing on the sides (both the sides (right & left side) of your head. Repeat 5 times. Switch sides. Do the exercise again, pressing on the back of your head. Repeat 5 times.
My father was 52 years old he have a back pain in 1 days but before 4 months he was the renal patients. But he will reco ...
Ask Free Question
First of all check your weight and your haemoglobin levels, as anaemia always leads to the symptoms of being tired and also having back pain. Because your kidneys are located toward your back and= underneath your ribcage, it may be hard to tell if the pain you’re experiencing in that area is coming from your back or your kidney. The symptoms you’re having can help you figure out which is the source of the pain. The location, type, and severity of the pain are some of the things that will be different depending on whether the pain is from a problem in your kidneys or your back. How to identify kidney painkidney pain is most often caused by a kidney infection or a stone in the tubes coming out of your kidney. If the pain is coming from your kidney, it will have these features: where the pain is located kidney pain is felt in your flank, which is the area on either side of your spine between the bottom of your ribcage and your hips. It usually occurs in one side of your body, but it can occur in both sides. Type of pain kidney pain is usually sharp if you have a kidney stone and a dull ache if you have an infection. Most often it will be constant. It won’t get worse with movement or go away by itself without treatment. If you’re passing a kidney stone, the pain may fluctuate as the stone moves. Radiation of the pain sometimes the pain spreads (radiates) to your inner thigh or lower abdomen. Severity of the pain kidney pain is classified according to how bad it is — severe or mild. A kidney stone usually causes severe pain, and the pain from an infection is usually mild. Things that make it better or worse typically, nothing makes the pain better until the problem is corrected, such as by passing the stone. Unlike back pain, it usually won’t change with movement. Accompanying symptoms if you have a kidney infection or a kidney stone, you may also experience: •fever and chills •nausea and vomiting •cloudy or dark urine •an urgent need to urinate •pain when you urinate •a recent infection in your bladder •blood in your urine (this can happen with an infection or kidney stones) •small kidney stones that look like gravel in your urine how to identify back pain back pain is more common than kidney pain and is usually caused by a problem in the muscles, bones, or nerves in your back. Has the following features: where the pain is located back pain can occur anywhere on your back, but it’s most commonly located in your lower back or one of your buttocks. Type of pain muscle pain feels like a dull ache. If a nerve has been injured or irritated, the pain is a sharp burning sensation that may travel down your buttock to your lower leg or even your foot. Muscle pain may affect one or both sides, but nerve pain usually only affects one side. Radiation of the pain nerve pain may spread to your lower leg. Pain from a muscle usually stays in the back. Severity of the pain back pain is described as acute or chronic based on how long you’ve had it. Acute pain lasts days to weeks, subacute pain lasts six weeks to three months, and chronic pain lasts longer than three months. Things that make it better or worse back pain may get worse with movement or if you sit or stand for a long time. It may get better if you switch positions or walk around. Accompanying symptoms other symptoms you may experience with back pain include: •the painful spot looking swollen and feeling tender to the touch •a muscle spasm in the painful area •numbness or weakness in one or both of your legs (if the pain is due to a nerve issue) if you find you have back pain and can’t hold your urine or bowel movements, something is pressing on your spinal nerves, and you should be evaluated immediately. This condition, called caudaequina syndrome, can cause severe long-term damage to your spinal nerves if not treated right away. 6 imbalances that cause pain—and how to fix them "pain is a medical condition and a medical issue, says brett jones, owner of applied strength in pittsburgh who is certified for the functional movement screen, a system of tests and cor rective exercise strategies. "it's a warning sign. The pain is there to tell you something's wrong. And that warning sign could be more serious than "you're going too hard. Jones and the other coaches consulted for this piece all had a horror story to tell-when pain in a client meant a more serious condition such as a nerve issue, thyroid issue, or even cancer. The point: if you experience regular pain while exercising-or when you're not-go to the doctor. If you've been cleared by a doc and you're still feeling discomfort, try these simple tests to see what's truly causing the pain-it could be related to an imbalance in a completely different part of your body. The good news: with these drills, stretches, and corrective exercises, you may be able to fix them-no doctors necessary.
Dr. prescribed me paroxetine 25 mg (2 tab/day) for my anxiety and depression, but it is very costly. Is there any cheape ...

Ask Free Question
Dear sir, medicines are not the only solution to depression and anxiety, having said that I do not imply you stopping them but along with it there are other solutions such as yoga, breathing exercises, deep realxation techniques etc and yes ofcourse psychotherapy being the most important. During the session of counseling the reasons of anxiety and depression will be assessed, the severity will be gauged and an appropriate treatment plan will be charted out. Its highly recommended you start therapy. Over the course of time it may help with lowering your medicine dose to completely stop it too. Psychotherapy is proven to prevent relapse better than medicines can help.